
To change a coolant reservoir, follow these steps: Drain the coolant, disconnect the hoses and electrical connections, remove the old reservoir, and install the new reservoir. Changing a coolant reservoir is a relatively simple task that can be completed with basic tools and a little bit of patience.
By following these steps, you can ensure that your vehicle’s coolant system stays in proper working condition, preventing potential overheating issues and engine damage. Regular maintenance and replacing faulty components are essential for keeping your vehicle running smoothly and efficiently.
The Role Of A Coolant Reservoir In Your Vehicle’S Cooling System
The coolant reservoir plays a crucial role in the cooling system of your vehicle. It serves as a storage tank for excess coolant that expands when the engine heats up. When the engine cools down, the coolant is drawn back into the radiator.
Proper functionality of the reservoir is essential for maintaining the optimal temperature of the engine and preventing overheating. It also helps in preventing coolant leakage by acting as a buffer for pressure changes. Regular maintenance of the coolant reservoir is important to ensure that it is working effectively.
Inspecting the reservoir for any cracks or leaks, and checking the coolant level regularly can help identify any issues early on. It is also important to follow the manufacturer’s guidelines for coolant replacement intervals to keep the reservoir functioning properly.
By taking care of your coolant reservoir, you can ensure the longevity and efficiency of your vehicle’s cooling system.
Understanding What You’Ll Need Before Starting The Process
Before changing a coolant reservoir, it is important to understand what tools you will need for the process. Some of the essential tools include a socket set, pliers, a drain pan, and a funnel. Additionally, it is crucial to have the correct type of coolant for your specific vehicle.
There are different types of coolants available, such as ethylene glycol-based and propylene glycol-based, each with their own specifications. It is necessary to check your vehicle’s manual or consult a professional to determine the appropriate coolant for your car. By being prepared with the right tools and understanding the different types of coolants, you can successfully change a coolant reservoir and ensure the proper functioning of your vehicle’s cooling system.
Safely Preparing The Vehicle For The Procedure
Changing a coolant reservoir involves certain precautions to ensure safety. The first step is identifying the location of the coolant reservoir in the vehicle. Take note of its position before proceeding. Before beginning the procedure, it is necessary to prepare the vehicle safely.
Park it on a level surface and engage the parking brake to prevent any accidents. Allow the engine to cool down completely before attempting any work on the coolant reservoir. It is also important to wear protective gloves and eyewear to prevent any contact with the coolant.
Remember to read the vehicle’s manual and follow the manufacturer’s instructions for changing the coolant reservoir. By adhering to these safety precautions, you can successfully change the coolant reservoir without any potential risks or mishaps.
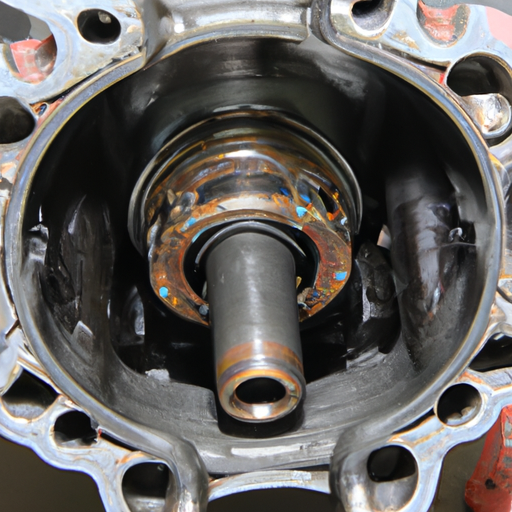
Detailed Instructions For Removing The Old Coolant Reservoir
Changing a coolant reservoir involves a detailed procedure that includes removing the old coolant reservoir and draining the coolant system. To start, you need to drain the coolant from the system entirely. This is followed by disconnecting the hoses and electrical connections attached to the old coolant reservoir.
Careful attention must be paid to ensure that all connections are properly detached. Once the hoses and electrical connections are disconnected, you can proceed with removing the old coolant reservoir. By following these instructions, you can successfully change a coolant reservoir in your vehicle.
Steps For Properly Installing The New Coolant Reservoir
Installing a new coolant reservoir requires following specific steps. First, attach the hoses and electrical connections securely. Then, refill the coolant system ensuring the reservoir is properly filled. Make sure to check for any leaks and tighten any loose connections.
Proper installation of the new reservoir is crucial to maintaining the cooling system’s functionality. By following these steps, you can effectively change a coolant reservoir and ensure proper functioning of your vehicle’s cooling system.

Credit: www.autozone.com
Ensuring Proper Installation And Identifying Potential Issues
Proper installation of a coolant reservoir is essential for the smooth functioning of your vehicle’s cooling system. Before beginning the process, it is crucial to check for any leaks and ensure that the old reservoir is completely drained. Once you have installed the new reservoir, it is important to test the functionality of the cooling system.
Start the engine and let it run for a few minutes, regularly monitoring for any signs of coolant leaks. Pay close attention to the reservoir and surrounding areas. If you notice any leaks or abnormalities, it is best to seek professional assistance to avoid potential damage to your engine.
Taking the time to change the coolant reservoir correctly and checking for leaks will help to maintain the efficiency and longevity of your vehicle’s cooling system.
Extra Advice For A Successful Coolant Reservoir Replacement
A successful coolant reservoir replacement involves extra advice to ensure proper disposal of the old coolant. The common pitfalls can be avoided by following certain guidelines. It is important to carefully handle the coolant reservoir and avoid any damage during the replacement process.
Make sure to consult the vehicle’s manual for specific instructions. Begin by draining the old coolant into a suitable container, ensuring proper disposal according to local regulations. Remove the old reservoir by detaching the mounting bolts and disconnecting any hoses or electrical connections.
Install the new reservoir in the reverse order, securing it tightly. Lastly, refill the system with fresh coolant, following the manufacturer’s recommendations. By following these steps, you can successfully change a coolant reservoir without encountering any issues.
Frequently Asked Questions On How To Change A Coolant Reservoir
How Long Does It Take To Replace Coolant Tank?
On average, it takes about 1 to 2 hours to replace a coolant tank.
How Much Does It Cost To Replace A Coolant Reservoir?
The cost to replace a coolant reservoir varies, but it typically ranges from $100 to $300.
What To Do After Changing Coolant Reservoir?

After changing the coolant reservoir, check for leaks and ensure proper installation. Also, monitor coolant levels regularly.
How Do You Fix A Coolant Reservoir?
To fix a coolant reservoir, diagnose the issue, locate the leak, replace or repair the reservoir, and refill the coolant.
Conclusion
Changing a coolant reservoir is a straightforward process that can be done at home with a few simple tools. By following the steps outlined in this guide, you can save time and money by avoiding a trip to the mechanic.
Remember to prioritize safety by allowing the engine to cool before starting and using caution when working with the coolant. Regularly inspecting and maintaining your coolant reservoir is essential for optimal vehicle performance and preventing engine overheating. By keeping an eye on the reservoir for any signs of cracks or leaks and promptly replacing it when necessary, you can help extend the lifespan of your vehicle and keep your engine running smoothly.
So, don’t hesitate to tackle this DIY project and ensure your coolant reservoir is in good condition to keep your car running cool and efficiently.
- How Much Does a Ford 9N Tractor Weigh - May 20, 2024
- How Many of My Exact Car were Made: Uncovering the Rarity - May 20, 2024
- How to Find Out What Someone Drives: Discover the Truth - May 20, 2024