To fix a bent rim, you can consult a professional wheel repair service. They will assess the damage and use specialized equipment to straighten the rim back into shape.
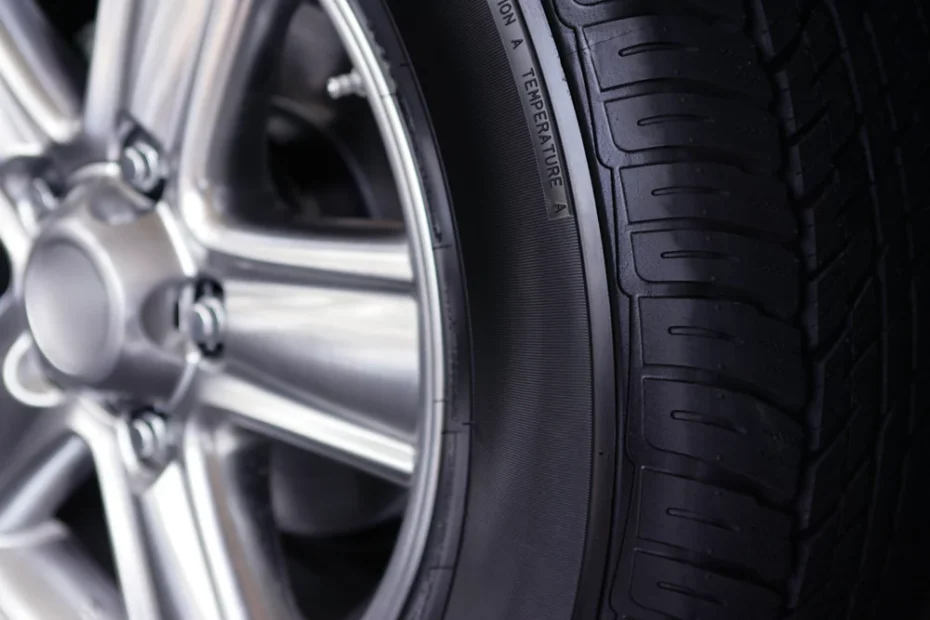
Rims are a crucial component of your vehicle’s wheels, providing stability and support. However, accidents happen, and your rim may become bent due to hitting a pothole, curb, or other road hazards. A bent rim can lead to various issues, such as vibrations, uneven tire wear, and even steering problems.
To ensure optimum performance and safety, it is essential to address the issue promptly. We will explore the steps to fix a bent rim, guiding you on how to restore it to its original condition. By following these instructions, you can avoid costly rim replacements and maintain a smooth and comfortable driving experience. Let’s dive in and learn how to fix a bent rim!

Credit: www.wikihow.com
Tools And Materials Needed
When it comes to fixing a bent rim, having the right tools and materials is crucial. With the right equipment at your disposal, you’ll be able to tackle the job efficiently and effectively. Here are the key tools and materials you’ll need to fix a bent rim:
Jack
A reliable jack is an essential tool for any wheel repair job. A hydraulic floor jack or a scissor jack can both be used to lift the car off the ground and provide the necessary space to access the bent rim. Ensure that the jack is capable of supporting the weight of your vehicle and follow safety guidelines when lifting your car.
Lug Wrench
A lug wrench, sometimes referred to as a lug nut wrench, is used to loosen and tighten the lug nuts holding the wheel onto the axle. This tool is necessary to remove the wheel from the vehicle and gain access to the bent rim. It’s important to choose a lug wrench that matches the size of your lug nuts to ensure a proper fit and avoid damaging them.
Rubber Mallet
A rubber mallet is a handy tool for straightening a bent rim. Its soft and malleable head allows you to apply gentle force without causing further damage to the rim. Using a rubber mallet, you’ll be able to carefully reshape the bent area of the rim and restore its original form.
Pry Bar
A pry bar, also known as a crowbar or a leverage bar, can be useful for more challenging rim repairs. This tool can provide additional leverage and help you exert controlled force to straighten out severe bends. Make sure to use the pry bar cautiously, taking care not to apply excessive pressure that could crack or warp the rim further.
Having these essential tools and materials at hand will empower you to fix a bent rim with confidence. Remember to follow proper safety precautions and consult a professional if you’re unsure about your ability to repair the rim yourself.
Step 1: Inspect The Damage
Look for visible signs of bending or warping
When it comes to a bent rim, it’s crucial to assess the damage properly before taking any further action. Inspecting the damage is the first step you should take to determine the extent of the problem. By thoroughly checking for visible signs of bending or warping, you can gain a clearer understanding of what needs to be done to fix it.
A bent rim can occur due to a variety of reasons, including hitting a pothole, curbing the wheel, or even a collision. These incidents can cause the rim to become bent or warped, leading to performance issues and potential safety hazards. By conducting a thorough visual inspection, you can identify the specific areas of damage and ascertain whether the rim can be repaired or if a replacement is necessary.
Here are some key steps to follow when inspecting the damage:
- Begin by visually examining the entire rim surface, both the outer and inner sides. Look for any irregularities, such as dents, deformations, or bends. These visible signs are indicative of potential bending or warping.
- Pay close attention to the rim’s edges and spokes. These areas are often more susceptible to damage. If you notice any abnormalities, be sure to highlight them for further evaluation.
- Check if the rim is still round and properly aligned. Irregularities in shape or alignment can impair the wheel’s performance and lead to handling issues.
- Inspect the rim for any cracks or breaks, as these can compromise the structural integrity and safety of the wheel. Cracks may not always be visible to the naked eye, so use a magnifying glass if needed.
- Take note of any other damages, such as paint chips or scratches, as these may also need attention during the repair process.
By closely following these inspection steps, you’ll be equipped with a comprehensive understanding of the rim’s condition. This information will guide your decision on the best course of action for fixing the bent rim.
Step 2: Remove The Wheel
Step 2: Remove the Wheel
Once you have successfully loosened the lug nuts and are ready to fix your bent rim, the next step is to remove the wheel from the vehicle. Follow these simple steps:
Loosen the lug nuts with the lug wrench
Using the lug wrench, apply firm pressure to each lug nut in a counter-clockwise direction. Ensure that all the lug nuts are loosened, but do not remove them completely at this stage. This step will prepare the wheel for removal.
Lift the vehicle using the jack
Before proceeding with removing the wheel, it is important to lift the vehicle off the ground using a jack. Place the jack in the recommended lifting point specified in your vehicle’s manual. Carefully pump the jack until the wheel is lifted off the ground. Make sure that the jack is stable and the vehicle is securely supported before continuing.
Completely remove the lug nuts
Once the vehicle is safely lifted, you can now proceed to remove the lug nuts completely. Use the lug wrench to unscrew each lug nut in a counter-clockwise direction and set them aside. Be sure to keep the lug nuts in a safe place, such as a pocket or a container, to avoid misplacing them.
With the lug nuts removed, you are now ready to take off the wheel and continue with fixing the bent rim.
Step 3: Assess The Severity Of The Bend
Once you’ve identified that your rim is indeed bent, it’s time to assess the severity of the bend. This step is crucial to determine whether the rim can be repaired or if it needs to be replaced entirely.
Spin the wheel to identify areas of wobbling or unevenness
Start by spinning the wheel and closely observing it. Look for any noticeable wobbling or areas of unevenness. A bent rim often causes the wheel to wobble when it rotates. By visually inspecting the spinning wheel, you can identify these problem areas.
Determine whether the rim can be repaired or needs replacement
Once you’ve identified the areas of wobbling or unevenness, it’s important to assess whether the rim can be repaired or if it needs to be replaced entirely. To make this determination, consider the following:
- The extent of the bend: Is the rim slightly bent or severely damaged? A mild bend can often be repaired, while extensive damage may require a replacement.
- The materials used in the rim: Different types of rims have varying levels of repairability. For example, alloy rims can often be fixed, whereas steel rims may require replacement in certain cases.
- The location of the bend: Some parts of the rim are more easily repairable than others. For instance, if the bend is closer to the center of the wheel, it may be more challenging to fix compared to an outer rim bend.

By considering these factors, you can determine the appropriate course of action for your bent rim. If you’re unsure, it’s best to consult a professional mechanic or wheel specialist who can provide expert advice based on the specific characteristics of your rim.
Step 4: Straightening The Rim
Now that you have removed the valve stem and deflated the tire, it’s time to move on to straightening the bent rim. This step requires a rubber mallet and careful precision to reshape the rim back to its original form. Follow the instructions below to ensure a successful repair:
Remove the valve stem to deflate the tire
To begin straightening the rim, the first thing you need to do is remove the valve stem to deflate the tire. This will provide you with more flexibility and allow you to effectively work on the bent area of the rim. Here’s how to do it:
- Locate the valve stem on the rim.
- Using a valve stem removal tool, unscrew the valve stem in a counterclockwise direction.
- Once the valve stem is loose, carefully pull it out of the rim.
Place a rubber mallet against the bent area
Now that the tire is deflated, it’s time to place a rubber mallet against the bent area of the rim. The rubber mallet will help absorb the impact and prevent any further damage to the rim. Follow these steps:
- Position yourself so that you have a clear view and access to the bent area of the rim.
- Hold the rubber mallet firmly in your hand, making sure your grip is secure.
- Align the rubber mallet against the bend, ensuring that the head of the mallet covers the entire affected area.
Gradually tap the mallet to reshape the rim
With the rubber mallet in place, it’s time to start reshaping the rim. It’s important to take it slow and gradually apply pressure to avoid causing any further damage. Follow these steps:
- Begin tapping the rubber mallet against the bent area of the rim using controlled force.
- Work your way around the entire bend, applying equal pressure on all sides.
- Continue tapping and reshaping until the rim starts to regain its original form.
Remember, patience is key when straightening the rim. Take breaks as needed, and carefully assess the progress after each round of tapping. If the bend is severe or the rim doesn’t fully straighten, it’s best to consult a professional to prevent any further damage or safety risks.
Step 5: Heat Treatment
Heat treatment is a crucial step in fixing a bent rim as it allows you to manipulate the metal and restore its original shape. This process is necessary especially when the rim is severely bent and cannot be straightened by other means. Here’s how you can perform heat treatment on your rim:
Heat the bent area with a propane torch
The first step in heat treatment is to heat the bent area of the rim using a propane torch. Make sure to wear appropriate safety gear, such as gloves and goggles, to protect yourself from the intense heat. Aim the torch at the affected area and move it back and forth to evenly distribute the heat. The heat will make the metal more pliable and easier to manipulate.
Use a pry bar to apply pressure and bend the rim back into shape
Once the bent area is heated, carefully use a pry bar to apply pressure and bend the rim back into shape. Position the pry bar against the bent section and gradually increase the pressure until the rim starts to straighten. Use gentle and controlled movements to avoid causing further damage to the rim.
Important tip: Ensure that you are applying pressure only on the bent area and not on other sections of the rim, as this may result in additional damage.
Let the rim cool down gradually
After the rim has been successfully straightened, it’s crucial to let it cool down gradually. This allows the metal to stabilize and prevents any unwanted changes to its shape. Avoid immersing the heated rim in water or using forced cooling methods, as this can cause rapid temperature changes and potentially lead to warping or cracking.
Pro tip: Place the rim on a flat, stable surface and let it cool naturally. You can place a piece of wood or a heat-resistant material under the rim to provide support and prevent any deformation while cooling.
In conclusion, heat treatment is an effective technique to fix a bent rim when other methods fail. By carefully heating the bent area, using a pry bar to apply pressure, and allowing the rim to cool down gradually, you can successfully restore your rim’s shape and ensure optimal performance for your vehicle.
Step 6: Reinstall The Wheel
Now that you’ve successfully fixed the bent rim, it’s time to reinstall the wheel onto your vehicle. Following the proper steps will ensure that the wheel is securely attached and ready for smooth and safe driving.
Inflate the tire back to the recommended pressure
The first step in reinstalling the wheel is to inflate the tire back to the recommended pressure. This is crucial to ensure proper handling and stability. Refer to your vehicle’s manual or the sidewall of the tire for the recommended tire pressure. Use a tire pressure gauge to check the pressure and inflate or deflate the tire as needed.
Place the wheel onto the hub and tighten the lug nuts
Next, carefully align the holes on the wheel with the studs on the hub. Gently place the wheel onto the hub, making sure it fits snugly. Once the wheel is in position, hand-tighten the lug nuts in a star or criss-cross pattern. This will help evenly distribute the tightening force.
Note: Be cautious when tightening the lug nuts to avoid cross-threading. If a lug nut feels resistant, double-check the alignment and try again.
Lower the vehicle and fully tighten the lug nuts
After securing the lug nuts by hand, it’s time to lower the vehicle. Carefully lower it until the wheel is in full contact with the ground. Now, use a torque wrench to fully tighten the lug nuts according to the manufacturer’s specifications. This is an important step to prevent the wheel from coming loose while driving.
Note: It’s crucial to follow the manufacturer’s recommended torque specifications for the lug nuts. Over-tightening or under-tightening can lead to complications and potential safety hazards.
By following these simple steps, you can easily reinstall the wheel after fixing a bent rim. Remember to check the tire pressure regularly to ensure optimal performance and extend the lifespan of your tires. Safe travels!
Step 7: Test The Repaired Rim
Take a short drive to ensure the wheel spins smoothly
Once the bent rim has been repaired and reinstalled, it’s essential to take a short drive to test its performance. This step will help ensure that the wheel spins smoothly and there are no further issues to be addressed. You can start by driving at a slow and steady pace, gradually increasing your speed. Pay close attention to how the vehicle handles and if there are any noticeable changes in the ride.Listen for any unusual noises or vibrations
While testing the repaired rim, listen carefully for any unusual noises or vibrations. These can be signs that the rim is not fixed correctly or that there may be additional problems. Rattles, squeaks, or clunking sounds could indicate loose bolts or an unstable rim. If you notice any vibrations that were not present before the repair, it may be a sign that further adjustments are necessary.Check the wheel periodically to ensure it remains fixed
To ensure the long-term effectiveness of the repair, it’s important to check the wheel periodically and make sure it remains fixed. Keeping an eye on the condition of the rim will help prevent any future issues or potential damage. Inspect the rim for any signs of loosening, cracks, or bending. Additionally, check the tire pressure regularly to ensure it is at the recommended level. Making these simple checks a part of your routine maintenance will help extend the life of your repaired rim. In conclusion, testing the repaired rim is a crucial step in the process of fixing a bent rim. Taking a short drive to ensure the wheel spins smoothly, listening for any unusual noises or vibrations, and periodically checking the wheel for any changes will help ensure the effectiveness and durability of the repair. Remember to prioritize routine maintenance to keep your rim in optimal condition for a safe and smooth driving experience.Frequently Asked Questions On How To Fix A Bent Rim
Can I Still Drive With A Bent Rim?
Yes, you can drive with a bent rim, but it is not recommended. A bent rim can cause problems with your car’s alignment, tire wear, and can even lead to a blowout or loss of control. It’s best to have your rim repaired or replaced as soon as possible to avoid further damage and ensure safe driving.
Can You Hammer Back A Bent Rim?
No, it’s not recommended to hammer back a bent rim. Hammering can further damage the rim and affect its structural integrity. It’s best to have a professional assess the damage and determine the appropriate solution, such as rim repair or replacement.
How Do You Straighten A Bent Steel Rim?
To straighten a bent steel rim, take it to a professional rim repair specialist. They will use specialized equipment and techniques to carefully reshape the rim back into its original form, ensuring it is safe to use on your vehicle.
Can Aluminum Rims Be Repaired?
Yes, aluminum rims can be repaired. Professional repair services can fix dents, scratches, and other damages to restore the rims’ functionality and appearance. Repairs are cost-effective compared to buying new rims.
How Can I Tell If My Rim Is Bent?
Bent rims can cause vibration and uneven tire wear. Inspect your rim for visible damage or take it to a professional.
Can A Bent Rim Be Fixed?
Yes, a bent rim can be fixed through a process called rim straightening or refinishing done by a professional.
How Much Does It Cost To Fix A Bent Rim?
The cost to fix a bent rim depends on the severity of the damage and can range from $75 to $400.
Conclusion
Fixing a bent rim is a common issue that many car owners face. By following the steps mentioned in this blog post, you can successfully repair your bent rim and restore its functionality. Remember to assess the severity of the damage, use suitable tools, and seek professional assistance if needed.
Proper maintenance and driving techniques can also help prevent future rim damage. Happy driving!
- How Much Does a Ford 9N Tractor Weigh - May 20, 2024
- How Many of My Exact Car were Made: Uncovering the Rarity - May 20, 2024
- How to Find Out What Someone Drives: Discover the Truth - May 20, 2024