To get a nut out of a socket, use pliers or a socket extractor tool to grip the nut and twist it counterclockwise until it comes loose. Finding yourself in a situation where a nut is stuck in a socket can be frustrating.
Whether you’re working on a DIY project or trying to repair something, removing the nut is essential to proceed. Fortunately, extracting a nut from a socket can be achieved with minimal effort by using the right tools and techniques. We will explore the steps to get a nut out of a socket, allowing you to successfully complete your task.
So, let’s dive straight into the practical guide and discover the best methods for freeing that stubborn nut from its socket.
Understanding The Problem And Importance Of Removing Stuck Nuts
When it comes to mechanical work, nothing can be more frustrating than encountering a stuck nut. It can bring even the most experienced professionals to their knees. Whether you’re a DIY enthusiast or a professional mechanic, dealing with a stubborn nut is a common challenge that can test your patience.
Common Challenges and Frustrations of Stuck Nuts
Stuck nuts are often the result of factors such as corrosion, rust, over-tightening, or even poor quality materials. Regardless of the cause, removing stuck nuts can be quite challenging. Here are some common frustrations you may encounter:
- Limited Access: In some cases, the nut may be in a hard-to-reach area, making it difficult to get the right tools and apply sufficient force.
- Stripped Threads: Trying to force your way through can lead to stripped threads, which further complicates the removal process.
- Time and Effort: Removing a stuck nut can be time-consuming and physically demanding. It often requires a combination of different techniques, tools, and a considerable amount of effort.
- Damage to Surrounding Components: The risk of damaging surrounding components or even the overall integrity of the assembly is another concern when trying to remove a stuck nut.
Why it’s Crucial to Remove Stuck Nuts Properly
Properly removing stuck nuts is imperative for several reasons:
- Safety: Removing a stuck nut ensures that the component or part can be repaired or replaced, preventing potential hazards or accidents.
- Functionality: A stuck nut could impede the proper functioning of a mechanism or system, leading to decreased performance or failure.
- Preventing Further Damage: Ignoring a stuck nut or attempting unconventional methods can result in damage to threads, surrounding components, or even the whole structure, leading to costly repairs.
- Time Efficiency: Proper techniques and tools can help expedite the removal process and save valuable time.
Ultimately, understanding the problem and the importance of removing stuck nuts is crucial for anyone working with mechanical components. By being aware of the common challenges and frustrations associated with stuck nuts, you can approach the removal process with a well-prepared mindset. Remember, patience, the right tools, and proper techniques are key when it comes to removing stuck nuts effectively and efficiently.
Essential Tools And Safety Precautions
When it comes to working with nuts and sockets, having the right tools and taking safety precautions is crucial. Whether you’re a seasoned DIYer or just starting out, understanding which tools to use and how to ensure a smooth and accident-free process is essential. In this section, we will explore the necessary tools you’ll need to get a nut out of a socket and outline some important safety precautions to follow. By following these guidelines, you can tackle this task with confidence and efficiency.
Gathering the Right Tools for the Job
Before diving into removing a nut from a socket, it’s important to gather the necessary tools to ensure a successful operation. Having the right tools on hand can make the process easier, saving you time and frustration. Here are the essential tools you’ll need:
| Tool | Purpose |
|---|---|
| Socket Wrench | Allows for easy turning of the nut and provides a secure grip. |
| Socket Set | Provides a range of socket sizes to accommodate different nut sizes. |
| Extension Bar | Enables you to reach nuts that are in hard-to-reach areas. |
| Pliers | Useful for turning smaller nuts and providing additional grip if needed. |
Remember, having the right tools for the job is essential for success. Ensure your tools are in good condition and the correct size for the nut you’re working with. Using the wrong size can lead to stripped threads or damaged nuts, making the removal process much more challenging.
Safety Precautions to Ensure a Smooth and Accident-Free Process
When working with tools, it’s always important to prioritize safety. Taking the necessary precautions can help prevent accidents and injuries. Here are some safety guidelines to follow:
- Wear Protective Gear: Before starting any work, put on safety glasses and work gloves to protect your eyes and hands from potential hazards.
- Secure the Workpiece: Ensure the object you’re working on is securely held in place, either using clamps or a vice, to prevent any unexpected movement during the removal process.
- Watch Your Surroundings: Make sure the working area is clean and well-lit, and there are no obstacles or trip hazards that could cause accidents or injuries.
- Apply Steady Pressure: When using tools to loosen the nut, apply steady and controlled pressure. Avoid applying excessive force, as this can lead to slips or stripped threads.
- Turn Tools Slowly: Slow and deliberate movements are important to maintain control and prevent sudden movements that could cause injury.
- Inspect Tools and Nuts: Before using any tools, inspect them for any damage or defects. Likewise, check the nut for signs of wear or damage that could affect its removal.
By following these safety precautions, you can reduce the risk of accidents and make the process of removing a nut from a socket much safer and smoother. Remember, safety should always be your top priority when undertaking any DIY project.
Preparatory Steps
Before attempting to remove a stubborn nut from a socket, it is essential to take a few preparatory steps to ensure a successful and efficient outcome. Proper preparation will not only make the process easier but also minimize the risk of damaging the surrounding area or the nut itself. In this section, we will discuss two crucial preparatory steps: cleaning the surrounding area and applying penetrating oil.
Cleaning the Surrounding Area
Before you get started, it is crucial to thoroughly clean the area around the nut and the socket. This is especially important if the nut has accumulated dirt, grease, or corrosion over time. Cleaning the surrounding area will help you to visualize the nut more clearly and provide better access to the socket.
To clean the area:
- Use a small brush to remove any loose debris or grime that may have accumulated around the nut.
- If there is excessive dirt or grease, you can use a mild degreasing agent and a clean cloth to wipe it away.
- If there is rust or corrosion on the nut or socket, gently scrub the affected area with a wire brush or a rust-removal solution until the surface is clean.
Applying Penetrating Oil
Another crucial step in preparing to remove a stubborn nut from a socket is applying penetrating oil. Penetrating oil is designed to seep into tight spaces and break down rust and corrosion, making it easier to loosen the nut. Follow these steps to apply penetrating oil effectively:
- Choose a high-quality penetrating oil or rust loosener spray available in the market.
- Shake the can well to ensure the oil is thoroughly mixed.
- Aim the nozzle towards the nut and the socket, ensuring each component is adequately coated with the oil.
- Allow the oil to penetrate and work its magic for the recommended amount of time mentioned on the product packaging. This typically ranges from a few minutes to several hours.
By cleaning the surrounding area and applying penetrating oil, you create a favorable environment for successfully removing a stubborn nut from a socket. These preparatory steps not only improve grip and stability but also contribute to the overall ease and efficiency of the removal process.
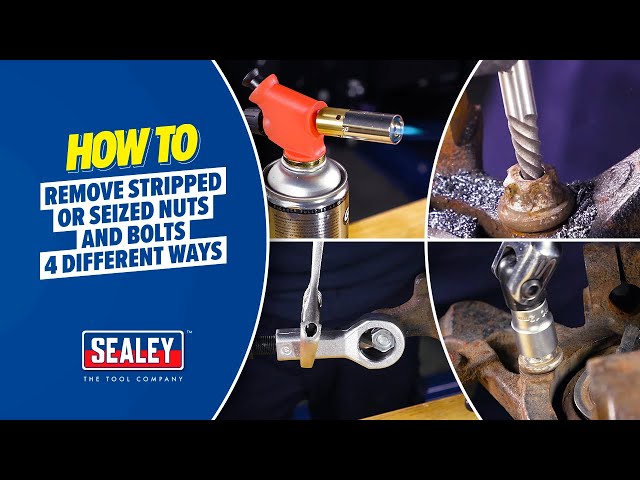
Step 1: Applying Heat To Loosen The Nut
Choosing the Appropriate Heat Source
When it comes to removing a stubborn nut from a socket, applying heat can be a game-changer. By subjecting the metal to high temperatures, the expansion of the material and the breaking of rust bonds become possible, ultimately making it easier to loosen the nut. However, it’s crucial to choose the appropriate heat source for this task.
Firstly, identify the type of metal you are dealing with. Different metals have different melting points, so it’s essential to select a heat source that can reach the required temperature without damaging the surrounding components. Common heat sources include:
- Torch: A torch can be highly effective in applying direct heat to the nut. It generates a focused and intense flame, allowing you to control the amount of heat applied. Choose a propane or butane torch as they provide enough heat to loosen the nut, while also minimizing the risk of overheating.
- Heat Gun: If you don’t have access to a torch, a heat gun can be a viable alternative. It produces a stream of hot air, which can be directed towards the nut. Heat guns are particularly useful when working in tight spaces since they provide a more concentrated heat source compared to methods like an open flame.
- Induction Heater: An induction heater is an advanced tool that provides precise and controlled heating. It uses electromagnetic waves to generate heat within the metal itself, making it an efficient choice. Induction heaters are especially handy for larger nuts or nuts embedded in a complex assembly.
Remember to prioritize safety when selecting your heat source. Wear protective gloves and goggles to shield yourself from any potential harm. Additionally, ensure there are no flammable materials nearby and keep a fire extinguisher within reach, just in case.
Step 2: Using Penetrating Oil To Break Down Rust
Selecting a high-quality penetrating oil
When it comes to removing a stubborn nut from a socket, a high-quality penetrating oil can be your best friend. Not all penetrating oils are created equal, so it’s important to select one that is known for its effectiveness in breaking down rust and lubricating metal surfaces.
Look for a penetrating oil that contains ingredients such as phosphoric acid, acetone, or petroleum distillates. These compounds have the power to effectively dissolve rust, making it easier to loosen and remove the nut from the socket.
In addition to the ingredients, pay attention to the brand reputation and customer reviews. Recommendations from other DIY enthusiasts can give you an idea of which penetrating oils have yielded successful results in similar situations.
Applying the oil and allowing it to work its magic

Once you have selected a high-quality penetrating oil, it’s time to apply it to the rusted nut and allow it to work its magic. Follow these steps to ensure maximum effectiveness:
- Clean the area: Before applying the oil, use a wire brush or sandpaper to remove any loose rust or debris from the surface of the nut. This will help the oil penetrate deeper into the rust and provide better results.
- Apply the oil: Using a nozzle or a small brush, carefully apply the penetrating oil to the rusted area. Make sure to cover the entire surface of the nut. Allow the oil to sit for at least 15-20 minutes to give it enough time to penetrate the rust and loosen it.
- Reapply if necessary: If the nut is heavily rusted or the oil seems to be evaporating too quickly, consider reapplying the penetrating oil and allowing it to sit for a longer period of time. Patience is key when dealing with stubborn rust.
Remember, rust can be a stubborn adversary, but with the right penetrating oil and a little patience, you can effectively break it down and free that nut from its socket.
Step 3: Utilizing Mechanical Methods For Removal
When it comes to removing a stubborn nut from a socket, employing mechanical methods can be an effective solution. By using the right-size wrench or socket and leveraging controlled force, you can successfully extract the nut without causing any damage. Let’s explore the steps involved in utilizing these mechanical methods.
Using the right-size wrench or socket
To begin the removal process, it is crucial to have the right tools on hand. Using a wrench or socket that is the correct size for the nut is essential for a successful extraction. If the tool is too small, it may slip or strip the nut, making it even more challenging to remove. Conversely, if the tool is too large, it will not fit properly, compromising your ability to apply sufficient force.
When selecting the wrench or socket, ensure that it matches the measurements of the nut precisely. This way, you can establish a secure connection with the nut, providing a better grip to facilitate the removal process. Remember, using the correct size tool is the key to avoiding unnecessary frustration and potential damage.
Employing leverage and applying controlled force
Once you have the appropriate tool in hand, it’s time to employ leverage and apply controlled force to remove the nut from the socket. Leverage can be achieved by placing the wrench or socket perpendicular to the nut’s position and exerting pressure in the opposite direction.
Take hold of the handle or grip firmly, ensuring a solid grip, and position your body in a way that allows you to exert controlled force without compromising your balance. Apply steady and controlled pressure in the anti-clockwise direction, as this is typically the direction for loosening nuts.
Avoid using sudden, jerky movements or excessive force as this could lead to injury or damage to the socket or surrounding components. Instead, focus on providing a steady and consistent application of force, gradually increasing it if necessary until the nut begins to loosen.
Remember to always follow the manufacturer’s guidelines and recommendations when it comes to using tools and applying force. Each nut may require a different level of force, so be attentive and adjust accordingly to prevent any mishaps.
In conclusion, utilizing mechanical methods, such as using the right-size wrench or socket and employing leverage with controlled force, can make the process of removing a nut from a socket more manageable. By using the correct tools and techniques, you can successfully extract the nut while minimizing the risk of damage or injury.
Step 4: Alternative Methods For Stubborn Nuts
While the previous steps outlined in this guide are generally effective in removing most nuts from sockets, there may be cases where you encounter particularly stubborn nuts that just won’t budge. In such situations, it is important to know alternative methods that can help you tackle these challenging nuts. Here are a few techniques you can try:
Tapping or Shock Techniques
In some cases, applying tapping or shock techniques can help loosen a stubborn nut from its socket. The idea behind these methods is to create vibrations or a sudden shock to break the grip between the nut and the socket. Here’s how you can do it:
- Use a hammer or mallet to tap gently on the sides of the socket. The vibrations created by the tapping can help loosen the nut.
- If tapping doesn’t work, you can try giving the nut a sharp shock using a wrench or a metal rod. Place the wrench or metal rod on the side of the nut and hit it with a hammer to create a sudden jolt.
Remember, it is important to be cautious when using tapping or shock techniques, as excessive force or improper handling can cause damage to the surrounding components.
Utilizing Specialized Nut-Removing Tools or Techniques
In situations where tapping or shock techniques are not yielding the desired results, you may need to resort to specialized tools or techniques specifically designed for removing stubborn nuts. These tools and techniques often provide additional leverage or grip to help loosen the nut. Here are a few options:
- Impact wrenches: An impact wrench delivers sudden bursts of high torque, making it particularly effective in removing stubborn nuts.
- Nut splitters: A nut splitter is a specialized tool that can be used to split the nut into two pieces, allowing for easier removal.
- Heat and cold application: Expanding or contracting the nut and socket using heat or cold can sometimes help break the bond. You can use a heat gun or a torch to apply heat to the nut or apply a freezing agent to create a sudden drop in temperature.
By utilizing these specialized nut-removing tools or techniques, you increase your chances of successfully removing stubborn nuts without causing any damage to the surrounding components.
Regular Cleaning And Lubrication
Regular cleaning and lubrication are essential for maintaining the functionality and lifespan of nuts and bolts. Keeping these components clean helps prevent the build-up of dirt, debris, and rust, ensuring smooth operation and facilitating easy removal. Additionally, using the appropriate lubricant enhances the efficiency of their movement, reduces friction and wear, and prevents seizing. In this section, we will highlight the importance of keeping nuts and bolts clean and guide you on choosing the right lubricant for different applications.Importance of keeping nuts and bolts clean
Regular cleaning of nuts and bolts is crucial to maintain their performance and avoid potential issues. Here are some reasons why cleanliness matters:- Prevention of rust formation: Nuts and bolts are often exposed to moisture, which can lead to rusting. By keeping them clean, you remove any moisture and minimize the risk of rust formation.
- Prevention of debris accumulation: Over time, nuts and bolts can accumulate various contaminants like dirt, dust, and debris. These particles can hinder their movement, making it difficult to tighten or loosen them. Regular cleaning ensures that such debris is removed
- Improved durability: Clean nuts and bolts are less likely to experience premature wear and tear. By keeping them free from contaminants, you prolong their lifespan and reduce the need for replacement.
Choosing the appropriate lubricant for different applications
Selecting the right lubricant plays a vital role in the smooth operation and longevity of nuts and bolts. Here’s a guide to help you choose the appropriate lubricant for various applications:| Application | Recommended Lubricant |
|---|---|
| General purpose | Multi-purpose grease |
| High temperature | Heat-resistant synthetic grease |
| Extreme pressure | Heavy-duty lithium grease |
| Food-grade | Food-grade silicone grease |
Ensuring Proper Torque And Fastening Techniques
When it comes to working with nuts and bolts, one of the key factors to consider is ensuring proper torque and fastening techniques. Understanding torque specifications and properly tightening nuts and bolts not only prevents future stuck nuts but also ensures the stability and durability of the assembled components. In this article, we will explore the importance of torque specifications and provide you with practical tips on how to tighten nuts properly.
Understanding torque specifications
Torque specifications refer to the specific amount of force that should be applied to tighten a nut or bolt. It is crucial to adhere to these specifications to avoid overtightening or undertightening, which can lead to various issues such as damage to the fastener or failure of the joint.
When working on a project, always refer to the manufacturer’s guidelines for the specific torque specifications. These guidelines are typically provided in a torque chart where you can find the recommended torque values based on the fastener size and material.
Moreover, it is essential to ensure that you are using the proper torque wrench or tool for the job. A torque wrench allows for accurate measurement and control of the applied force, ensuring consistent and reliable fastening.
Properly tightening nuts and bolts to prevent future stuck nuts
Incorrectly tightened nuts and bolts can cause serious issues, such as nuts getting stuck in sockets. To prevent this problem, follow these best practices:
- Hand-tighten first: Begin by hand-tightening the nut or bolt until you feel resistance. This initial step ensures that the threads are aligned correctly and prevents any cross-threading, which can lead to stripped threads or stuck nuts.
- Use the correct tools: Once hand-tightened, use the appropriate tool such as a socket wrench or torque wrench to achieve the desired torque. Avoid using excessive force or makeshift tools, as they can damage the fasteners.
- Follow Torque specifications: Refer to the torque specifications provided by the manufacturer and gradually tighten the nut or bolt in incremental steps. This technique helps distribute the tension evenly, reducing the risk of stripping the threads or damaging the fastener.
- Consider lubrication: In some cases, applying a suitable lubricant to the threads can facilitate smooth tightening and prevent excessive friction, especially when working with rusty or corroded fasteners.
- Inspect the fastener: After tightening the nut or bolt, visually inspect the fastener to ensure it is seated securely. Ensure there are no signs of cross-threading or misalignment.
By following these practices, you can minimize the likelihood of encountering stuck nuts in the future and ensure proper fastening and torque application.
Botched Attempts And Broken Tools
When it comes to removing a stubborn nut from a socket, things don’t always go according to plan. Sometimes, despite your best efforts, you may end up with a botched attempt and even worse, broken tools. But don’t worry, there are solutions to salvage the situation and get your project back on track.
Solutions for when things don’t go according to plan
If you find yourself in a situation where your attempts to remove a nut from a socket have failed and your tools have suffered the consequences, don’t panic. Here are some steps you can take to rectify the situation:
- Assess the damage: Before proceeding any further, it’s important to assess the extent of the damage. Determine if it’s the tool that needs replacement or repair, or if the nut and socket are salvageable.
- Replacing or repairing damaged tools: If your tools have been damaged during the process, it’s crucial to address this before proceeding. Broken tools can hamper your progress and potentially cause further damage. Consider the following options:
Option 1: Replacing broken tools
If your tool is beyond repair or poses a safety risk, it’s best to replace it. Look for a high-quality replacement that suits your specific needs. Take note of the size, durability, and functionality of the tool to ensure a successful outcome.
Option 2: Repairing damaged tools
If your tool can be repaired, it may be a cost-effective solution. However, it is essential to conduct the repairs properly to avoid further issues. Seek professional assistance or follow a reliable repair guide to ensure the tool is restored to its optimal condition.
- Proceeding with the nut and socket: Once your tools are taken care of, it’s time to revisit the nut and socket. Here are a few tips to consider:
- Apply penetrating oil: If the nut is still stuck, applying a penetrating oil can help loosen it. Allow the oil some time to seep into the threads and create lubrication. This might make it easier to remove the nut without damaging the surrounding socket.
- Use heat: Heat can expand the metal and loosen the grip between the nut and the socket. Applying heat directly to the nut using a heat gun or a torch can be an effective technique. However, be cautious when using heat near flammable materials or on delicate components.
- Consider impact tools: Impact tools, such as impact wrenches or nut extractors, can provide the necessary force to free a stuck nut. These tools deliver sudden impacts, allowing you to break the nut’s stubborn grip on the socket. Ensure you choose the right tool for the job and follow the manufacturer’s instructions.
- Seek professional help: If all else fails and you’re still unable to remove the nut safely, it’s time to seek professional assistance. A trained mechanic or technician will have the expertise and tools necessary to tackle even the most challenging situations.
Remember, not every attempt to remove a nut from a socket will be smooth sailing. However, by assessing the damage, replacing or repairing broken tools, and employing strategic techniques, you can overcome these obstacles and get that stubborn nut out of the socket efficiently and safely.
Dealing With Seized Or Stripped Nuts
When it comes to home repairs or DIY projects, dealing with seized or stripped nuts can be a frustrating experience. Whether it’s a rusty bolt or a tightly fitting nut, these situations can bring out the inner mechanic in all of us. In this section, we’ll explore some effective strategies and techniques for removing stripped or rounded nuts, so you can save both time and your sanity.
Strategies for addressing more challenging situations
When encountering a seized or stripped nut, it’s crucial to approach the problem with the right strategy. Here are some effective strategies to keep in mind:
- Apply penetrating oil: Start by applying a liberal amount of penetrating oil, such as WD-40, to the threads of the nut. Allow the oil to penetrate deep into the threads and work its magic for at least a few hours or overnight. This will help loosen the rust or grime that may be causing the nut to seize.
- Heat it up: If the nut still won’t budge, try heating it up with a blowtorch or a heat gun. The expansion caused by the heat can help break the bond between the nut and the bolt, making it easier to remove. But be cautious not to overheat the surrounding components, as this can lead to damage.
- Use a breaker bar: In some stubborn cases, using a breaker bar or a longer-handled wrench can provide the extra leverage needed to loosen the nut. The longer handle allows for more torque, making it easier to break the resistance.
Techniques for removing stripped or rounded nuts
If you find yourself dealing with a stripped or rounded nut, don’t fret. There are several techniques you can try to successfully remove it:
- Try using pliers: Pliers can be a handy tool when it comes to gripping a rounded nut. Use adjustable pliers, such as locking pliers or Vise-Grips, and clamp them tightly onto the edges of the nut. Carefully turn the pliers counterclockwise to loosen the stripped nut.
- Use a nut splitter: When all else fails, a nut splitter can be a lifesaver. This tool has a wedge-shaped blade that is inserted onto the nut and tightened. As the blade digs into the nut, it splits it open, allowing for easy removal. Just be cautious not to damage the surrounding area.
- Grind a new groove: If the nut has a rounded top, you can try using a rotary tool with a cutting disk to create a new groove. Carefully grind a channel across the top of the nut, creating a flat surface for a wrench or socket to grip onto.
Remember, patience is key when dealing with seized or stripped nuts. Take your time, apply the right strategy, and utilize the appropriate technique for the best results. With these tips in your toolbox, you’ll be well-equipped to tackle any stubborn nut that comes your way.

Credit: www.amazon.com
Frequently Asked Questions Of How To Get A Nut Out Of A Socket
How Do You Get A Nut Off A Socket?
To remove a nut from a socket, use a wrench or socket wrench in the opposite direction of tightening. Rotate the tool counterclockwise to loosen the nut. Apply steady pressure and make sure to choose the correct size socket for a secure grip.
How Do You Remove A Nut That Won’T Budge?
To remove a stubborn nut, apply penetrating oil to help loosen it, then use a wrench with an extension bar for extra leverage. If it still won’t budge, tap the nut with a hammer to break the rust or corrosion.
How Do You Get A Rusted Nut Out Of A Socket?
To remove a rusted nut from a socket, apply penetrating oil to loosen the rust. Let it sit for a few minutes, then use a wrench or pliers to turn the nut counterclockwise. If it still won’t budge, try tapping it with a hammer or using heat before attempting again.
Which Way Do You Remove A Nut?
To remove a nut, use a wrench or pliers and turn counterclockwise. Apply force gradually and steadily until the nut is loosened.
Faq 1: How Do You Remove A Nut Stuck In A Socket?
To remove a nut stuck in a socket, try tapping the socket gently with a hammer or using a penetrating oil.
Conclusion
Removing a nut from a socket doesn’t have to be a daunting task. By following these simple steps and using the right tools, you can easily tackle the challenge. Remember to apply lubrication, use the correct size wrench, and apply steady pressure in the right direction.
With a little patience and technique, you’ll have that nut out in no time. Happy fixing!
- How Much Does a Ford 9N Tractor Weigh - May 20, 2024
- How Many of My Exact Car were Made: Uncovering the Rarity - May 20, 2024
- How to Find Out What Someone Drives: Discover the Truth - May 20, 2024