To remove a CV axle from a transmission, first, lift the vehicle and secure it with jack stands. Then, remove the wheel and brake caliper to access the axle.
Finally, disconnect the axle from the transmission by removing the retaining clip or bolts.

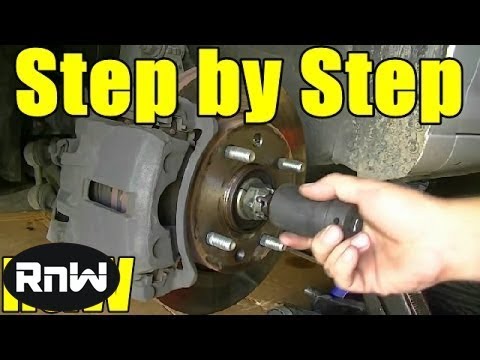
Credit: www.mobil.com
Preparing For Axle Removal
Before you begin removing the CV axle from the transmission, it’s important to gather all the necessary tools. Having the right tools on hand will make the process much easier and more efficient. Here are the tools you’ll need for this task:- Socket wrench: This versatile tool will help you loosen and tighten various bolts and nuts.
- Allen wrench: You may need this tool to remove specific bolts that require an Allen head.
- Pry bar: Use a sturdy pry bar to separate the CV axle from the transmission.
- Jack stands: These essential tools will help support the vehicle once it’s lifted.
- Floor jack: A reliable floor jack is necessary to raise the vehicle off the ground.
- Locate the proper lifting points: Before lifting the vehicle, it’s crucial to identify the correct lifting points. Consult your vehicle’s user manual for guidance.
- Use the floor jack to lift the vehicle: Position the floor jack under the designated lifting point and pump the handle until the vehicle is raised off the ground.
- Secure the vehicle with jack stands: Once the vehicle is lifted, place the jack stands under the recommended support points. Lower the vehicle onto the jack stands and ensure they are securely in place before continuing.
- Loosen the lug nuts: Use your socket wrench equipped with the correct size socket to loosen the lug nuts on the wheel. Loosen them enough to remove them easily later on.
- Remove the wheel from the axle: Once the lug nuts are loose, carefully lift the wheel off the axle. Set it aside in a safe location for now.
Disconnecting The Axle From The Transmission
When it comes to removing the CV axle from the transmission, there are several steps you need to follow to ensure a smooth and successful process. This includes disconnecting the hub nut, suspension components, and finally removing the axle from the transmission.
Removing the Hub Nut
Before you can disconnect the axle from the transmission, you’ll first need to remove the hub nut. Here’s how:
- Locate the hub nut: Begin by finding the hub nut, which is usually located in the center of the wheel hub.
- Secure the hub nut with a pry bar: Once you’ve located the hub nut, use a pry bar to secure it in place. This will prevent the axle from rotating while you’re trying to remove it.
- Loosen and remove the hub nut: Now, using a socket wrench, loosen and remove the hub nut completely. This will free the axle from the wheel hub.
Disconnecting the Suspension Components
After removing the hub nut, the next step is to disconnect the suspension components. This will allow you to have enough room to remove the axle from the transmission. Follow these steps:
- Remove the tie rod end: Start by removing the tie rod end. This can usually be done by loosening the nut that secures it to the steering knuckle and then using a tie rod end puller to separate it from the knuckle.
- Disconnect the stabilizer bar: Next, disconnect the stabilizer bar. This can typically be done by removing the nuts that secure it to the lower control arm.
- Remove the lower control arm: Finally, remove the lower control arm. This is usually done by removing the bolts that hold it in place on the vehicle’s frame and steering knuckle.
Removing the Axle from the Transmission
With the hub nut and suspension components out of the way, it’s time to remove the axle from the transmission. Here’s what you need to do:
- Locate the axle shaft and transmission housing: Start by locating the axle shaft, which is connected to the wheel hub, and the transmission housing, where the axle will be inserted.
- Use a pry bar to detach the axle from the transmission: With the axle and transmission housing in sight, gently insert a pry bar between the two to detach the axle from the transmission. Apply gradual pressure until the axle comes loose.
- Gently pull the axle out of the transmission: Once the axle is detached, gently pull it out of the transmission. Be careful not to apply too much force or create any unnecessary strain on the components.
By following these steps and using the proper tools, you’ll be able to disconnect the CV axle from the transmission effectively. Remember to take your time and exercise caution throughout the process to avoid any damage to the vehicle or yourself.
Installing A New Cv Axle
If your CV axle is damaged or worn out, it’s essential to replace it to ensure your vehicle’s optimal performance and safety. Installing a new CV axle is not a complicated task, but it does require proper preparation and steps to be followed. In this section, we will guide you through the process of installing a new CV axle, including inspecting the new axle for damage, applying grease to the axle splines, aligning the splines with the transmission, reconnecting the suspension components, and reattaching the hub nut and wheel.
Preparing the New CV Axle
Before installing the new CV axle, it’s crucial to inspect it for any potential damage. Inspecting the new axle will help you ensure that it’s in perfect condition and free from any defects. Carefully look for cracks, bends, or signs of wear on the axle. If you find any damage, it’s essential to replace the axle before installation.
Once you have confirmed that the new CV axle is in good condition, it’s time to apply grease to the axle splines. Greasing the splines will provide lubrication and prevent any friction or damage during installation. Apply a generous amount of grease to the splines, making sure to cover them thoroughly.
Installing the New CV Axle
To install the new CV axle, start by aligning the splines of the axle with the transmission. Ensure that the splines are correctly aligned to prevent any issues during installation.
Once aligned, gently push the axle into the transmission until it clicks into place. You may need to exert some force, but be careful not to use excessive pressure that could cause damage. The axle should slide smoothly into the transmission, indicating a proper installation.
After the axle is securely in place, it’s time to reconnect the suspension components. Depending on your vehicle’s make and model, the suspension components may vary. Follow the manufacturer’s instructions or refer to your vehicle’s manual to properly reconnect the suspension components.
Reattaching the Hub Nut and Wheel
With the suspension components reconnected, it’s time to reattach the hub nut and wheel. Start by tightening the hub nut securely. The hub nut is responsible for holding the wheel hub and CV axle together, so it’s essential to tighten it properly. Use the appropriate tools and torque specifications provided by the manufacturer to ensure a secure connection.
Once the hub nut is tightened, reinstall the wheel onto the axle. Align the wheel with the axle and slide it on until it’s firmly in place. Make sure the wheel is properly aligned and sits flush against the hub.
Finally, tighten the lug nuts to secure the wheel onto the axle. Start by hand-tightening each lug nut, ensuring they are snug. Then, using a torque wrench or wrench, tighten each lug nut according to the manufacturer’s recommended torque specifications.
Lowering The Vehicle And Testing
Once you have successfully replaced the CV axle in your vehicle, it is important to lower the vehicle properly and test the functionality of the new part. Following the correct procedure will ensure that the vehicle is safe and that the CV axle replacement has been done correctly.
Lowering the Vehicle
When you are ready to lower the vehicle after replacing the CV axle, there are a few steps you need to follow to ensure the process is carried out safely:
- Remove the jack stands: Start by carefully removing the jack stands from under the vehicle. Make sure you have a firm grip on the stands to prevent them from falling or causing any damage.
- Carefully lower the vehicle with the floor jack: Slowly and carefully lower the vehicle using the floor jack. Keep an eye on the vehicle as it is being lowered to ensure it is stable and not tilting to one side.
Testing the CV Axle Replacement
After lowering the vehicle, it is important to test the CV axle replacement to ensure that everything is working properly. Here are some steps you can follow to conduct a thorough test:
- Take the vehicle for a test drive to ensure proper functionality: Drive the vehicle at various speeds and on different road surfaces to test the CV axle replacement. Pay attention to any unusual sounds, vibrations, or performance issues.
- Listen for any unusual sounds or vibrations: While driving, listen carefully for any strange noises coming from the CV axle area. Unusual sounds could indicate a problem with the installation or the new CV axle itself.
If you notice any issues during the test drive, it is important to address them promptly. This may involve re-checking the installation, consulting a professional mechanic, or obtaining a replacement CV axle if necessary. Properly testing the CV axle replacement will ensure the safety and functionality of your vehicle.
Frequently Asked Questions Of How To Get Cv Axle Out Of Transmission
How Do You Release A Cv Axle?
To release a CV axle, follow these steps: 1. Raise the vehicle using a jack and secure it with jack stands. 2. Remove the wheel and brake caliper. 3. Disconnect the lower ball joint and tie rod end from the steering knuckle.
4. Use a pry bar to release the axle from the hub assembly. 5. Finally, remove the axle from the transmission by pulling it out.
Can A Cv Axle Break Transmission?

Yes, a CV axle can break the transmission.
What Connects The Cv Axle To The Transmission?
The CV axle connects directly to the transmission, transferring power from the engine to the wheels.
What Tool Do You Use To Remove Cv Axle?
The tool used to remove a CV axle is called a CV axle puller tool. It is specifically designed to safely and effectively remove the CV axle from the vehicle’s hub assembly.
How Do You Remove A Cv Axle From The Transmission?
Removing a CV axle from the transmission involves loosening the axle nut, disconnecting the lower ball joint, and pulling the axle out of the transmission.
What Tools Are Needed To Remove A Cv Axle?
To remove a CV axle, you will need a socket and ratchet set, pry bar, hammer, torque wrench, and a set of pliers.
Can I Remove The Cv Axle Without Removing The Transmission?
Yes, you can remove the CV axle without removing the transmission. However, it requires disconnecting the axle from the transmission and pulling it out.
Conclusion
Removing a CV axle from a transmission is a task that requires some finesse and preparation. By following the step-by-step process outlined in this blog post, you can successfully complete this procedure and ensure the smooth functioning of your vehicle.
Remember to exercise caution, gather the necessary tools, and leverage the helpful tips provided. With these insights, you’ll be well-equipped to tackle this task with confidence. Happy fixing!
- How Much Does a Ford 9N Tractor Weigh - May 20, 2024
- How Many of My Exact Car were Made: Uncovering the Rarity - May 20, 2024
- How to Find Out What Someone Drives: Discover the Truth - May 20, 2024