
Mounting a light bar on your vehicle’s roof without drilling can be accomplished using various alternative methods. These methods include using adhesive mounts, roof rack clamps, or magnet mounts.
Additionally, specialized brackets designed for specific vehicle models are also available for a secure and non-invasive installation. Considering these options ensures you can mount your light bar safely and easily without any damage or drilling required.
Getting Started: Tools And Materials You Will Need
To mount a light bar on the roof without drilling, you will need a few tools and materials. First, you’ll need a roof rack or a light bar mounting bracket that attaches to your vehicle’s existing roof rails. Make sure to measure the width of your roof rails to ensure a proper fit.
Next, gather a set of adjustable mounting clamps that can attach to the roof rack or mounting bracket. These clamps will securely hold the light bar in place. You’ll also need an Allen wrench or a socket set to tighten the mounting clamps.
Additionally, gather some rubbing alcohol and a clean cloth to clean the roof surface before installation. It’s important to remove any debris or dirt for a strong bond. Finally, don’t forget to have your light bar and wiring harness ready.
With these tools and materials, you can easily mount a light bar on your roof without drilling.
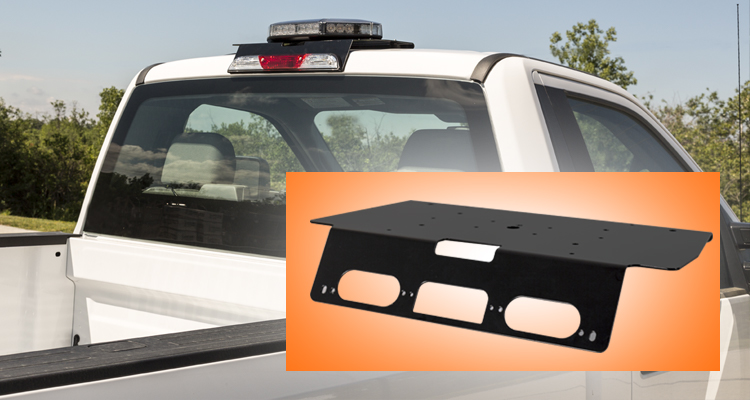
Credit: www.buyersproducts.com
Assessing Your Vehicle And Roof Compatibility
Before mounting a light bar on your roof without drilling, it’s crucial to assess the compatibility of your vehicle and roof. Start by considering whether your vehicle’s roof structure and material can support the weight of the light bar. Additionally, determine if there are any existing accessories or components that may hinder the installation process.
Inspect the roof for any irregularities or obstructions that may affect the mounting process. Moreover, ensure there is sufficient space on the roof to accommodate the light bar without obstructing the view or causing any safety concerns. Take measurements and compare them to the dimensions of the light bar to confirm compatibility.
By thoroughly evaluating your vehicle and roof, you can determine if it is possible to mount a light bar without drilling and take the necessary steps for a successful installation.
Selecting The Right Mounting Method
Selecting the ideal method to mount a light bar on your roof without drilling is crucial. There are alternative mounting options that you can explore. One such method is using roof racks or crossbars if your vehicle has them installed.
These racks provide a stable base for attaching the light bar without having to drill into the roof. Another option is using adhesive tapes or magnetic mounts designed specifically for light bars. These are easy to install and remove without causing any damage to the roof.
Additionally, there are gutter mounts available that utilize the rain gutters on your vehicle to secure the light bar. These mounts are adjustable and can be easily attached and detached. By considering these alternative mounting methods, you can safely and securely install a light bar on your vehicle’s roof without drilling.
Method 1: Roof Rack Mounting
Mounting a light bar on your vehicle’s roof without drilling is easy with the roof rack method. This method requires a roof rack, which serves as a stable base for the light bar installation. To begin, make sure your roof rack is securely attached to your vehicle.
Next, position the light bar on the roof rack and secure it using the mounting brackets or clamps provided. Adjust the position of the light bar so it is centered and aligned with your vehicle. Tighten the brackets or clamps to ensure the light bar is securely mounted.
Take a moment to double-check that everything is tightly fastened and secure. Once you’ve completed these steps, your light bar should be firmly mounted on your roof without the need for drilling. Enjoy enhanced visibility on your next adventure!
Step 1: Measure And Mark The Mounting Area
To mount a light bar on your roof without drilling, start by measuring and marking the area where you plan to mount it. This will help determine the ideal location on your roof rack. Measure the width and length of the light bar to ensure a proper fit.
Take into consideration any obstructions or limitations that may affect the mounting process. Once you have marked the area, clean it thoroughly to ensure a secure attachment. Use strong, adhesive mounting brackets or tape designed to withstand outdoor conditions. Place the light bar onto the brackets or tape, making sure it is aligned properly.
Apply pressure to ensure a strong bond. Test the mounting to ensure it is secure before using the light bar. Now you can enjoy the benefits of a mounted light bar without the need for drilling.
Step 2: Prepare The Mounting Brackets
When installing a light bar on your roof without drilling, the second step involves preparing the mounting brackets. These brackets need to be modified and securely attached to your roof rack. To ensure a proper fit, measure the dimensions and customize the brackets accordingly.
Use a saw or file to trim any excess material and create a clean finish. Align the brackets with the roof rack, ensuring they are evenly spaced and level. Use a wrench or Allen key to tighten the bolts securely, ensuring the brackets are firmly attached.
This step is crucial for the overall stability and safety of your light bar installation. Once the brackets are in place, you can proceed with the remaining steps to complete the mounting process.
Step 3: Attach The Light Bar To The Mounting Brackets
To attach a light bar to the mounting brackets without drilling, follow these steps. First, ensure the brackets are securely mounted on the roof of your vehicle. Next, align the light bar with the brackets and slide it into place.

Use the provided hardware, such as bolts and screws, to secure the light bar onto the brackets. Make sure to tighten the hardware properly to prevent any movement or vibrations while driving. Finally, double-check that the light bar is securely attached by giving it a gentle tug or shake.
By following these steps, you can mount a light bar on your vehicle’s roof without the need for drilling or permanent modifications.
Method 2: Magnetic Mounting
Mounting a light bar on the roof without drilling is possible by using magnetic mounts. These mounts provide a convenient and secure way to install a light bar. Here are step-by-step instructions for using magnetic mounts. Firstly, choose a suitable position on the roof where the light bar will be mounted.
Clean the surface thoroughly to ensure strong adhesion. Place the magnetic mounts on the cleaned surface and ensure they are securely attached. Carefully attach the light bar to the magnetic mounts, ensuring a tight fit. Test the installation by giving the light bar a gentle tug to ensure it is secure.
Finally, make any necessary adjustments to the positioning of the light bar to achieve the desired angle and direction of the light. With magnetic mounts, it is now possible to mount a light bar on the roof without the need for drilling.
Step 1: Clean And Prepare The Roof Surface
Before mounting a light bar on your roof without drilling, it is crucial to clean and prepare the roof surface. This step ensures proper adhesive bonding by removing any dirt or residue. Start by thoroughly cleaning the roof surface using a mild detergent or soap and water mixture.
Use a soft cloth or sponge to scrub away any grime or debris. Rinse the roof surface with clean water and let it dry completely. Next, use rubbing alcohol to wipe down the area where the light bar will be mounted.
This will eliminate any remaining dirt or grease. Finally, apply the adhesive mounting pads that come with the light bar to the cleaned and dry roof surface. Press firmly to ensure a secure bond. With a clean and prepared roof surface, you can confidently mount your light bar without drilling.
Step 2: Place The Magnetic Mounts
Mounting a light bar on your roof without drilling is a convenient solution. To begin, place the magnetic mounts on the roof. Carefully position them according to where you want the light bar to be. Ensure that the magnets are securely attached to the roof surface.
This will provide the stability needed for the light bar. Make sure to clean the roof area before placing the magnets to ensure proper adhesion. Once the magnetic mounts are firmly in place, you can proceed with attaching the light bar.
There are various methods available, such as using brackets or clips. Choose the best option for your specific light bar model. By following these steps, you can mount a light bar on your roof without the need for drilling.
Step 3: Attach The Light Bar To The Magnetic Mounts
To secure the light bar onto the magnetic mounts, there are a few crucial steps to follow. First, ensure that the mounting surface is clean and free of debris. Next, attach the light bar to the magnetic mounts, making sure they are secure and aligned properly.
Double-check that all fasteners are tightened, and the light bar is firmly in place. Once the light bar is attached, test its stability by gently shaking or moving it to ensure it doesn’t budge. If everything is secure, you’re ready to hit the road with your mounted light bar, without the need for drilling.
Enjoy the added visibility and functionality it brings to your vehicle!
Method 3: Adhesive Mounting
When mounting a light bar on your roof without drilling, adhesive mounts offer a convenient solution. Begin by cleaning the roof surface to ensure proper adhesion. Then, measure and mark the desired placement of the light bar. Prepare the adhesive mounts by removing the backing and applying them to the marked spots.
Press firmly to secure the mounts in place. Next, attach the light bar to the mounts, making sure it is aligned correctly. Apply pressure to ensure a strong bond between the mounts and the light bar. Give the adhesive sufficient time to cure before testing the installation.
Adhesive mounts provide a non-permanent option for mounting a light bar without drilling, making it easy to remove or adjust as needed.
Step 2: Apply Adhesive Mounts To The Roof
To mount a light bar on the roof without drilling, you can apply adhesive mounts to the designated area. Start by cleaning the roof surface thoroughly to ensure proper adhesion. Then, peel off the backing of the adhesive mount and firmly press it onto the roof.
Make sure to choose a location that provides the best visibility and does not obstruct the driver’s view. Once the adhesive mounts are in place, allow them to cure for the recommended time as per the manufacturer’s instructions. This will ensure a strong bond between the mounts and the roof.
After the curing period, you can securely attach the light bar to the adhesive mounts using the provided hardware. Double-check everything to ensure proper installation and functionality of the light bar.
Step 3: Attach The Light Bar To The Adhesive Mounts
Mounting a light bar on your vehicle’s roof without drilling is easier than you think. Once you’ve reached step 3 in the installation process, it’s time to attach the light bar to the adhesive mounts. This step is crucial to ensure that the light bar is securely mounted and will withstand any driving conditions.
Carefully follow the instructions provided with your adhesive mounts, making sure to clean the mounting surface thoroughly before applying them. Once the adhesive mounts are in place, you can easily attach the light bar to them. Make sure to follow the manufacturer’s instructions for securing the light bar properly.
With this method, you can enjoy the benefits of having a light bar without the need for drilling or permanent modifications to your vehicle’s roof.
Tips And Precautions For A Secure Light Bar Installation
Installing a light bar on your vehicle’s roof without drilling is possible with a few practical tips. Safety should be your top priority to ensure a secure installation. Begin by thoroughly cleaning the mounting surface to remove any dirt or debris that could compromise the adhesive.
It’s advisable to use an adhesive promoter or primer to enhance the bond. When positioning the light bar, make sure it doesn’t obstruct the driver’s view or interfere with any other components. Applying pressure and allowing sufficient curing time will help the adhesive bond effectively.
Additionally, consider using additional support methods like clamps or brackets for added security. Regularly inspect the light bar to ensure it remains firmly attached. Remember, following these precautions will help you enjoy a hassle-free and stable light bar installation on your vehicle’s roof.
Frequently Asked Questions For How To Mount Light Bar On Roof Without Drilling
Can I Mount A Light Bar On My Roof?
Yes, you can mount a light bar on your roof.
How Do You Run A Light Bar Wire From A Roof?
To run a light bar wire from a roof, follow these steps: 1. Position the light bar on the roof and secure it using mounting brackets. 2. Determine the optimal route for the wire, avoiding any obstructions or potential damage. 3.
Use zip ties or adhesive clips to fasten the wire neatly along the roof’s edge or inside the vehicle’s interior. 4. Connect the wire to the light bar, ensuring a secure and proper electrical connection. Remember to consult the light bar’s installation manual for specific instructions and safety precautions.
Can You Wire Led Light Bar Directly To Battery?
Yes, you can wire an LED light bar directly to a battery.
Can You Install A Light Bar Without A Relay?
No, a relay is necessary for the proper functionality of a light bar installation.
Conclusion
Mounting a light bar on your roof without drilling offers a convenient and versatile option for enhancing your vehicle’s lighting capabilities. By utilizing various mounting solutions such as brackets, magnetic mounts, or adhesive tapes, you can securely attach the light bar without any permanent damage or modifications.
Each method has its own advantages and considerations, so be sure to choose the appropriate one based on your vehicle type and intended usage. Remember to follow the manufacturer’s instructions and take into account the applicable laws and regulations in your area.
With this knowledge, you can confidently transform your vehicle and enjoy the added safety and functionality that a roof-mounted light bar provides. Whether you’re off-roading, camping, or simply looking for additional lighting options, these alternative mounting techniques make it possible to elevate your driving experience without drilling into your roof.
- How Much Does a Ford 9N Tractor Weigh - May 20, 2024
- How Many of My Exact Car were Made: Uncovering the Rarity - May 20, 2024
- How to Find Out What Someone Drives: Discover the Truth - May 20, 2024