To adjust the shift linkage on a 4l60e transmission, follow these steps. First, locate the shift linkage on the transmission.
Then, loosen the adjustment bolt and move the linkage into the desired position. Tighten the bolt to secure the adjustment. Additionally, make sure to test the gears for smooth shifting before completing the adjustment process. The shift linkage on a 4l60e transmission plays a crucial role in smoothly changing gears.
If you’re experiencing issues with shifting or are looking to optimize your vehicle’s performance, adjusting the shift linkage might be necessary. Understanding how to properly adjust the shift linkage can help you maintain optimal transmission functionality. In this guide, we will walk you through the steps to adjust the shift linkage on a 4l60e transmission, ensuring smooth gear transitions and an improved driving experience. Follow the instructions below to adjust the shift linkage effectively.

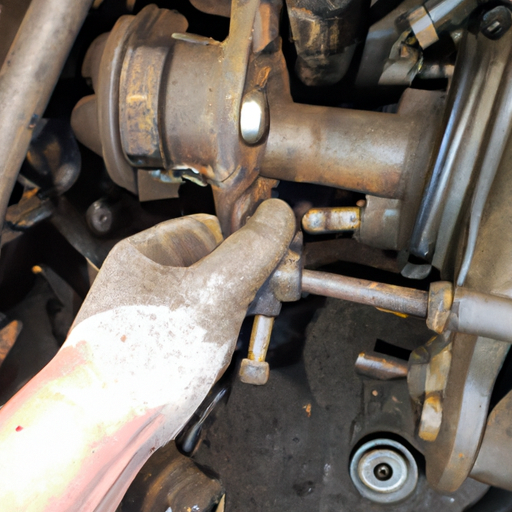
Credit: www.youtube.com
Understanding The Importance Of Properly Adjusted Shift Linkage
A well-adjusted shift linkage is crucial for the smooth operation of a 4l60e transmission. When the shift linkage is properly aligned, it ensures that the transmission shifts smoothly between gears, resulting in improved overall performance. Here are the key points to understand why a well-adjusted shift linkage is essential:
- Improved gear shifting and performance: Properly adjusted shift linkage allows the transmission to shift smoothly and precisely. This ensures that the vehicle accelerates smoothly and efficiently, preventing any jerking or hesitation during gear changes. With a well-adjusted shift linkage, you can expect improved performance and a smoother driving experience.
- Prevents gear slippage and damage: If the shift linkage is misaligned, it can cause gear slippage where the transmission fails to engage the correct gear. This can lead to increased wear and tear on the transmission components, ultimately resulting in costly repairs. Avoiding gear slippage by ensuring proper shift linkage adjustment helps to maintain the longevity of your transmission.
- Enhanced fuel efficiency: A properly adjusted shift linkage contributes to better fuel efficiency. When the transmission shifts smoothly, the engine can operate at its optimal speed range, maximizing fuel efficiency. On the other hand, a misaligned shift linkage can cause the transmission to stay in lower gears for longer periods, leading to increased fuel consumption.
- Prolongs the life of transmission components: When the shift linkage is properly adjusted, it reduces unnecessary strain on the transmission components. By preventing excessive wear and tear, a well-adjusted shift linkage helps to prolong the life of the transmission, saving you from the cost and hassle of premature transmission failure.
The Effects Of Improperly Adjusted Shift Linkage On Gear Shifting And Overall Performance
When the shift linkage is not properly adjusted, it can have various negative effects on gear shifting and overall performance. It’s important to be aware of these effects so that you can address any misalignment promptly. Here are the key points to consider:
- Rough shifting: Improperly adjusted shift linkage can cause rough shifting between gears. The transmission may jerk or hesitate, impacting the overall driving experience. This rough shifting can also lead to increased wear on the transmission components, potentially resulting in costly repairs.
- Difficulty engaging or changing gears: Misaligned shift linkage can make it challenging to engage or change gears smoothly. This can lead to gear grinding or difficulty shifting into the desired gear. In severe cases, it may even prevent gears from engaging altogether, rendering the vehicle undrivable.
- Transmission slippage: A common effect of misadjusted shift linkage is transmission slippage. In this scenario, the transmission slips out of gear unexpectedly, causing a loss of power and acceleration. This not only affects the vehicle’s performance but also poses safety risks, especially during overtaking or uphill driving.
- Decreased fuel efficiency: When the shift linkage is misaligned, the transmission might not shift at the appropriate rpm range. This can result in increased engine rpm and decreased fuel efficiency. By addressing any misalignment promptly, you can restore optimal gear shifting and improve fuel economy.
Common Signs Of Misaligned Shift Linkage And Their Impact On Driving Experience
Identifying signs of misaligned shift linkage is vital for maintaining the smooth operation of your 4l60e transmission. It’s important to recognize these signs early on to prevent further damage. Here are some common signs of misaligned shift linkage and their impact on the driving experience:
- Difficulty engaging gears: If you find it difficult to engage gears smoothly or if there is resistance while shifting, it may indicate a misaligned shift linkage. This can make it challenging to shift gears effectively, resulting in a jerky or unresponsive driving experience.
- Grinding or clunking noises: A misaligned shift linkage can cause grinding or clunking noises during gear shifts. These noises indicate that the gears are not engaging smoothly, potentially leading to premature wear on the transmission components.
- Gear slippage: When the shift linkage is misaligned, you might experience gear slippage. This is characterized by a sudden loss of power while driving, as if the vehicle slips out of gear. Gear slippage can be dangerous, especially during critical maneuvers such as overtaking or merging onto highways.
- Inconsistent shifting: Misaligned shift linkage can result in inconsistent shifting patterns. You may notice that the transmission shifts at irregular rpm intervals or fails to shift into higher gears when necessary. This inconsistency affects the vehicle’s performance and can lead to decreased fuel efficiency.
By paying attention to these common signs of misaligned shift linkage, you can address any issues promptly and ensure a smoother and more enjoyable driving experience.
Tools And Materials Needed For Adjusting Shift Linkage
A List Of Essential Tools Required For Adjusting The Shift Linkage On A 4L60E Transmission
When it comes to adjusting the shift linkage on a 4l60e transmission, having the right tools is crucial. With the correct tools at your disposal, you can ensure accurate adjustments, making the whole process much smoother. So, before diving into the procedure, here is a list of essential tools you will need:
- Wrench set: A set of wrenches in various sizes is necessary for loosening and tightening bolts and nuts.
- Screwdriver set: A set of screwdrivers with different types and sizes will help you remove screws and other fasteners.
- Socket set: A socket set is essential for accessing and manipulating fasteners that require a socket.
- Torque wrench: A torque wrench allows you to tighten bolts to the specific torque recommended by the manufacturer.
- Pry bar: A pry bar will come in handy when you need to separate or pry apart components during the adjustment process.
- Allen wrench set: An allen wrench set is necessary for adjusting components that require an allen key.
- Needle-nose pliers: These pliers are perfect for gripping and bending small parts during the adjustment process.
- Rubber mallet: A rubber mallet is useful for gently tapping parts into place without causing damage.
- Cleaning supplies: Cleaning the shift linkage components is essential before making any adjustments. Have some rags, a cleaning solution, and a brush ready to remove any dirt and grime.
- Lubricant: After cleaning, lubricating the shift linkage components is necessary for smooth operation. Use a high-quality lubricant to minimize friction and ensure proper functioning.
The Importance Of Using The Correct Tools To Ensure Accurate Adjustments
Using the correct tools is vital when adjusting the shift linkage on a 4l60e transmission. Here’s why:
- Precision: The correct tools are designed to fit specific components and fasteners, ensuring precise adjustments. Using improper tools can result in inaccurate adjustments, leading to performance issues.
- Safety: The right tools reduce the risk of damaging the transmission or other components during the adjustment process. Proper tools provide better control and minimize the chances of accidents or unintended damage.
- Efficiency: With the correct tools, you can work more efficiently, saving time and effort. Trying to make adjustments with inappropriate tools can be frustrating and time-consuming. In contrast, specialized tools streamline the process and improve efficiency.
- Longevity: When adjustments are made accurately using the right tools, the shift linkage and transmission components are less likely to experience premature wear and tear. This can extend the lifespan of the transmission and prevent costly repairs down the line.
Recommended Materials For Cleaning And Lubricating The Shift-Linkage Components
Cleaning and lubricating the shift linkage components are essential steps in ensuring smooth and reliable shifts. Here are some materials you should have on hand for these tasks:
- Degreaser or cleaning solution: Choose a degreaser or cleaning solution specifically designed for automotive applications. This will effectively remove dirt, grime, and old grease from the components.
- Cleaning brush: A small brush with stiff bristles is ideal for scrubbing away stubborn dirt and debris from hard-to-reach areas of the shift linkage.
- Rags or paper towels: Use absorbent rags or paper towels to wipe away excess cleaning solution and dry the components after cleaning.
- High-quality lubricant: Select a lubricant that is specifically formulated for transmission or automotive applications. A suitable lubricant will provide long-lasting protection against friction and wear, ensuring smooth shifting.
By following these recommendations and having the right tools and materials at your disposal, you can confidently proceed with adjusting the shift-linkage on your 4l60e transmission. Remember to refer to the manufacturer’s instructions for your specific vehicle model to ensure accurate adjustments.
Step-By-Step Guide To Adjusting Shift Linkage On A 4L60E Transmission
Preparing The Vehicle For Adjustment: Ensuring It Is In A Safe And Stable Position
Before diving into adjusting the shift-linkage on a 4l60e transmission, it is crucial to prepare the vehicle to ensure safety and stability. Take the following steps:
- Park the vehicle on a leveled surface: Find a flat area, preferably a driveway or an empty parking lot, to park the vehicle. This will help maintain stability throughout the adjustment process.
- Engage the parking brake: To prevent any unexpected movement of the vehicle, engage the parking brake firmly. This will provide an additional layer of safety.
- Install wheel chocks: Wheel chocks are small blocks that can be placed against the tires to prevent accidental movement. Install wheel chocks on the opposing side of the vehicle that you will be working on, ensuring it stays firmly in place.
Locating The Shift Linkage Components: Identifying The Various Components Involved In The Shift Linkage System
Now that the vehicle is secure, let’s familiarize ourselves with the shift linkage components. Pay attention to the following points:
- Identify the shift cable and manual linkage: The shift cable is the component responsible for transmitting the gearshift position from the shifter inside the vehicle to the transmission. The manual linkage, on the other hand, connects the shift cable to the transmission itself.
- Understand the adjustment points and their purposes: The shift linkage system consists of adjustable components that help fine-tune the shift pattern. Common adjustment points include the shift cable connector and the manual linkage rod. It’s important to grasp the role of these points to proceed with the adjustment process.
Adjusting The Shift Linkage:
Now that you are familiar with the shift-linkage components, let’s dive into the step-by-step guide for adjusting the shift linkage on a 4l60e transmission.
Step 1: Loosening The Adjustment Locknuts To Gain Access To The Adjustment Points
- Locating the adjustment locknuts: Find the locknuts on both the shift cable connector and the manual linkage rod. These locknuts keep the adjustment points in place.
- Loosening the locknuts: Use an appropriate wrench or socket to loosen the locknuts on both adjustment points. This will allow for adjustments to be made.
Step 2: Making Incremental Adjustments To Achieve The Desired Shift Pattern
- Adjusting the shift cable: Pull or push the shift cable connector to adjust the shift cable’s length. Make small incremental changes to achieve the desired shift pattern. Refer to your vehicle’s specific requirements or manufacturer’s guidelines for the ideal shift pattern.
- Adjusting the manual linkage: Rotate the manual linkage rod to fine-tune the shift-linkage system. Similar to the previous step, small adjustments at a time are key to achieving precise results.
**important considerations when making adjustments:**
- Smooth and precise shifts: Ensure that as you make adjustments, the shifts remain smooth and precise. This will maximize the performance and longevity of your transmission.
- Proper adjustment techniques: Avoid excessive adjustments and maintain patience throughout the process. Follow the manufacturer’s guidelines or consult a professional if needed.
Step 3: Tightening The Adjustment Locknuts To Secure The New Settings
- Secure the new settings: Once you have achieved the desired shift pattern, tighten the adjustment locknuts on both the shift cable connector and the manual linkage rod. This will ensure the adjustments stay in place during operation.
By following this step-by-step guide, you can adjust the shift-linkage on your 4l60e transmission and improve the overall shifting experience.
Testing And Fine-Tuning The Adjusted Shift Linkage
After adjusting the shift linkage on your 4l60e transmission, it’s important to conduct a road test to evaluate its effectiveness. This will allow you to monitor the shift points and smoothness during acceleration and deceleration, and identify any issues or inconsistencies that may require further adjustment.
Fine-tuning the shift linkage will ensure optimal performance and adapt the adjustment to your personal driving preferences. Consider environmental factors such as climate and terrain to fine-tune the shift-linkage for optimal performance.
Conducting A Road Test To Evaluate The Effectiveness Of The Adjustment
- Start the vehicle and take it for a drive, paying close attention to the shifting patterns.
- Accelerate the vehicle and note how the transmission shifts through each gear.
- Observe the shift points and ensure they align with the manufacturer’s specifications.
- Pay attention to the smoothness of the shifts during acceleration and deceleration.
- Take note of any harsh or delayed shifts that may indicate further adjustment is necessary.
Monitoring The Shift Points And Smoothness During Acceleration And Deceleration
- During the road test, monitor the rpms and vehicle speed as you accelerate and decelerate.
- Observe how the transmission smoothly shifts through each gear without any jerking or hesitation.
- Ensure that the shift points occur at the correct rpm range for optimal performance.
- Take note of any inconsistencies or irregularities in the shifting patterns.
Noting Any Issues Or Inconsistencies That May Require Further Adjustment
- If you encounter any issues or inconsistencies during the road test, such as harsh or delayed shifts, make a note of them.
- Consider factors such as throttle input, vehicle load, and engine temperature that may affect the shifting performance.
- These observations will help you identify the specific areas that require further adjustment.
Fine-Tuning The Shift Linkage For Optimal Performance
- If you’ve identified any issues or inconsistencies, it’s time to fine-tune the shift-linkage.
- Start by referring to the manufacturer’s guidelines for the correct shift point rpm ranges.
- Make small adjustments to the linkage, following the manufacturer’s instructions or consulting a repair manual.
- After each adjustment, conduct another road test to assess the impact and determine if further adjustments are needed.
- Continue to fine-tune the shift linkage until you achieve optimal shifting performance.
Adapting The Adjustment To Personal Driving Preferences
- Keep in mind that driving preferences can vary from person to person.
- Pay attention to how the transmission performs during your road test and consider any adjustments you’d like to make based on your driving style.
- Whether you prefer crisper shifts for more aggressive driving or smoother shifts for a more comfortable ride, you can fine-tune the shift-linkage to match your preferences.
- Remember to strike a balance between performance and the longevity of your transmission.
Taking Into Account Environmental Factors Such As Climate And Terrain
- Environmental factors, such as climate and terrain, can impact the performance of your transmission.
- Consider the temperature and humidity levels in your area, as extreme weather conditions can affect shifting patterns.
- Additionally, rough or hilly terrains may require adjustments to ensure optimal shifting performance.
- Take these factors into account during the adjustment process to ensure the best possible performance and longevity of your transmission.
Troubleshooting Common Issues After Adjusting Shift Linkage
Addressing Potential Issues That May Arise After Adjusting The Shift Linkage
After successfully adjusting the shift linkage on your 4l60e transmission, it’s not uncommon to encounter a few hiccups along the way. Troubleshooting these common issues will ensure that your vehicle’s shifting performance remains smooth and efficient. Let’s take a closer look at some problems that may arise and how to address them.
Unintended Gear Engagement Or Skipping Gears
- Inconsistent shifting or gears engaging unexpectedly can be a result of incorrect adjustment or an issue with the transmission itself.
- Ensure that the shift linkage is properly aligned and tightened according to the manufacturer’s specifications.
- Verify that the shifter mechanism is correctly installed and securely fastened.
- Inspect the shift cable for any signs of damage or wear and replace if necessary.
- Consider replacing the transmission fluid and filter, as dirty or low fluid levels can affect the shifting operation.
Difficulty In Shifting Or Gear Slippage
- If you experience difficulty shifting gears or notice gear slippage after adjusting the shift linkage, several factors may be at play.
- Double-check the shift linkage adjustment to ensure it is within the recommended range.
- Examine the transmission fluid level and condition. Low or contaminated fluid can cause shifting issues.
- Inspect the clutch system for any faults, such as worn-out components or a slipping clutch.
- Check the throttle cable, as a loose or faulty cable can affect proper gear engagement.
- If gear slippage occurs, it may indicate internal transmission problems that require professional attention.
Consulting A Professional If Problems Persist
After attempting to address the above-mentioned issues and troubleshooting steps, if you still encounter problems with your vehicle’s shifting performance, it is advisable to consult a professional mechanic or transmission specialist. They have the expertise and specialized diagnostic tools to identify and resolve any underlying transmission problems.
Remember, a properly adjusted shift linkage is crucial for smooth and efficient gear changes. Regular maintenance and inspections can help prevent issues with your transmission and ensure a trouble-free driving experience.
Tips For Maintaining A Well-Adjusted Shift Linkage

The shift linkage is an essential component of the 4l60e transmission, responsible for enabling the smooth transition between gears. Properly maintaining the shift linkage is crucial to ensure optimal performance and prevent any potential issues. Here are some tips to help you maintain a well-adjusted shift linkage for your vehicle:
Regular Inspections To Ensure The Shift Linkage Remains In Proper Alignment
- Perform regular visual inspections of the shift linkage to check for any signs of misalignment or damage.
- Look for loose or worn-out components such as bushings, clips, or rods that may affect the linkage’s functionality.
- Pay attention to any abnormal noises, vibrations, or difficulty shifting gears, as these may indicate a shift linkage problem.
- Inspect the shift cable or rod for any fraying, kinks, or rust that may hinder its smooth operation.
Cleaning And Lubricating The Shift Linkage Components At Recommended Intervals
- Clean the shift linkage components periodically to remove dirt, debris, and rust, which can affect their performance.
- Use a degreaser or a mild soap solution to clean the shift linkage thoroughly.
- Pay special attention to the pivot points, joints, and bushings, as they are prone to dirt buildup.
- After cleaning, apply a suitable lubricant to ensure smooth movement of the shift linkage. Use a lubricant recommended by the vehicle manufacturer for best results.
Seeking Professional Assistance For Complex Adjustments Or If Experiencing Difficulties
- If you encounter difficulties shifting gears or notice significant misalignment, it is advisable to seek professional assistance.
- Complex adjustments, such as realigning the shift linkage or replacing worn-out components, may require specialized tools and expertise.
- Professional technicians can accurately diagnose and address any shift linkage issues, ensuring proper adjustments and optimal performance.
- Attempting complex adjustments without the necessary knowledge and tools can potentially cause further damage to the transmission or other related components.
Remember, maintaining a well-adjusted shift linkage is crucial for the smooth operation of your vehicle’s transmission. Regular inspections, proper cleaning, and lubrication can go a long way in preventing potential problems and ensuring a comfortable driving experience. If you encounter any difficulties or require complex adjustments, it’s always best to consult with a professional technician.
Frequently Asked Questions For How To Adjust Shift Linkage On 4L60E
How Do I Know If My 4L60E Shift Linkage Needs Adjustment?
To determine if your 4l60e shift linkage needs adjustment, look for signs of delayed or rough shifting.
What Causes The Shift Linkage On A 4L60E To Go Out Of Adjustment?
The shift linkage on a 4l60e can go out of adjustment due to normal wear and tear, excessive force, or improper installation.
How Can I Adjust The Shift Linkage On My 4L60E?
To adjust the shift linkage on a 4l60e, locate the adjustment bolt or nut near the transmission and carefully tighten or loosen it as needed.
Can I Adjust The Shift Linkage On A 4L60E Without Any Special Tools?
Yes, you can adjust the shift linkage on a 4l60e without any special tools. A basic set of wrenches or sockets should be sufficient.
Is It Difficult To Adjust The Shift Linkage On A 4L60E?
Adjusting the shift linkage on a 4l60e is a relatively simple task that can be accomplished by following the proper steps and precautions.
Conclusion
To summarize, adjusting the shift linkage on a 4l60e transmission is a crucial task that ensures smooth and efficient gear shifting. By following the steps outlined in this blog post, you can confidently take on this task even if you have little to no mechanical experience.
The first step is to locate the shift linkage and understand its components. Next, make the necessary adjustments to obtain the correct shift cable tension. Remember to test the gear shifting after each adjustment to ensure precise and accurate shifts.
Additionally, regular maintenance and inspection of the shift linkage will prevent future issues and extend the lifespan of your transmission. With the knowledge gained from this guide, you can maintain the optimal performance of your 4l60e transmission and enjoy a smooth and comfortable driving experience.