To change a battery terminal, first, disconnect the negative cable, then the positive cable. Then, loosen the bolt on the terminal and remove it.
Changing a battery terminal is a simple task that can be done with just a few tools and some precautions. Whether your car’s battery terminal is corroded, damaged, or simply needs replacing, following the right steps can ensure a smooth and safe process.
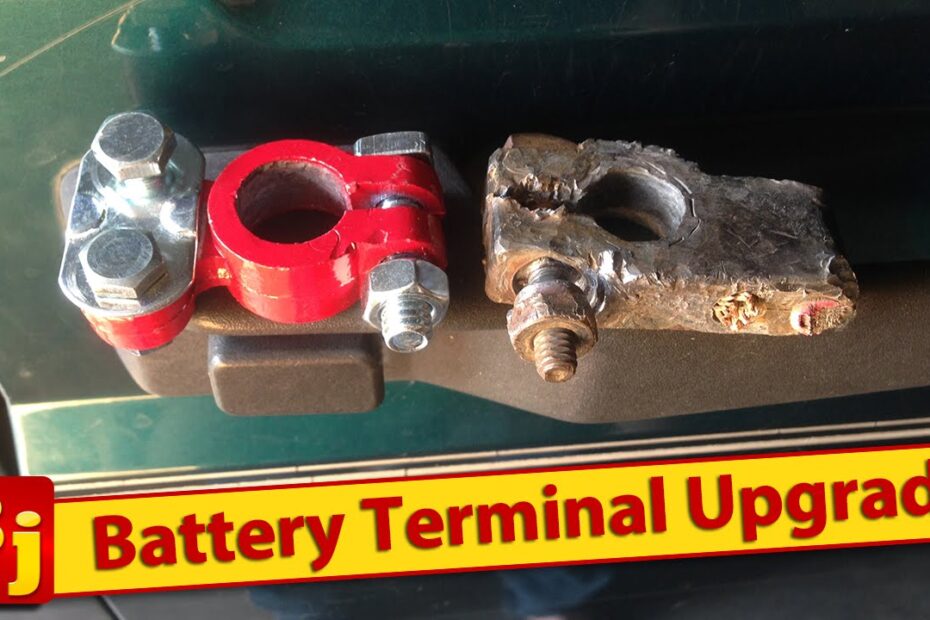
By taking proper precautions and carefully removing the old terminal and installing the new one, you can effectively change a battery terminal without any hassle. This step-by-step guide will help you understand how to change a battery terminal and keep your vehicle running smoothly.
Credit: www.familyhandyman.com
Inspecting The Battery Terminal
To change a battery terminal, begin by inspecting for corrosion or damage. Clean the terminal and connectors before securely fastening them for optimal battery performance. Remember to handle with care and wear protective gloves when working on your vehicle.
Checking For Corrosion
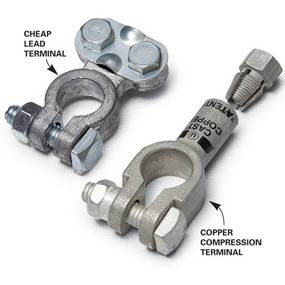
To properly inspect the battery terminal, start by checking for any signs of corrosion. Corrosion can build up on the battery terminal and hinder its performance. Look for a powdery substance or a greenish-blue crust around the terminal connections. If corrosion is present, it needs to be addressed before changing the battery terminal.
Looking For Loose Connections
In addition to checking for corrosion, it is crucial to inspect the battery terminal for any loose connections. Loose connections can disrupt the flow of electricity and prevent the battery from functioning effectively. Gently wiggle the battery cables to ensure they are securely attached to the terminals. If you notice any looseness, this must be resolved before proceeding with changing the battery terminal.
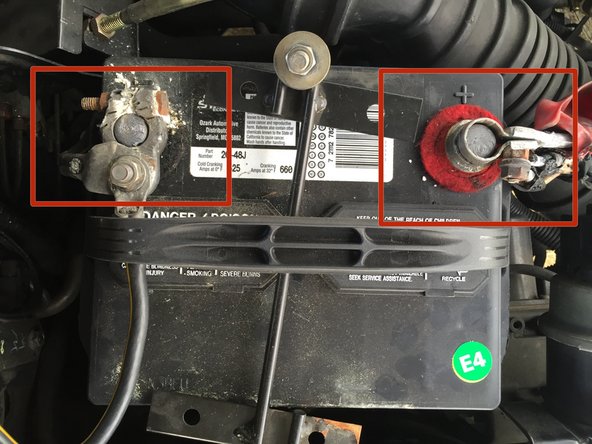

Credit: www.ifixit.com
Removing The Old Terminal
Removing the old battery terminal is a vital step in the process of changing a car battery. It is important to follow a systematic approach to ensure safety and efficiency in the replacement process.
Disconnecting The Battery
Before starting the removal process, ensure the car is turned off and the key is removed from the ignition. It is crucial to disconnect the negative terminal first. Locate the negative terminal, marked with a minus sign (-), and use a wrench to loosen the nut securing the cable. Once the cable is loose, carefully remove it from the terminal and place it away from the battery, ensuring it does not make contact during the rest of the process.
Loosening The Terminal Connector
Next, focus on the terminal connector. Use a wrench to loosen the nut or bolt that secures the terminal connector to the battery post. Once the nut is sufficiently loose, carefully lift the terminal connector away from the battery post and set it aside. Be cautious when handling the connector to avoid any accidental contact with the battery post, as it may still contain residual electrical charge. Once the old terminal is removed, proceed with the installation of the new terminal following the manufacturer’s guidelines.
Replacing The Terminal
When it comes to replacing the terminal of a car battery, it’s essential to ensure a secure and reliable connection. A corroded or damaged terminal can lead to issues with starting the vehicle, so it’s important to address any signs of wear and tear promptly. In this guide, we’ll walk through the process of attaching a new terminal and securing the connection to help you get your car back on the road safely.
Attaching The New Terminal
Once you have obtained a new battery terminal, start by identifying the positive and negative terminals on the battery. Ensure the car is turned off before proceeding with the replacement. Use a wrench to unscrew the nut securing the existing terminal and remove it from the battery. Carefully place the new terminal over the battery post, ensuring it fits snugly.
Securing The Connection
After positioning the new terminal, tighten the nut securely to ensure a stable connection. Check the terminal to ensure it is firmly in place and does not wiggle when tugged. Once the new terminal is properly secured, apply a small amount of petroleum jelly or terminal grease to the connection to prevent corrosion and ensure a reliable electrical connection.

Credit: www.terminalmart.com
Testing The Connection
To change a battery terminal, start by testing the connection. Disconnect old terminal, clean, and attach new one securely. Double check tightness for a reliable connection.
Testing the connection is an important step in changing a battery terminal. Before considering the job complete, it’s crucial to ensure that the battery terminal has been properly connected to the battery and that it’s securely attached. This ensures that the electrical current flows smoothly and eliminates the risk of loose connections. In this section, we will discuss two key aspects of testing the connection: checking for proper fit and ensuring a secure connection.Checking For Proper Fit
Battery terminals come in various sizes, so it’s essential to make sure that the new terminal you have chosen fits snugly onto the battery post. A loose fit can lead to intermittent electrical connections and potentially damage your vehicle’s electrical system.
When testing the fit, examine the new battery terminal closely. Look for signs of corrosion or damage that could affect its ability to fit properly. If you notice any issues, it’s wise to replace the terminal before proceeding.
Once you’ve confirmed that the new terminal is in good condition, carefully slide it onto the battery post. It should fit securely without any excessive wobbling or movement. Take a moment to ensure that the new terminal is in the correct position and aligned properly with the battery post.
Remember, a proper fit is essential for optimal performance and longevity of your battery and electrical system.
Ensuring A Secure Connection
After confirming the proper fit of the battery terminal, the next step is to ensure a secure connection. This is crucial to prevent any potential electrical issues or the terminal becoming loose over time.
Begin by tightening the clamp or fasteners on the battery terminal. Make sure they are securely fastened but be cautious not to overtighten, as this could damage the terminal or cause it to crack.
Inspect the connections to see if there are any visible gaps or loose parts. If you notice any gaps or signs of looseness, readjust the terminal and tighten the connections further.

Once you’re confident in the secure fit and connection of the battery terminal, it’s time to test the battery. Start your vehicle and check if all the electrical components are functioning correctly. Listen for any unusual noises or observe any warning lights that may indicate an unstable connection.
If everything appears normal, congratulations! You have successfully changed the battery terminal and tested the connection to ensure optimal performance and reliability.
Frequently Asked Questions On How To Change A Battery Terminal
How Do You Replace Battery Terminals?
To replace battery terminals, follow these steps: 1. Disconnect the negative terminal first, then the positive terminal. 2. Remove any corrosion using a wire brush or battery terminal cleaner. 3. Install the new terminals by sliding them onto the battery posts and tightening the nuts.
4. Connect the positive terminal first, then the negative terminal. 5. Make sure the connections are secure and test the battery to ensure it’s working properly.
How Much Does It Cost To Replace Battery Terminals?
It costs around $20 to $50 to replace battery terminals. Costs may vary based on the type of vehicle and where you have the work done. Factors such as labor, parts, and additional repairs can affect the overall cost.
Can You Replace A Corroded Battery Terminal?
Yes, you can replace a corroded battery terminal. It’s important to do so to maintain proper connection and prevent further damage. Simply disconnect the old terminal, clean the area, and install the new terminal. Make sure to tighten the connection firmly.
When Changing A Battery Which Terminal Do You Take Off First?
To change a battery, start by removing the negative terminal first.
How To Identify A Bad Battery Terminal?
Inspect for corrosion, loose connection or visible damage on the terminal.
Why Is It Important To Replace A Damaged Battery Terminal?
To ensure proper electrical connection, prevent power loss, and avoid hazardous situations.
What Tools Are Needed To Change A Battery Terminal?
Commonly used tools include wrenches, pliers, terminal cleaner, and protective equipment.
Conclusion
In this blog post, we have discussed the step-by-step process of changing a battery terminal. By following these simple instructions, you can easily replace a faulty or worn out terminal and ensure the proper functioning of your vehicle’s battery. Remember to always prioritize safety and consult a professional if you feel unsure or uncomfortable performing any of the steps.
With the knowledge gained from this guide, you can confidently handle battery terminal replacements and keep your vehicle running smoothly.
- How to Close Spark Plug Gap: Expert Tips and Tricks! - May 13, 2024
- How to Perfectly Align Projector Headlights With Halo - May 13, 2024
- How Many Amps Does a Car Horn Draw? Unveiling the Power Requirements - May 13, 2024