To fix a honda accord air conditioner, start by checking the refrigerant level and filling it if needed. If the issue persists, inspect the compressor, condenser, and other components for any signs of damage or wear.
It is advisable to take the car to a professional technician for a comprehensive diagnosis and repair. The air conditioner in a honda accord is crucial for maintaining a comfortable and cool interior during hot summer months. However, it may occasionally experience problems that need attention.
We will discuss some common troubleshooting steps to fix the honda accord air conditioner. By following these steps, you can potentially resolve minor issues and restore the functionality of your car’s air conditioning system, ensuring a pleasant driving experience. If the problem persists or if you are unsure about the cause, it is recommended to seek the assistance of a qualified mechanic to diagnose and fix the issue.

Credit: www.edmunds.com
Common Issues With Honda Accord Air Conditioner
Overview Of The Most Common Problems Experienced By Honda Accord Owners With Their Air Conditioners
Is your honda accord’s air conditioner giving you trouble? Don’t worry, you’re not alone. Many honda accord owners have encountered various issues with their car’s air conditioning system. In this section, we’ll discuss the most common problems faced by honda accord owners and shed light on possible causes.
Possible Causes Of These Issues
Here are the possible causes behind the common air conditioning problems in honda accord vehicles:
- Refrigerant leaks: A refrigerant leak may cause the air conditioner to blow warm air or fail to cool the cabin adequately. This can happen due to damaged hoses, seals, or evaporator coils.
- Faulty compressor: The compressor is an essential component of the air conditioning system. If it malfunctions, it can result in inadequate cooling or no cooling at all. A worn-out clutch, electrical issues, or a seized compressor may be responsible.
- Clogged or faulty condenser: The condenser plays a vital role in cooling the refrigerant. If it gets clogged with debris or becomes faulty, it can hinder the cooling process, leading to insufficient cooling performance.
- Electrical issues: Problems with the electrical system, such as a malfunctioning blower motor or faulty wiring, can impact the overall functioning of the air conditioner. This may manifest as weak airflow or intermittent operation.
- Failed temperature control unit: A malfunctioning temperature control unit can result in unreliable temperature regulation. It may cause the air conditioner to blow hot air when it should be cooling or vice versa.
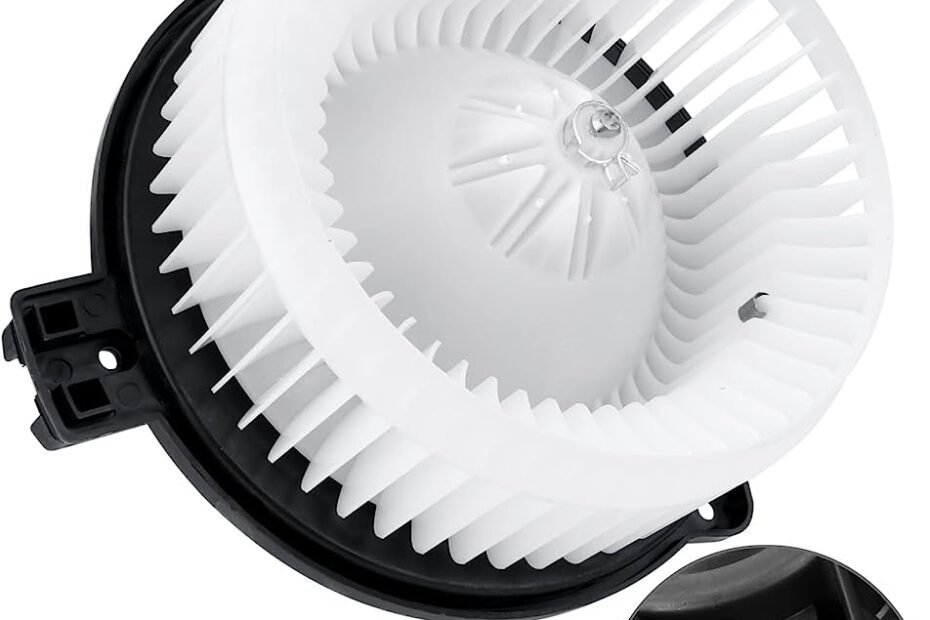
- Damaged blower motor: The blower motor is responsible for circulating the cooled air throughout the cabin. If it becomes damaged or fails to function properly, it can lead to reduced airflow or no airflow at all.
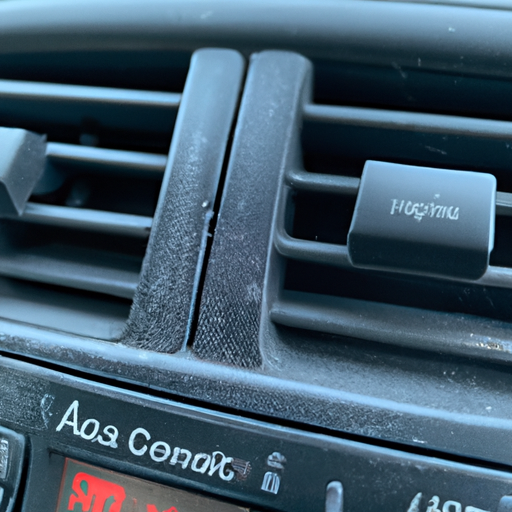
- Blocked air vents: Blocked or obstructed air vents can restrict the flow of cool air into the cabin. This can reduce the overall cooling performance of the air conditioning system.
- Faulty sensors: Honda accord air conditioners rely on various sensors to regulate temperature and control the system’s operation. If these sensors become faulty or malfunction, it can result in irregular cooling or improper functioning.
- System contamination: Contaminants such as dirt, debris, or mold can accumulate within the air conditioning system over time. These contaminants can impair the system’s performance and cause unpleasant odors.
- Worn-out components: With prolonged use, certain components of the air conditioning system, such as belts and hoses, can wear out. This wear and tear can lead to reduced efficiency or complete failure of the system.
Remember, while these are the most common issues honda accord owners face with their air conditioners, it is always recommended to seek professional help from a qualified technician to accurately diagnose and fix the problem.
How To Diagnose Honda Accord Air Conditioner Problems
Step-By-Step Guide On Identifying The Root Cause Of The Air Conditioning Problems

Is your honda accord’s air conditioner not functioning properly? Identifying the root cause of the problem is the first step in fixing it. Follow this step-by-step guide to diagnose your honda accord’s air conditioner problems.
- Check the air conditioner controls:
- Ensure that the air conditioning controls are properly set to the desired temperature and mode.
- Make sure the fan speed is set to the appropriate level.
- Inspect the air vents to verify if they are open and not blocked.
- Listen for any unusual noises:
- Turn on the air conditioner and listen carefully for any unusual noises, such as rattling, buzzing, or squeaking.
- Strange noises can indicate problems with the compressor, condenser, or other components.
- Check for airflow issues:
- If the air coming from the vents is weak or not as cold as it should be, there may be airflow issues.
- Inspect the cabin air filter and clean or replace it if necessary.
- Check for obstructions in the air ducts that might impede airflow.
- Monitor the temperature:
- Pay attention to the temperature of the air coming from the vents while the air conditioner is running.
- If the air is not as cold as expected or if it fluctuates, it could indicate a problem with the refrigerant or the system’s overall efficiency.
- Inspect the refrigerant levels:
- Low refrigerant levels can result in poor cooling performance.
- If you suspect a refrigerant leak, it’s best to have a professional inspect and fix the issue.
- Do not attempt to add refrigerant yourself unless you have the proper knowledge and equipment.
- Check for leaking fluids:
- Look for any signs of leaking fluids underneath your honda accord.
- Puddles or stains near the air conditioning system components may indicate a refrigerant or coolant leak.
- Test the electrical connections:
- Inspect the electrical connections related to the air conditioning system, such as fuses and relays.
- Loose or damaged connections can lead to malfunctions.
- Pay attention to unusual odors:
- If you notice strong, unpleasant odors coming from the air vents, it could be a sign of mold, mildew, or a dirty cabin air filter.
- Cleaning or replacing the cabin air filter, as well as having the system inspected for any mold growth, can help resolve the issue.
- Consider environmental factors:
- Extreme outside temperatures can impact the air conditioning system’s performance.
- In very hot or humid conditions, the system may take longer to cool the interior of the vehicle.
- Keep track of recurring issues:
- If you experience ongoing problems with your honda accord’s air conditioner, it’s important to document the symptoms and details.
- This information can be helpful when seeking professional assistance or troubleshooting further.
Tips For Conducting Basic Troubleshooting
Now that you have identified the potential root cause of your honda accord’s air conditioner problems, here are some tips for conducting basic troubleshooting:
- Start by checking the simplest and most common issues, such as the controls and airflow.
- Inspect and clean the cabin air filter regularly to ensure proper air circulation.
- If you suspect a refrigerant leak or any issues with the electrical connections, consult a professional technician.
- Avoid attempting complex repairs or adding refrigerant without the necessary expertise and equipment.
- Be mindful of any unusual noises, odors, or temperature fluctuations and address them promptly.
- Keep track of any recurring problems and gather relevant information to assist technicians in diagnosing and fixing the issue.
- Regular maintenance, including professional inspections and servicing, can help prevent future air conditioning problems.
By following these steps and conducting basic troubleshooting, you can diagnose and resolve many common air conditioner problems in your honda accord. Remember, if the issues persist or if you are uncertain about any repairs, it is always best to consult a qualified technician for assistance.
Recharging The Air Conditioner System
Explanation Of The Importance Of Recharging The System
Recharging the air conditioner system of your honda accord is an essential maintenance task to ensure that it functions at its best. Over time, the refrigerant in the system can deplete, causing the air conditioner to blow warm air or not cool effectively.
By recharging the system, you can restore the proper amount of refrigerant, allowing the air conditioner to cool your car efficiently. It is important to address this issue promptly to avoid further damage to the components of the air conditioning system and to ensure your comfort during hot summer months.
Here are the steps you can follow to recharge your honda accord air conditioner:
Step-By-Step Instructions On How To Recharge The Honda Accord Air Conditioner
- Gather the necessary tools and materials:
- Refrigerant kit specifically designed for automotive air conditioners.
- Safety goggles and gloves.
- A pressure gauge designed for automotive air conditioners.
- Owner’s manual of your honda accord for specific instructions.
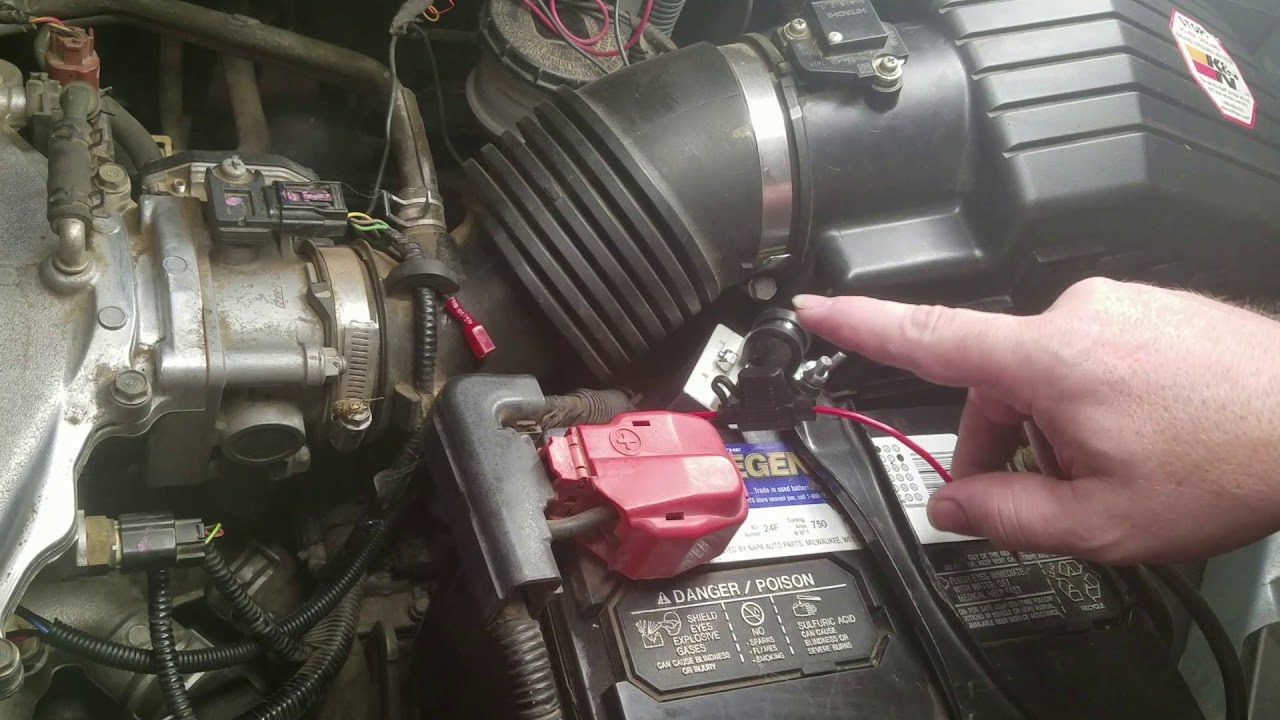
- Find the low-pressure port:
- Open the hood of your honda accord and locate the air conditioning system components.
- Identify the low-pressure port, which is usually located on the larger of the two metal pipes coming from the compressor.
- Refer to your owner’s manual or consult a professional technician if you are unsure about the location.
- Prepare the refrigerant:
- Shake the refrigerant canister well before using it to ensure proper mixing.
- Attach the pressure gauge to the refrigerant canister according to the manufacturer’s instructions.
- Connect the refrigerant canister to the low-pressure port:
- Put on safety goggles and gloves to protect yourself from potential leaks or spills.
- Connect the valve on the refrigerant canister to the low-pressure port on your honda accord using the hose provided with the kit.
- Ensure a secure connection to prevent any refrigerant from escaping.
- Start the engine and turn on the air conditioner:
- Start the engine of your honda accord and let it run idle.
- Switch on the air conditioner to its maximum cooling setting.
- Adjust the blower to the highest setting.
- Monitor the pressure gauge:
- Keep an eye on the pressure gauge and check for any abnormal readings or fluctuations.
- Aim to maintain the pressure within the recommended range specified in the owner’s manual.
- Be cautious not to overcharge the system, as it can damage the air conditioning components.
- Recharge the system:
- Slowly open the valve on the refrigerant canister to release the refrigerant into the system.
- Monitor the pressure gauge while adding the refrigerant.
- Follow the manufacturer’s instructions regarding the proper amount of refrigerant to add.
- Stop adding refrigerant once the pressure gauge indicates that the system is adequately charged.
- Close the valve on the refrigerant canister to prevent any leaks.
- Test the air conditioner:
- Let the air conditioner run for a few minutes to ensure that it is blowing cold air.
- Check for any unusual sounds or odors that may indicate a problem with the system.
- If everything seems to be functioning properly, you can proceed to disconnect the refrigerant canister.
Remember, if you are unsure about any step or if you encounter any issues during the process, it is always recommended to seek assistance from a professional technician or refer to the owner’s manual of your honda accord. By recharging the air conditioner system, you can enjoy a properly functioning and efficient cooling system in your car.
Stay cool and comfortable during your journeys!
Cleaning The Air Conditioner Evaporator
Importance Of Cleaning The Evaporator For Optimal Performance
Cleaning the air conditioner evaporator is an essential maintenance step to ensure the optimal performance of your honda accord’s air conditioning system. Over time, the evaporator coil can become dirty and clogged with debris, which can lead to reduced cooling efficiency, unpleasant odors, and even potential damage to the system.
Regularly cleaning the evaporator not only helps maintain cool air circulation but also prolongs the lifespan of your air conditioner. Let’s explore a step-by-step guide on how to clean the evaporator effectively.
Step-By-Step Guide On Cleaning The Evaporator
To clean the air conditioner evaporator in your honda accord, follow these simple steps:
- Prepare the necessary tools and materials:
- Screwdriver or socket set
- Air conditioner coil cleaner
- Small bristle brush
- Clean cloth or towel
- Vacuum cleaner with attachments
- Turn off the engine and disconnect the negative battery cable to ensure safety.
- Locate the air conditioner evaporator housing by referring to your honda accord’s owner’s manual. It is typically situated beneath the dashboard on the passenger side.
- Remove the lower dashboard panels or covers to gain access to the evaporator housing. Use a screwdriver or socket set to carefully remove any screws or fasteners holding the panels in place.
- Once the evaporator housing is visible, inspect it for any visible dust, dirt, or debris. If there is excessive buildup, use a small bristle brush to loosen the dirt gently.
- Next, use a vacuum cleaner with a soft brush attachment to remove the loose dirt and debris from the evaporator coil and surrounding areas.
- After removing the loose dirt, it’s time to apply an air conditioner coil cleaner. Follow the instructions on the cleaner’s packaging carefully. Typically, you would need to spray the coil cleaner onto the evaporator coil and allow it to foam and penetrate the dirt.
- Let the coil cleaner sit for the recommended time listed on the product packaging. This allows the cleaner to dissolve stubborn dirt and debris.
- Once the allotted time has passed, use a clean cloth or towel to wipe away the foam and any loosened dirt from the evaporator coil.
- Reinstall the lower dashboard panels or covers that were previously removed, ensuring that all screws or fasteners are securely tightened.
- Finally, reconnect the negative battery cable and start the engine to test the air conditioning system. Enjoy the refreshed and efficient cooling provided by your clean evaporator.
Regularly cleaning the evaporator in your honda accord’s air conditioner not only ensures optimal performance but also helps prolong the lifespan of the system. By following this step-by-step guide, you can maintain a clean and efficient evaporator, ensuring comfortable rides even on the warmest days.
Remember to refer to your vehicle’s owner’s manual for specific instructions and recommended maintenance intervals.
Replacing The Air Conditioner Filter
Importance Of A Clean Air Conditioner Filter
A clean air conditioner filter is crucial for the efficient functioning of your honda accord’s air conditioning system. It plays a significant role in maintaining the air quality inside your car and ensuring optimal airflow. Here are a few reasons why keeping your air conditioner filter clean is important:
- Improved air quality: A clean filter prevents dirt, dust, pollen, and other particles from entering the car’s interior through the air vents. It helps to remove contaminants and allergens, ensuring that you breathe in fresh and clean air.
- Enhanced airflow: A clogged or dirty air conditioner filter can restrict the flow of air into your vehicle’s cabin. This can lead to reduced cooling performance and cause the air conditioning system to work harder, consuming more energy.
- Extended lifespan of the air conditioning system: By regularly replacing the air conditioner filter, you can prevent dust and debris from accumulating on the evaporator coil and other sensitive components. This helps in maintaining the efficiency of the system and can potentially extend its lifespan.
- Optimal cooling performance: A clean air conditioner filter allows for better air circulation, leading to improved cooling performance. This ensures that you and your passengers stay comfortable even on hot summer days.
- Cost savings: When the air conditioning system is running efficiently, it consumes less energy. By replacing the filter regularly, you can help reduce energy consumption, resulting in potential cost savings on fuel or electricity bills.
Step-By-Step Instructions On How To Replace The Filter
Replacing the air conditioner filter in your honda accord is a relatively simple task that you can do on your own. Follow these step-by-step instructions:
- Locate the air conditioner filter compartment: In most honda accord models, the filter compartment can be found behind the glove box. Open the glove box and remove any items stored inside.
- Remove the glove box: To access the filter compartment, you need to remove the glove box. Open the glove box fully and locate the stops on each side. Push these stops inwards to release them, allowing the glove box to drop down.
- Remove the filter cover: Once the glove box is removed, you will see the filter cover behind it. Unclip or unscrew the filter cover to expose the filter.
- Take out the old filter: Carefully remove the old air conditioner filter from its housing. Pay attention to the way it is installed as you will need to place the new filter in the same orientation.
- Clean the filter housing: Before installing the new filter, use a clean cloth or vacuum to remove any dust or debris from the filter housing. Ensure that it is free from any obstructions that could hinder proper airflow.
- Install the new filter: Insert the new air conditioner filter into the housing, making sure it is properly aligned. Ensure that it fits securely without any gaps or misalignment.
- Replace the filter cover: Once the new filter is in place, reattach the filter cover securely. Make sure it is properly fastened to prevent any air leaks.
- Reinstall the glove box: Lift the glove box back into position and align the stops on each side. Push them back into place until they snap securely.
- Test the air conditioning system: Start the engine and turn on the air conditioning system to test its performance. Check for proper airflow and ensure that the system is cooling effectively.
- Regularly replace the filter: To maintain optimal air quality and cooling performance, it is recommended to replace the air conditioner filter in your honda accord every 12,000 to 15,000 miles or as per your vehicle’s maintenance schedule.
By following these simple steps, you can ensure that your honda accord’s air conditioning system stays in top condition, providing you with cool and clean air during your drives.
Fixing Air Conditioner Compressor Issues
Explanation Of Common Compressor Problems And Their Symptoms
When your honda accord’s air conditioner fails to blow cold air, there’s a good chance that the compressor is facing some issues. The compressor is a critical component in the air conditioning system, responsible for pressurizing the refrigerant and facilitating the cooling process.
Understanding common compressor problems and their symptoms can help you diagnose and fix the issue effectively. Here are some key points to consider:
- Abnormal noise: A noisy compressor is often a sign of trouble. If you hear grinding, squeaking, or rattling sounds coming from the compressor, it could indicate a faulty bearing or internal damage.
- No cooling effect: When the compressor fails to engage or the air conditioner doesn’t cool the cabin, it may be due to a failed compressor clutch or a refrigerant leak. If the ac blows warm air even when the system is turned on, there could be a problem with the compressor’s ability to pressurize the refrigerant.
- Frequent cycling: If the compressor cycles on and off too frequently or runs continuously without shutting off, it might be struggling to maintain the appropriate pressure levels. This could be caused by low refrigerant levels, a malfunctioning expansion valve, or a failing compressor itself.
- Refrigerant leaks: Refrigerant leaks are common culprits behind air conditioner issues. If you notice refrigerant stains or puddles beneath your vehicle, it’s a clear indication of a leak in the ac system. Compressor seals, hoses, or even the compressor itself could be the source of the leak.
- High pressure or low pressure: An air conditioning system that displays abnormally high or low pressure readings on the gauge could imply compressor-related problems. High pressure may suggest a failing condenser, while low pressure could indicate a lack of refrigerant or a faulty compressor.
Possible Solutions For Fixing Compressor Issues
When faced with a malfunctioning air conditioner compressor in your honda accord, there are several possible solutions to consider. Here are some key points for fixing compressor issues:
- Compressor replacement: If the compressor has suffered significant damage or is beyond repair, the best course of action may be to replace it entirely. A new compressor will ensure proper functioning of the air conditioning system and restore cool air circulation.
- Repairing compressor clutch: In some cases, the issue may lie with the compressor clutch rather than the entire compressor. Replacing or repairing the clutch assembly can resolve problems like failure to engage or no cooling effect.
- Addressing refrigerant leaks: If refrigerant leaks are detected, it is crucial to identify and fix them promptly. This may involve replacing damaged hoses or seals, or repairing the compressor itself if it is the source of the leak. Once the leak is fixed, the system should be recharged with the appropriate amount of refrigerant.
- Maintenance and inspection: Regular maintenance and inspection can help catch compressor issues early on. Keeping the air conditioning system clean, ensuring proper lubrication, and checking for loose connections can prevent compressor problems from occurring.
- Seeking professional help: In some situations, diagnosing and fixing compressor issues requires expertise. If you’re unsure about tackling the problem yourself, it’s always advisable to consult a certified technician who can diagnose the problem accurately and provide the most suitable solution.
Remember, while understanding compressor problems and their potential solutions is helpful, it’s important to exercise caution and prioritize safety when working with the air conditioning system.
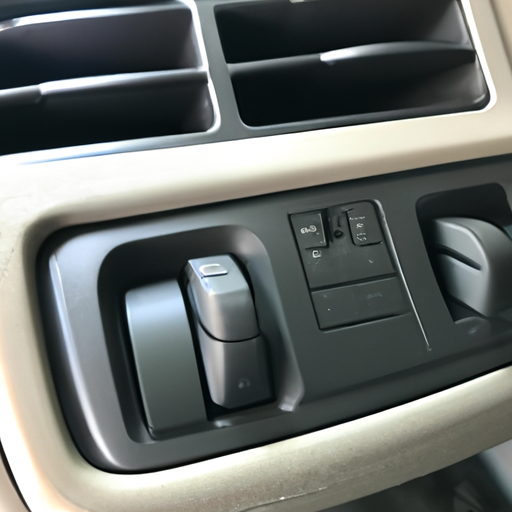
Checking And Repairing Air Conditioner Electrical Components
Overview Of The Electrical Components Involved In The Air Conditioning System
The air conditioning system in your honda accord relies on various electrical components that work together to cool the air inside your vehicle. Understanding these components is essential to diagnose and fix any issues you may encounter. Here’s a brief overview of the key electrical components involved:
- Compressor: The compressor is responsible for compressing the refrigerant gas, which helps to cool the air.
- Condenser: The condenser helps dissipate the heat from the refrigerant by converting it from a gas to a liquid state.
- Evaporator: Located inside the car’s cabin, the evaporator cools the air by removing heat from it.
- Blower motor: The blower motor is responsible for pushing the cooled air into the cabin through the vents.
- Thermostat: The thermostat regulates the temperature by controlling the operation of the air conditioning system.
- Electrical wiring: Various electrical wires connect all the different components, allowing them to communicate and function properly.
Now, let’s dive into the step-by-step guide on how to check and repair any faulty electrical components in your honda accord’s air conditioning system.
Step-By-Step Guide On Checking And Repairing Faulty Electrical Components
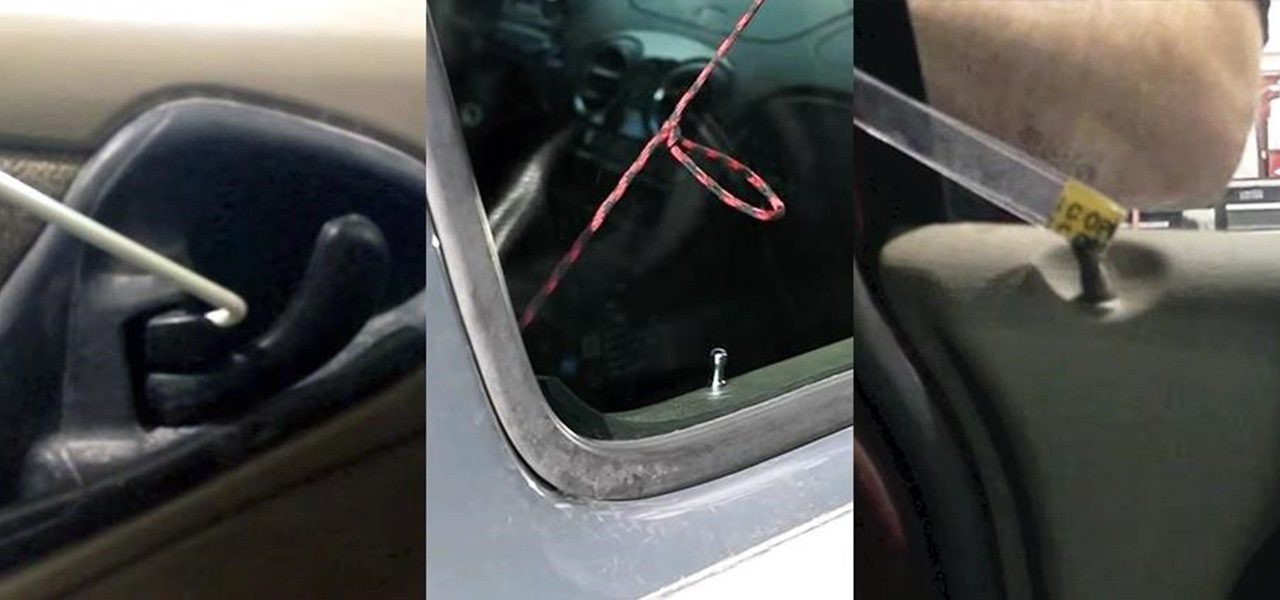
- Inspect the electrical connections: Start by visually examining all the electrical connections in the air conditioning system. Look for any loose or corroded connections that could hinder the flow of electricity. If you spot any issues, tighten the connections or clean the corrosion using an appropriate electrical cleaner.
- Check the fuses: Locate the fuse box in your honda accord, usually found under the dashboard or in the engine compartment. Check the air conditioner-related fuses for any signs of damage or blown fuses. Replace any faulty fuses with new ones of the same rating.
- Test the relays: Relays play a crucial role in controlling the flow of electricity in the air conditioning system. Use a multimeter to test the relays for proper functioning. If a relay is found to be faulty, replace it with a new one.
- Inspect the compressor clutch: The compressor clutch engages and disengages the compressor based on the temperature settings. Inspect the clutch for signs of damage or wear. If the clutch is faulty, it may need to be replaced.
- Test the blower motor: Start the engine and turn on the air conditioner. If the blower motor does not work or operates intermittently, it may be faulty. Test the blower motor by checking for power at its connector using a voltmeter. If there is power, but the blower motor does not function, it may need to be replaced.
- Check the thermostat: The thermostat regulates the temperature inside the car. If the air conditioning system is not cooling properly, the thermostat may be faulty. Test the thermostat by setting it to different temperature settings and monitoring the response of the system.
- Inspect the electrical wiring: Carefully inspect the electrical wiring throughout the air conditioning system. Look for any signs of damage, such as frayed wires or loose connections. Repair or replace any damaged wiring as necessary.
By following these step-by-step instructions, you can effectively diagnose and fix any electrical component issues in your honda accord’s air conditioning system. However, if you are not familiar with automotive electrical systems, it is recommended to seek professional assistance to ensure a proper repair.
Frequent Maintenance Tips To Prevent Air Conditioner Problems
Importance Of Regular Air Conditioner Maintenance
Regular maintenance of your honda accord’s air conditioner is crucial to ensure its optimal performance and prevent any potential problems. By following these simple tips, you can keep your air conditioner in top condition, ensuring efficient cooling even during scorching summers.
Tips For Keeping Your Honda Accord Air Conditioner In Good Condition
- Clean or replace the air filters: Dirty or clogged air filters can restrict airflow, reducing your air conditioner’s efficiency. Regularly clean or replace the filters to maintain proper airflow and prevent dust and debris from entering the system.
- Inspect and clean the condenser unit: The condenser unit, located outside the vehicle, can accumulate dirt, leaves, and debris over time. Check the unit regularly and clean it using a gentle stream of water or with a soft brush to prevent airflow obstruction.
- Check and maintain proper refrigerant levels: Low refrigerant levels can lead to reduced cooling capacity and potential damage to the compressor. If you notice decreased cooling performance, have a professional inspect and recharge the refrigerant as needed.
- Keep the evaporator and vents clean: Dust and debris can accumulate on the evaporator coils and vents, hindering proper airflow and reducing cooling efficiency. Use a soft brush or a vacuum cleaner with a brush attachment to clean the evaporator and vents regularly.
- Inspect and clean the blower motor: The blower motor helps circulate cool air into the cabin. Regularly inspect and clean the blower motor for dirt or debris, ensuring smooth operation and maximum airflow.
- Check the drive belt: A worn or damaged drive belt can cause the air conditioner to function poorly or even fail. Regularly inspect the drive belt for cracks, fraying, or signs of wear, and replace it if necessary.
- Ensure proper drainage: The air conditioner’s condensate drain can become clogged with debris, leading to water leakage and potential damage. Inspect the drain regularly and clear any blockages to ensure proper drainage.
- Test the system regularly: Regularly test your honda accord’s air conditioner to ensure it is cooling properly. If you notice any issues such as weak airflow, strange noises, or unpleasant smells, consult a professional technician for a comprehensive inspection and necessary repairs.
Following these maintenance tips will not only keep your honda accord’s air conditioner running smoothly but also extend its lifespan. By taking care of your air conditioner, you can enjoy comfortable rides throughout the year, no matter the weather conditions.
Frequently Asked Questions Of How To Fix Honda Accord Air Conditioner
How Do You Fix A Honda Accord Air Conditioner?
To fix a honda accord air conditioner, start by checking the refrigerant levels, cleaning the air filter, and inspecting the compressor and condenser for any issues.
Why Is My Honda Accord’S Air Conditioner Not Cooling?
If your honda accord’s air conditioner is not cooling, it could be due to a refrigerant leak, a faulty compressor, a clogged condenser, or an issue with the fan or blower motor.
How Often Should I Service My Honda Accord’S Air Conditioner?
It is recommended to service your honda accord’s air conditioner every 1-2 years to ensure optimal performance and prevent any potential issues.
Can I Fix My Honda Accord’S Air Conditioner Myself?
While some simple maintenance tasks can be done by yourself, it is recommended to consult a professional technician for more complex repairs or if you are unsure about the issue.
How Much Does It Cost To Fix A Honda Accord Air Conditioner?
The cost to fix a honda accord air conditioner can vary depending on the specific issue, but it can range from $100 for minor repairs to several hundred dollars for major repairs or component replacements.
Conclusion
To wrap up, fixing a honda accord air conditioner can be a relatively simple task with the right knowledge and tools. By following the troubleshooting steps outlined in this guide, you can resolve common issues such as lack of cooling or unusual noises.
Remember to start with the basics of checking refrigerant levels and cleaning or replacing air filters. If these steps don’t solve the problem, it may be necessary to seek professional help. Regular maintenance and attention to minor issues can help prevent major air conditioner problems down the line, saving you time and money.
By taking the time to understand and fix your accord’s air conditioner, you can ensure a comfortable driving experience in any weather. Stay cool and enjoy the ride!