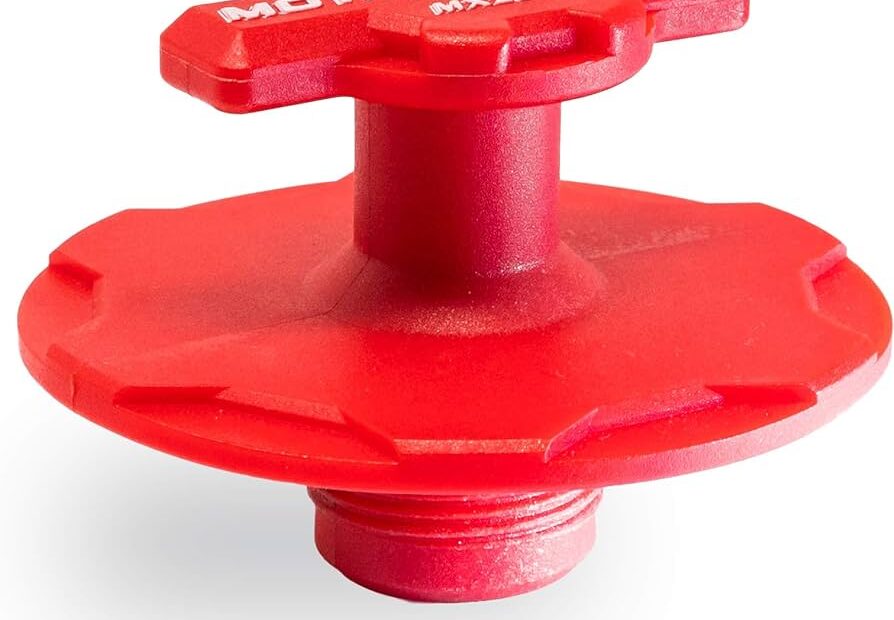
To get the oil cap off, grip the cap firmly and twist it counterclockwise, applying steady pressure until it unscrews. Struggling to remove the oil cap?
Don’t worry, we have you covered with a quick and straightforward solution. Whether it’s for a routine oil change or a maintenance check, removing the oil cap can sometimes be a challenging task. We will guide you through the process of safely and easily getting the oil cap off.
So, let’s dive in and discover the tricks to removing that stubborn oil cap without damaging your vehicle.
Why Removing The Oil Cap Correctly Matters
Proper maintenance of your vehicle is essential for its optimal performance and longevity. One essential task in this maintenance routine is changing the engine oil regularly. While this task may seem simple, there are often overlooked details that can have significant consequences if not handled correctly. One such detail is removing the oil cap correctly. In this article, we will explore why removing the oil cap correctly matters and how it can prevent messy spills and accidents and avoid potential damage to the engine.
Preventing Messy Spills and Accidents
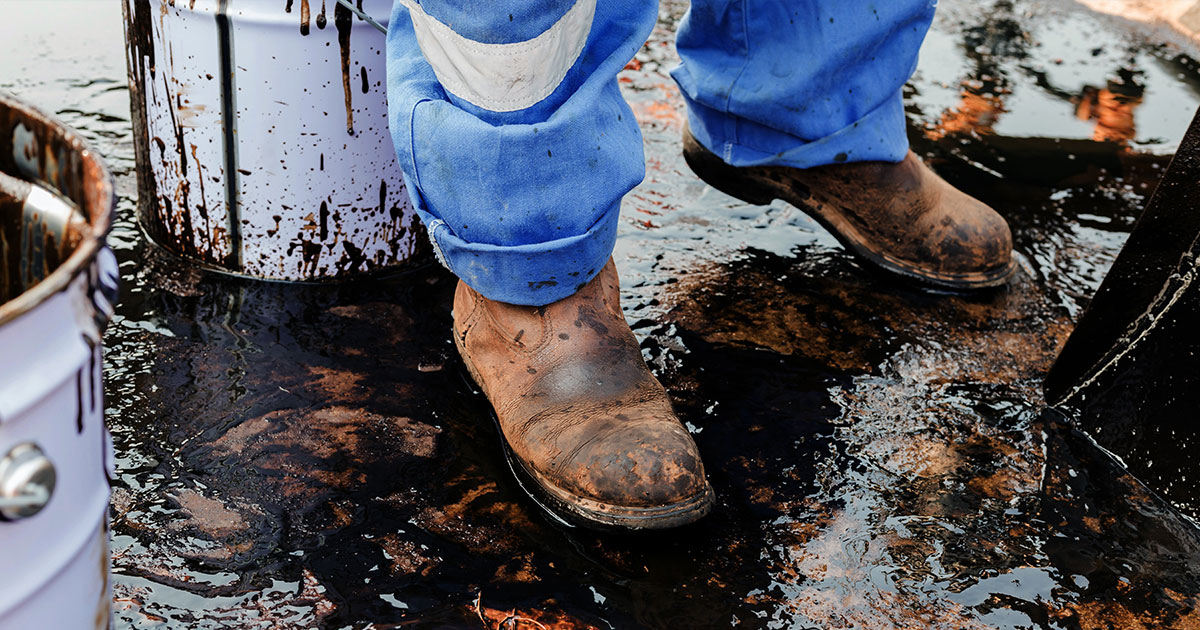
When it comes to changing the engine oil, removing the oil cap is the first step. Many people underestimate the importance of this seemingly straightforward task. However, removing the oil cap incorrectly can lead to messy spills and accidents, causing unnecessary frustration and potential damage to both your vehicle and the environment.
- Improperly removing the oil cap can result in oil splattering onto the engine and surrounding components. This can create a slippery surface, making it difficult to handle the cap or perform other necessary tasks during the oil change process.
- Avoiding hasty removal of the oil cap is crucial, as it diminishes the risk of accidentally knocking over the oil container, causing a spill. Not only does this waste precious oil, but it also poses a safety hazard, especially if the spill occurs on a busy driveway, parking lot, or garage floor.
- Furthermore, a rushed oil cap removal can lead to oil spraying onto your hands or clothing, resulting in stains, odors, and potential skin irritation. Taking the time to remove the oil cap in a controlled manner minimizes the risk of messy accidents.
Avoiding Damage to the Engine
Removing the oil cap correctly is also crucial for safeguarding the engine from potential damage. The oil cap serves as a barrier that prevents contaminants, dirt, and debris from entering the engine while maintaining optimal oil pressure. Mishandling the oil cap can compromise this protection, leading to potential engine issues that could be costly to repair.
Here are a few reasons why removing the oil cap correctly helps in avoiding engine damage:
- Removing the cap at an angle or with excessive force can cause the cap to crack or break. This can result in oil leakage or, worse, complete detachment of the cap, leading to oil loss, inadequate lubrication, and engine malfunction.
- Proper removal of the oil cap allows excess air to escape gradually, minimizing the risk of pressure buildup within the engine. Sudden release of pressure can lead to oil gushing out, potentially damaging engine components or even causing the oil filter to dislodge.
- Additionally, removing the oil cap correctly enables the engine to vent properly, preventing a vacuum that may hinder oil flow. Adequate ventilation ensures consistent oil circulation and lubrication throughout the engine, reducing the risk of overheating and premature wear.
By following the correct procedure to remove the oil cap during an oil change, you can prevent messy spills, accidents, and potential engine damage. Taking the time to perform this task carefully shows dedication to maintaining your vehicle’s performance and extends its lifespan. Now that we understand the importance of removing the oil cap correctly, let’s explore the step-by-step process in our next section.
Common Mistakes To Avoid
In the world of automotive maintenance, removing the oil cap may seem like a simple task. However, it’s not uncommon for car owners to make mistakes that can lead to frustration, damage, or even accidents.
Twisting the cap too tightly
One of the most common mistakes people make when trying to remove an oil cap is twisting it too tightly. This can happen when we are afraid of it coming off during the driving or in a hurry to get the job done quickly. However, tightening the cap excessively can make it difficult to remove later on. It’s important to remember that the oil cap should be securely tightened, but not overly tightened.
Using the wrong tools or techniques
Another mistake car owners make is using the wrong tools or techniques to remove the oil cap. Some people may use pliers or wrenches to gain extra leverage, which can lead to damage to the cap or the surrounding components. It’s important to use the proper tools, such as a firm grip with your hand or a socket wrench if necessary, to avoid any unnecessary accidents or damage.
Overtightening the cap
Overtightening the oil cap is another common mistake that people make. It’s important to remember that overtightening the cap can cause the gasket to become damaged or create a vacuum that can lead to oil leaks or even engine damage. When replacing the cap, make sure to tighten it until it’s snug, but avoid overtightening it to prevent any potential issues.
Gathering The Required Tools
Before attempting to get the oil cap off, it’s important to gather all the necessary tools for the job. Having the right tools on hand will make the process easier and more efficient. Here are the steps to follow:
Check the owner’s manual or manufacturer’s recommendations
To begin, it’s important to consult the owner’s manual or check the manufacturer’s recommendations for your specific vehicle. The manual will provide valuable information about the type of oil cap used and any specific instructions or precautions to follow. It’s always a good idea to familiarize yourself with the manufacturer’s guidelines before starting any maintenance tasks.
Identify the appropriate tools
Once you have reviewed the owner’s manual, it’s time to identify the tools needed to remove the oil cap. The following tools are commonly used for this task:
- Oil filter wrench: This wrench comes in various sizes and is specifically designed to remove the oil filter cap. It provides a secure grip and makes it easier to apply the necessary torque to loosen the cap.
- Rubber gloves: Wearing rubber gloves will protect your hands from coming into direct contact with the engine oil and any dirt or debris that may be present. Additionally, it can help provide a better grip while handling the oil cap.
- Lint-free cloth or paper towel: Having a lint-free cloth or paper towel nearby is essential for cleaning any excess oil or debris from the oil cap or surrounding area. This ensures a clean and secure seal when reattaching the cap.
- Oil drain pan or container: It is necessary to have an oil drain pan or container to collect the old oil when the cap is removed. This will help prevent any spills or messes during the process.
Gathering these tools before attempting to get the oil cap off will save you time and frustration. It’s always better to be prepared and have everything you need within reach. Now that you have all the required tools, you’re ready to move on to the next step of the process.
Credit: www.halenhardy.com
Preparing For Oil Cap Removal
When it comes to removing the oil cap from your vehicle, taking the necessary precautions is essential to ensure a smooth and safe process. Preparing for oil cap removal involves a few important steps that you shouldn’t skip. By following these guidelines, you can be well-prepared and prevent any potential mishaps along the way.
Park the vehicle on level ground
Parking your vehicle on level ground is a crucial first step before attempting to remove the oil cap. This helps to keep the oil level stable and prevents any unnecessary spills or accidents. Find a flat and even surface to park your vehicle to ensure its stability during the oil cap removal process.
Allow the engine to cool down
Before you begin removing the oil cap, it’s important to let the engine cool down. A hot engine can cause hot oil to spurt out when you remove the cap, leading to potential injuries. Allow the engine to cool for at least 30 minutes before proceeding with the oil cap removal to ensure your safety.
Wear protective gloves and eyewear
Protecting yourself is paramount when dealing with any automotive maintenance task. To safeguard against any possible oil spills or splashes, wear protective gloves and eyewear during the oil cap removal process. These protective measures help to keep your hands and eyes safe from potential harmful substances and ensure a comfortable and hazard-free procedure.
Finding And Accessing The Oil Cap
One of the basic maintenance tasks for any car owner is changing the oil. In order to do so, you must first locate and access the oil cap. This may seem like a simple task, but if you’re not familiar with the layout of your car’s engine bay, it can be a bit confusing. In this section, we’ll guide you through the steps to easily find and access the oil cap, so you can get your oil change done with ease.
Locate the oil cap in the engine bay
The oil cap is typically located on the top of the engine, near the front of the vehicle. It is usually labeled with the word “oil” or has an icon that represents an oil can. Finding it may require you to open the hood of your car and visually inspect the engine bay. Before you proceed, ensure that your car’s engine is off and the hood is securely propped open.
Remove any plastic covers or obstacles obstructing access

Once you have located the oil cap, the next step is to remove any plastic covers or obstacles that may be obstructing access to it. Some vehicles have engine covers or splash shields that need to be removed in order to reach the oil cap. Refer to your car’s owner’s manual for specific instructions on how to remove these coverings.
It’s important to be cautious when removing these covers, as they might have screws or clips holding them in place. Use a screwdriver or a pry tool, if necessary, to gently loosen and remove them. Make sure not to force or apply excessive pressure, as this may result in damage to the cover or other engine components.
Once you have removed the plastic covers or obstacles, you should now have clear access to the oil cap. It is a round or square-shaped cap that can usually be unscrewed by hand. If the cap is hot due to the engine running, use caution and wait for it to cool down before attempting to remove it.
Now that you have successfully located and accessed the oil cap, you can move on to the next steps involved in changing your car’s oil. Refer to our upcoming blog posts for further guidance on this topic.
Removing The Oil Cap Properly
When it comes to maintaining your car’s engine, one important task is changing the oil regularly. As part of this process, it’s crucial to know how to properly remove the oil cap. This seems like a simple task, but if not done correctly, it can lead to oil spills, damage to the cap, or even injuries. In this section, we will explore the proper way to remove the oil cap, ensuring a smooth and hassle-free process.
Choose the right tool for the job
Before attempting to remove the oil cap, it’s essential to select the appropriate tool. Ideally, you should use a socket wrench or an oil filter wrench specifically designed for this purpose. These tools offer a better grip and leverage, making it easier to loosen the cap.
Apply gentle pressure and twist counterclockwise
Once you have the right tool, position it securely onto the oil cap. Apply gentle pressure and start twisting it counterclockwise. Remember to keep a firm grip on the tool to avoid slipping or losing control. Slow and steady is the key here; avoid using excessive force as it may lead to the cap breaking or causing damage to the oil filter.
Pay attention to any resistance or signs of over-tightening
While unscrewing the oil cap, pay close attention to any resistance or signs of over-tightening. If you feel excessive resistance, stop immediately and assess the situation. It’s possible that the cap may be stuck due to an issue such as excessive heat or the build-up of debris. In such cases, it’s best to consult a professional mechanic for assistance.
Moreover, if you encounter any signs of over-tightening, such as stripped threads or cracks on the cap, it is crucial to replace the cap before proceeding. Driving with a damaged oil cap can lead to oil leaks and potential engine damage.
Summary
Removing the oil cap properly is an essential part of changing the oil in your car. By following these basic steps, you can ensure a smooth and hassle-free process:
- Choose the right tool for the job, such as a socket wrench or an oil filter wrench.
- Apply gentle pressure and twist the cap counterclockwise, using slow and steady movements.
- Pay attention to any resistance or signs of over-tightening, seeking professional help if needed.
With these guidelines in mind, you can confidently perform this routine maintenance task and keep your engine running smoothly.
Preventing Messy Spills
When it comes to changing the oil in your vehicle, it’s important to take precautions to prevent messy spills. Not only can oil spills create a hazardous environment, but they can also be a pain to clean up. To ensure a smooth and spill-free oil change experience, follow these steps to prevent any messy accidents.
Position a drain pan or container below the oil cap
The first step in preventing messy spills is to position a drain pan or container below the oil cap. This will catch any oil that may drip or spill out when the cap is removed. To effectively position the container, ensure it is directly under the oil cap and can hold an adequate amount of oil. This will help contain the oil and prevent it from spreading onto the ground or surrounding surfaces, minimizing the chances of a messy spill.
Angle the container to catch any drips or spills
Just positioning the container beneath the oil cap may not be enough to prevent all potential spills. To increase the effectiveness, angle the container slightly to catch any drips or spills. By angling the container towards the oil cap, you can ensure that any oil that may escape during the process will flow directly into the container. This simple adjustment can go a long way in preventing messy spills and saving you from unnecessary clean-up.
By following these simple steps to prevent messy spills when removing the oil cap, you can make your oil change experience cleaner and more hassle-free. Remember, taking these precautions not only minimizes the risk of accidents and injuries, but it also helps protect the environment by preventing oil from seeping into the ground or causing pollution. So, the next time you’re changing your vehicle’s oil, don’t forget to position a drain pan or container below the oil cap and angle it to catch any drips or spills. Happy oil changing!
Replacing The Oil Cap
When it comes to maintaining your vehicle’s engine, one of the simplest yet crucial tasks is replacing the oil cap. The oil cap seals and protects the oil reservoir, ensuring that no dirt, debris, or contaminants enter the engine. If the oil cap is damaged or worn out, it can result in oil leakage and potential engine damage. In this guide, we will walk you through the step-by-step process of replacing the oil cap, so you can keep your engine running smoothly.
Clean the Cap and Inspect for Any Damage or Wear
Before installing a new oil cap, it is essential to clean the cap thoroughly and inspect it for any signs of damage or wear. Neglecting this step can lead to poor sealing and potential oil leakage. Here’s what you need to do:
- Remove the oil cap from the engine.
- Wipe the cap clean using a lint-free cloth or paper towel.
- Inspect the cap for any cracks, dents, or excessive wear.
- If you notice any damage, it’s crucial to replace the cap with a new one.
Cleaning and checking the oil cap ensure that you have a clean surface to work with and that the new cap is in optimal condition.
Line up the Cap and Threads Correctly
Once the oil cap is thoroughly cleaned and inspected, it’s time to install the new cap. Proper alignment of the cap and the threads is crucial for a secure seal. Here’s what you need to do:
- Ensure that the oil reservoir’s filler neck is clean and free of debris.
- Hold the new oil cap and align it with the threads on the filler neck.
- Make sure the cap is positioned correctly over the threads.
By aligning the cap and threads properly, you will avoid any cross-threading or misalignment issues, which could compromise the seal and ultimately lead to oil leaks.
Twist the Cap Clockwise until Snug
Once the cap is properly aligned with the threads, it’s time to secure it onto the oil reservoir. Follow these steps:
- Gently but firmly twist the oil cap clockwise onto the threads.
- Continue twisting until you feel resistance.
- Once you feel the resistance, give the cap an extra quarter-turn to ensure a snug fit.
By twisting the cap clockwise until it is snug, you will create a tight seal and minimize the risk of oil leakage.
Now that you know the step-by-step process of replacing the oil cap, you can confidently perform this task yourself. Remember to clean and inspect the cap, align it correctly with the threads, and tighten it until snug. By following these simple steps, you can ensure that your engine remains well-protected and performs at its best.
Regularly Clean The Oil Cap Area
The oil cap is an essential component of your car’s engine, responsible for sealing the oil chamber and preventing any contaminants from entering. Over time, dirt, dust, and oil residue can accumulate on the oil cap and its surrounding area, hindering its proper functionality. Cleaning the oil cap area regularly is crucial to maintain the longevity and efficiency of your vehicle’s engine.
Wipe off any excess oil or dirt
Before diving into a thorough cleaning, begin by wiping off any excess oil or dirt from the oil cap and the surrounding area. Use a clean cloth or a paper towel to gently remove the surface-level buildup. This initial step will make the cleaning process more effective and prevent any debris from getting pushed into the oil chamber when you proceed further.
Use a mild detergent and water to clean the area
Once you have removed the excess oil and dirt, it’s time to deep clean the oil cap area. Creating a solution of mild detergent and water is an effective and safe method to remove stubborn grime and oil residue. Fill a bucket with warm water and add a few drops of mild detergent, ensuring it is well-mixed.
Take a clean sponge or a soft brush and dip it into the soapy mixture. Gently scrub the oil cap and the surrounding area, ensuring you reach all the nooks and crannies. Pay special attention to any visible buildup or stains, as these can impact the sealing capabilities of the oil cap.
After scrubbing, rinse the area thoroughly with clean water to remove any soap residue. Take care to avoid getting water into the oil chamber. Once rinsed, use a clean cloth to dry the oil cap and the surrounding area before proceeding to the next step.
Inspect for any damage or leaks
While cleaning the oil cap area, it’s an opportune time to inspect for any signs of damage or leaks. Examine the oil cap itself for cracks, corrosion, or worn-out seals. If you discover any issues, it is crucial to have them addressed promptly to prevent further complications.
Additionally, check the area surrounding the oil cap and the oil chamber for any visible leaks or traces of oil. A leaking oil cap can lead to oil loss or contamination, which can severely impact your engine’s performance. If you notice any leaks, consult a professional mechanic for diagnosis and repairs.
To ensure maximum efficiency and longevity of your car’s engine, make it a habit to regularly clean the oil cap area. This simple maintenance task can prevent potential issues and keep your vehicle running smoothly for years to come.
Double-Check The Cap’S Tightness
Double-Check the Cap’s Tightness
Properly securing the oil cap is essential to prevent leaks and maintain the efficiency of your vehicle’s engine. After changing the oil or performing routine maintenance, it’s crucial to double-check the cap’s tightness. In this section, we will explore the best practices to ensure the cap is secure but not overly tight.
Ensure the cap is secure but not overly tight
When securing the oil cap, it’s important to strike a balance between tightness and looseness. You want to make sure the cap is properly sealed, but over-tightening can lead to issues such as damaged threads or difficulty in removing the cap when it’s time for the next oil change. Here are some steps to follow to find the perfect balance:
- Start by hand-tightening the cap: Using your hand, twist the cap clockwise until it feels snug. Remember to never use excessive force or tools as this can cause damage and make it challenging to remove the cap in the future.
- Use a gentle touch: It’s essential to avoid using excessive force or tools like pliers or wrenches. Over-tightening can lead to a variety of problems such as stripped threads, cracked caps, or even engine damage. Be careful not to apply too much pressure while ensuring a secure fit.
- Test the cap’s tightness: Once you have hand-tightened the cap, give it a gentle twist counterclockwise. If the cap moves easily, it may need to be tightened further. On the other hand, if it feels difficult to turn, it may be too tight. Find the sweet spot where the cap is secure but still allows for easy removal.
- Check for signs of leaks: After securing the cap, inspect the area around it for any signs of oil leaks. If you notice any drips or wet spots, it may indicate that the cap is not properly sealed. In this case, re-evaluate the tightness and make necessary adjustments.
By following these simple guidelines, you can ensure that your oil cap is securely tightened without causing any damage. Remember, finding the right balance is crucial to maintain the integrity of your engine and ensure optimal performance. Double-checking the cap’s tightness should become a part of your routine maintenance to keep your vehicle running smoothly.
Monitor The Oil Level
Checking the oil level regularly is an essential part of maintaining your vehicle’s engine health. By monitoring the oil level, you can prevent overfilling and ensure that your engine is properly lubricated. In this section, we will highlight the importance of regularly checking the oil level and following the manufacturer’s recommendations for oil changes.
Check the oil level regularly to prevent overfilling
Overfilling the oil can lead to serious engine problems, such as oil leaks and foaming. To prevent this, it is crucial to check the oil level regularly. Here’s a step-by-step guide on how to do it:
- Park your vehicle on a level surface and let the engine cool down for a few minutes.
- Locate the oil dipstick. It is usually labeled with a bright-colored handle and is located near the engine.
- Take out the dipstick and wipe it clean with a cloth or paper towel.
- Insert the dipstick back into the tube completely and then pull it out again.
- Observe the oil level on the dipstick. It should be between the maximum and minimum marks or within the recommended range specified by the manufacturer.
- If the oil level is low, add oil gradually while checking the level until it reaches the appropriate mark.
- Be sure not to overfill the oil, as this can be just as harmful as having insufficient oil. If the level exceeds the maximum mark, remove the excess oil using a suitable method or seek assistance from a professional.
Follow the manufacturer’s recommendations for oil changes
Adhering to the manufacturer’s recommendations for oil changes is crucial to keep your engine running smoothly. Each vehicle has specific requirements for oil type and intervals for oil changes. Here are a few tips to ensure you follow the right guidelines:
- Refer to your vehicle’s owner manual to find the specific oil change recommendations from the manufacturer.
- Take note of the recommended oil type, such as conventional, synthetic, or a blend.
- Pay attention to the recommended mileage or time intervals for oil changes.
- Consider driving conditions that may require more frequent oil changes, such as extreme temperatures or stop-and-go traffic.
- Keep a log or set reminders to help you stay on track with oil changes.
- Remember, following the manufacturer’s recommendations for oil changes will help ensure optimal engine performance and longevity.
By regularly monitoring the oil level and following the manufacturer’s recommendations for oil changes, you can keep your vehicle’s engine in top condition. Remember, a well-maintained engine leads to better fuel efficiency, smoother operation, and ultimately, a longer lifespan for your vehicle.
Frequently Asked Questions Of How To Get Oil Cap Off
Why Can’T I Get My Oil Cap Off?
Having difficulty removing your oil cap? Apply gentle but firm pressure while turning it counterclockwise. Ensure that the cap is not stuck due to excessive heat or oil residue. If the problem persists, seek professional assistance to avoid any damage.
Should There Be Pressure When Removing Oil Cap?
No, there shouldn’t be pressure when removing the oil cap.
What Happens If You Remove Oil Cap With Engine Running?
Removing the oil cap while the engine is running can cause oil to splash out, creating a mess and potential fire hazard. It can also lead to a loss of oil pressure and engine damage. Avoid this by always shutting off the engine before removing the oil cap.
Why Is My Oil Cap Covered In Oil?
Oil cap covers get oil due to overflow or a faulty gasket. Oil can leak into the cap, resulting in a covering of oil. Check for excessive oil levels or a loose cap. If the issue persists, consult a mechanic for a proper inspection and repairs.
How Do You Remove An Oil Cap?
To remove an oil cap, locate the cap on the engine, twist it counterclockwise, and lift it off.
Why Is My Oil Cap Stuck?
Your oil cap may be stuck due to heat and pressure buildup or residue accumulation. Use a rubber glove for a better grip and twist it gently to remove.
Can I Remove The Oil Cap Hot?
It’s not recommended to remove the oil cap when the engine is hot. Wait for the engine to cool down before attempting to remove the cap to avoid burns.
Conclusion
Removing the oil cap may seem challenging, but with a few simple steps, it can be done effortlessly. By using the right tools and following safety precautions, anyone can successfully remove the oil cap and perform necessary maintenance on their vehicle.
Remember to consult your car’s manual for specific instructions and always take your time to ensure a smooth process. Happy oil cap removal and safe driving!
- How to Diagnose Bad Strut Mounts: Expert Tips for Quick Fixes - May 16, 2024
- How to Bypass Blower Motor Relay: 7 Expert Techniques - May 16, 2024
- How to Easily Check Ecu Ground: Essential Steps for Optimal Performance - May 16, 2024