Are you a passionate car enthusiast looking to enhance the performance and sound of your vehicle? If so, you’ve come to the right place! In this comprehensive guide, we will walk you through the process of installing a resonator, a vital component that can significantly improve the exhaust system of your car. Whether you’re a seasoned DIY mechanic or a beginner, our step-by-step instructions, accompanied by detailed illustrations, will ensure that you can confidently tackle this project and unleash the full potential of your vehicle’s engine.
Before diving into the installation process, let’s briefly explore what a resonator is and why it is an essential addition to your exhaust system. A resonator is a specialized component designed to modify the sound waves produced by your car’s engine, resulting in a more refined and pleasing exhaust note. Not only does it enhance the overall auditory experience, but it also helps to reduce drone and cabin noise, creating a more comfortable driving environment. With the right resonator, you can achieve that perfect balance between performance and acoustics, making every drive an exhilarating symphony of power and sonorous harmony. So, buckle up and get ready to embark on this exciting journey of installing a resonator that will elevate your car’s performance and make heads turn wherever you go!
How to Install a Resonator:
- First, gather the necessary tools such as a wrench, screwdriver, and safety goggles.
- Locate the resonator underneath your vehicle. It is usually positioned near the exhaust system.
- Use the wrench to loosen and remove any bolts or clamps securing the old resonator in place.
- Carefully disconnect the resonator from the exhaust pipe.
- Install the new resonator by connecting it to the exhaust pipe.
- Secure the new resonator in place by tightening the bolts or clamps.
- Double-check all connections and ensure they are secure.
- Put on your safety goggles and start the vehicle to test the new resonator.
How to Install a Resonator
In this informative guide, we will provide step-by-step instructions on how to properly install a resonator. A resonator is an essential component in any exhaust system, helping to reduce noise and improve engine performance. By following these instructions, you will be able to successfully install a resonator with ease.
Gather the Necessary Tools and Materials
Before beginning the installation process, it is important to gather all the necessary tools and materials. This will ensure that you have everything you need and will help to streamline the installation process. Here is a list of the tools and materials you will need:
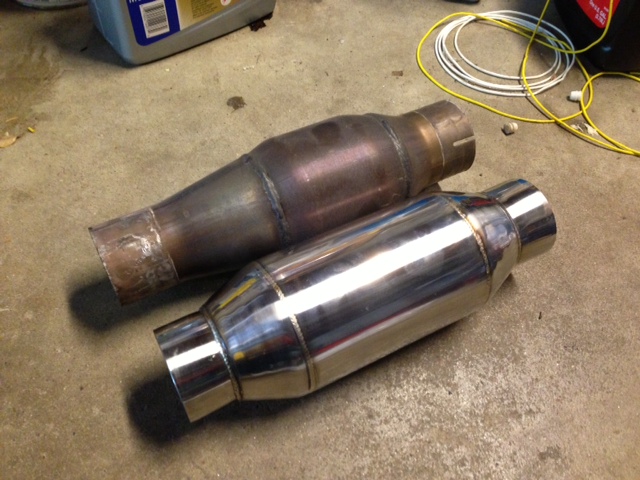
- Resonator
- Exhaust clamps
- Wrench set
- Socket set
- Jack stands
- Jack
- Safety glasses
- Work gloves
- Penetrating oil
- Lint-free cloth
Make sure you have all these items readily available before you start the installation process. This will save you time and prevent any unnecessary delays.
Step 1: Prepare the Vehicle
Prior to installing the resonator, it is important to prepare the vehicle. Start by parking the vehicle on a flat surface and engaging the parking brake. Put on your safety glasses and work gloves to protect yourself during the installation process. Use a jack to lift the vehicle off the ground and secure it with jack stands.
Next, locate the current exhaust system and identify the section where the resonator will be installed. Use penetrating oil to loosen any rusted or stuck bolts. Once the bolts are loosened, use a wrench or socket set to remove the old exhaust components. Clean the area with a lint-free cloth to ensure a smooth installation surface.
Step 2: Install the Resonator
With the vehicle prepared, it is now time to install the resonator. Start by positioning the resonator in the desired location, ensuring that it is aligned properly with the rest of the exhaust system. Use exhaust clamps to securely attach the resonator to the existing exhaust components.
Tighten the clamps using a wrench or socket set, making sure they are firmly in place. Double-check the alignment of the resonator to ensure it is straight and properly connected. Once everything is securely installed, lower the vehicle off the jack stands and remove the jack.
Step 3: Test and Adjust
After the installation is complete, it is important to test the newly installed resonator. Start the vehicle and listen for any unusual noises or vibrations. If everything sounds normal, take the vehicle for a short test drive to further assess the performance of the exhaust system.
If you notice any issues or abnormalities, double-check the installation to ensure everything is properly connected. Make any necessary adjustments or tighten the clamps if needed. It is essential to have a well-functioning resonator for optimal engine performance and noise reduction.
By following these steps, you can successfully install a resonator in your vehicle. Remember to always prioritize safety and take your time during the installation process. With the right tools and materials, you can enjoy the benefits of a properly installed resonator for years to come.
Frequently Asked Questions
Here are some common questions and answers about how to install a resonator:
What is a resonator?
A resonator is a device used in exhaust systems to reduce noise and control emissions. It is typically made of stainless steel and is designed to create a specific sound and optimize the performance of the engine.
Why would I need to install a resonator?
If you find that your vehicle’s exhaust system is too loud or producing unpleasant sounds, installing a resonator can help reduce the noise and create a more pleasant driving experience. A resonator also helps to control emissions and improve the overall performance of the engine.
Where should I install the resonator in my exhaust system?
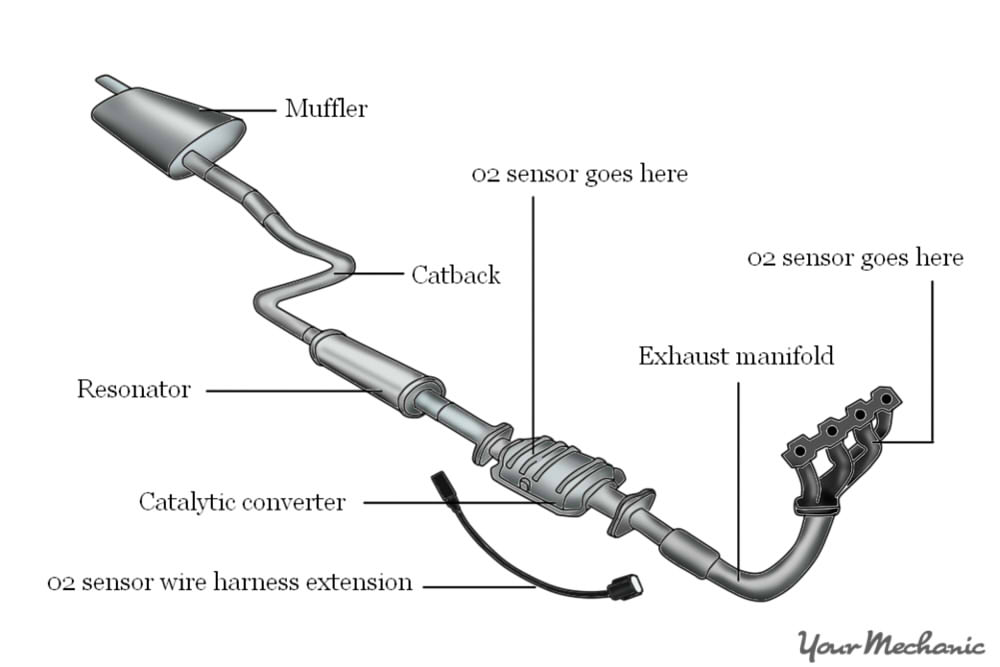
The resonator should be installed in the exhaust system between the catalytic converter and the muffler. This placement allows the resonator to effectively reduce noise and control emissions without interfering with the performance of the engine.
What tools do I need to install a resonator?
To install a resonator, you will typically need a wrench or socket set to remove the existing exhaust components, such as the muffler or pipe. You may also need a saw or pipe cutter to modify the exhaust pipe to fit the resonator properly. It is important to have the right tools and equipment to ensure a proper installation.
Can I install a resonator myself, or do I need professional help?
While it is possible to install a resonator yourself if you have some mechanical knowledge and the necessary tools, it is recommended to seek professional help. A professional mechanic will have the expertise and experience to ensure the resonator is installed correctly and does not interfere with the performance or functionality of the exhaust system.
280Z DD Project – Installing a resonator the quick way.
In conclusion, installing a resonator can greatly enhance the performance and sound of your vehicle’s exhaust system. By following the step-by-step guide provided in this article, you can confidently tackle this project on your own. Remember to gather all the necessary tools and materials, and to take your time to ensure a proper installation.
As you embark on this journey, it is important to approach it with patience and a willingness to learn. Installing a resonator may seem like a daunting task at first, but with the right knowledge and tools, it can be a rewarding and fulfilling experience. Not only will you be able to enjoy a more refined sound and improved performance from your vehicle, but you will also gain a sense of accomplishment knowing that you accomplished this task on your own.

By following the instructions provided in this article, you are well on your way to successfully installing a resonator. So, roll up your sleeves, gather your tools, and get ready to transform your vehicle’s exhaust system into something truly remarkable. Happy installing!