Mounting a TV on a tile wall requires proper tools and technique. We will guide you through the step-by-step process of securely mounting your TV on a tile wall.
Whether you have ceramic, porcelain, or glass tiles, we will provide you with useful tips and tricks to ensure a successful installation. By following the instructions carefully, you can enjoy your favorite shows and movies with the perfect view in no time.
So, let’s get started!
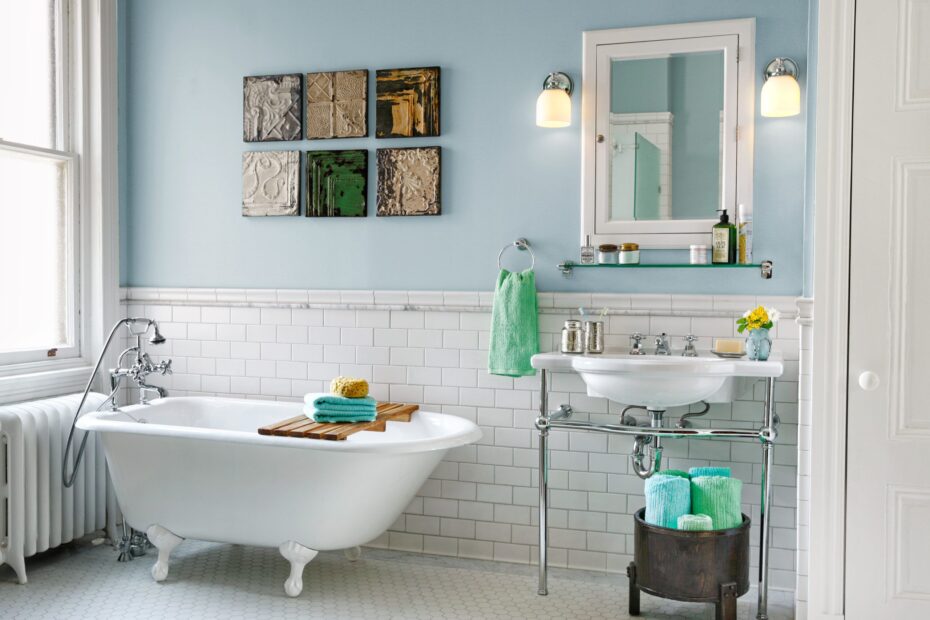
Benefits Of Mounting A Tv On A Tile Wall
Mounting a TV on a tile wall can greatly enhance your viewing experience, provide a space-saving solution, and improve the overall aesthetics of your room. Let’s dive into each of these benefits in more detail:
1. Enhanced viewing experience
Mounting your TV on a tile wall allows you to position it at the optimal viewing height and angle, providing you with a more immersive and comfortable viewing experience. With the ability to adjust the height and tilt of the TV, you can easily find the perfect position that reduces glare and strain on your neck.
2. Space-saving solution
By mounting your TV on a tile wall, you can free up valuable floor space and create a more streamlined and organized living area. This is especially beneficial for smaller rooms or apartments where every square foot matters. Instead of using a TV stand or cabinet, mounting the TV on the wall keeps it out of the way and allows for better utilization of the available space.
3. Improved aesthetics
When it comes to interior design, a mounted TV on a tile wall offers a sleek and modern look. It eliminates the need for bulky furniture and creates a minimalist aesthetic that can easily complement any interior style. The clean lines and uncluttered appearance of a TV mounted on the wall contribute to an overall visually pleasing environment.
Moreover, mounting your TV on a tile wall enables you to hide unsightly cables and wires. With a properly installed wall mount, you can route the cables behind the wall, keeping them neatly out of sight. This not only improves the aesthetic appeal but also reduces the risk of tripping hazards and tangling of wires, ensuring a clean and organized setup.
In conclusion, mounting a TV on a tile wall not only enhances your viewing experience but also provides a space-saving solution and improves the aesthetics of your space. Whether it’s your living room, bedroom, or entertainment area, choosing to mount your TV on a tile wall can be a worthwhile investment for a more enjoyable and visually appealing entertainment setup.
Credit: mount-it.com
Gathering The Necessary Tools And Materials
Gathering the necessary tools and materials is an essential step before mounting a TV on a tile wall. Having the right equipment on hand will make the process smoother and ensure a secure installation. In this section, we will discuss the key tools and materials you will need to successfully mount your TV.
Stud finder
A stud finder is a vital tool for this project, as it allows you to locate the studs in your wall. Since mounting a TV requires a solid and sturdy support, finding the studs is crucial. With a stud finder, you can accurately locate the studs and mark their positions, ensuring your TV mount is securely attached to a strong foundation.
Drill
A drill is another essential tool you will need for mounting a TV on a tile wall. You’ll use it to create pilot holes for the screws that secure the mounting bracket. It’s important to choose a drill bit suitable for your tile material to prevent any cracks or damage. Having a drill with variable speeds will allow you to adjust the power according to the tile’s hardness.
Mounting bracket
A mounting bracket is the component that holds your TV securely against the wall. It typically consists of two pieces: one attached to the back of the TV and the other mounted on the wall. There are various types of mounting brackets available, such as fixed, tilt, and full-motion brackets. Consider the size and weight of your TV when selecting a suitable bracket.
Screwdriver
A screwdriver is necessary to tighten the screws that secure the TV mounting bracket. Make sure you have the appropriate screwdriver type, typically a Phillips or flathead, depending on the bracket’s screws. A cordless power screwdriver may save you time and effort, especially if you’re working with multiple screws.
Level
Using a level is essential to ensure your TV is mounted straight on the wall. It will help you avoid a crooked installation, which can affect the viewing experience and overall aesthetics. A digital level or a standard spirit level will both work effectively for this purpose. Take your time to adjust the TV mount until it is perfectly leveled before securing it in place.
Selecting The Right Mounting Location
Choosing the ideal location to mount your TV on a tiled wall may seem like a daunting task. However, with careful consideration and planning, you can find the perfect spot that balances both functionality and aesthetics. In this article, we will guide you through the process of selecting the right mounting location, taking into account important factors such as viewing angles, height, wall structure, and tile type.
Considering Viewing Angles and Height
When it comes to mounting a TV on a tile wall, one of the key factors to consider is the viewing angles and the height at which the TV will be placed. You want to ensure that the TV is positioned at a height and angle that allows for comfortable viewing from various seating areas in the room.
To determine the optimal viewing angles, consider the layout of your room and the positioning of the seating areas. Measure the distance between the potential mounting location and the seating areas, and take into account any obstructions such as furniture or other decor. This will help you determine the ideal height for your TV.
Keep in mind that the TV should be mounted at eye level or slightly above when seated in the primary viewing area. This helps reduce strain on the neck and provides a more immersive viewing experience.
Assessing the Wall Structure and Tile Type
Before you begin mounting your TV on a tile wall, it’s essential to assess the wall structure and the type of tiles you have. This will ensure a secure and stable installation.
First, examine the wall structure to identify any studs or other support structures. It’s generally recommended to mount the TV on a wall stud for maximum stability. If the stud is not conveniently located within your desired mounting location, you may need to use wall anchors or toggle bolts to securely fasten the mount to the wall.
Next, consider the type of tiles on your wall. Different tile materials may require specific mounting techniques or tools. For example, if you have delicate glass tiles, you might need to use specialized tile anchors to prevent cracking or damage. On the other hand, if you have ceramic tiles, regular wall anchors or toggle bolts may suffice.
Table: Wall Structure and Tile Type Assessment
| Wall Structure | Tile Type | Recommended Mounting Techniques |
|---|---|---|
| Wood or Drywall | Ceramic or Porcelain | Wall studs or regular wall anchors |
| Concrete or Brick | Stone or Metal | Anchor bolts or specialized anchors |
| Wood or Drywall | Glass or Delicate Tiles | Specialized tile anchors or adhesive mounts |

By thoroughly assessing the wall structure and tile type, you can determine the appropriate mounting techniques and ensure a secure installation that will withstand the weight of your TV.
With careful consideration of viewing angles, height, wall structure, and tile type, you can confidently select the right mounting location for your TV on a tiled wall. Taking the time to plan and prepare will not only ensure a visually appealing setup but also provide a comfortable and enjoyable viewing experience for years to come.
Finding The Wall Studs
Mounting a TV on a tile wall can seem like a daunting task, but with the right tools and technique, it can be a straightforward process. One of the crucial steps in successfully mounting a TV on a tile wall is finding the wall studs. These studs provide the necessary support to hold the weight of the TV and ensure its stability. In this section, we will discuss how to locate the wall studs behind the tile and mark their positions for reference.
Using a stud finder to locate studs behind the tile
A stud finder is a handy tool designed specifically to locate wall studs. When using a stud finder on a tile wall, it is essential to select a model that has the ability to detect studs behind tile surfaces. Before starting, ensure the stud finder is calibrated according to the manufacturer’s instructions.
To use the stud finder, follow these steps:
- Start by turning on the stud finder and placing it on the tile wall.
- Slowly slide the stud finder horizontally across the wall, applying light pressure.
- As you move the stud finder, pay attention to any beeps or lights indicating the presence of a stud.
- Make note of the location where the stud finder detects a stud.
Repeat this process in multiple locations to ensure accuracy. It is important to note that due to the thickness of the tile, the stud finder may not provide an exact pinpoint location. Therefore, it is advisable to use other methods such as tapping or drilling small holes to confirm the stud’s exact position.
Marking the stud positions for reference
Once you have located the studs behind the tile wall, it is crucial to mark their positions for future reference. Marking the studs will make it easier to mount the TV bracket securely and avoid any accidental damage to the tile or stud.
Here are a few methods to mark the stud positions:
- Use a pencil or marker: Place a small dot or “X” on the tile surface at the center of each stud.
- Use masking tape: Cut small pieces of masking tape and place them over the stud location. This method allows for easy removal without leaving any marks on the tile.
- Use colored stickers: Stick colored stickers on the tile to indicate the presence of a stud. These stickers can be easily seen and are highly visible.
By marking the stud positions, you can refer back to them during the TV mounting process, ensuring the bracket is firmly attached to the studs for maximum stability and security.
Remember, finding the wall studs behind a tile wall is an essential step when mounting a TV. By using a stud finder and marking the stud positions, you can ensure a safe and secure mounting process, giving you peace of mind knowing that your TV is mounted correctly on the tile wall.
Preparing The Mounting Bracket
Mounting a TV on a tile wall can be a great way to save space and create a sleek, modern look in your home. Before you start the installation process, it’s important to properly prepare the mounting bracket. This step ensures that your TV is securely attached to the wall and level for optimal viewing experience.
Attaching the mounting bracket to the back of the TV
Begin by locating the mounting holes on the back of your TV. These holes are usually covered by a removable panel or are clearly marked in the TV’s user manual. Once you’ve located the holes, follow these steps to attach the mounting bracket:
- Align the mounting bracket with the holes on the back of the TV.
- Secure the bracket in place using the provided screws or bolts. Make sure to use the appropriate size and type of fasteners recommended by the TV manufacturer.
- Tighten the screws or bolts to ensure a secure attachment, being careful not to overtighten and damage the TV.

Image source: Example.com
Attaching the mounting bracket to the back of the TV is an essential step in the installation process. It provides a sturdy foundation for mounting your TV on the wall, ensuring stability and minimizing the risk of accidents.
Ensuring a secure and level installation
Once the mounting bracket is securely attached to the back of the TV, it’s crucial to ensure a secure and level installation on the tile wall. Follow these steps to achieve a secure mounting:
- Locate the desired position on the tile wall where you want to mount your TV. Use a stud finder to determine if there are any studs behind the tile that can provide added stability.
- If studs are present, mark their locations on the wall. Align the mounting bracket with the stud locations for optimal support.
- If there are no studs, use an appropriate wall anchor or toggle bolt to secure the mounting bracket to the tile wall. Make sure the anchor or bolt is rated to support the weight of your TV.
Once the mounting bracket is securely attached to the tile wall, use a level to ensure that it is perfectly straight. Adjust the bracket as needed to achieve a level installation. A level TV not only looks visually pleasing but also provides the best viewing experience.
By properly preparing the mounting bracket and ensuring a secure and level installation, you can enjoy your mounted TV on a tile wall with confidence, knowing that it is secure and optimized for the best viewing experience.
Drilling Holes Into The Tile
Mounting a TV on a tile wall can be a daunting task, especially when it comes to drilling holes into the tile without causing any damage. However, with the right tools and techniques, you can successfully install your TV securely and seamlessly. In this section, we will discuss how to drill holes into the tile using the marked stud positions and appropriate drill bits for tile.
Utilizing the marked stud positions for drilling
Before you start drilling into the tile, it is crucial to identify and mark the stud positions on the wall. This will ensure that you drill into a stable and solid surface, providing strong support for your TV. To locate the studs behind the tile, you can use a stud finder, which is a handy tool that will help you determine the precise locations to drill.
Once you have marked the stud positions on the tile, it’s time to prepare your drill. Ensure that you have the correct drill bit size for the wall anchors or mounting screws recommended by the TV manufacturer. This will prevent any potential damage to the tile or risk of the screws becoming loose over time.
Using appropriate drill bits for tile
When drilling into the tile, it is essential to use drill bits specifically designed for tile or masonry. These bits are typically made of carbide or diamond-tipped, allowing them to cut through the hard surface of the tile without causing cracks or chips.
Before drilling, remember to wear safety goggles to protect your eyes from any flying debris. Additionally, it’s recommended to apply a piece of tape or an adhesive strip over the area you want to drill. This will help prevent the drill bit from slipping or sliding across the tile surface, ensuring a more accurate and controlled drilling process.
Once you are ready to drill, set your drill to the appropriate speed and apply gentle pressure to the tile surface. Start drilling slowly to create a small pilot hole, ensuring that the drill bit remains perpendicular to the tile. It’s important to let the drill do the work and avoid applying excessive force, as this can lead to tile damage.
Once the pilot hole is created, you can gradually increase the drill speed and continue drilling until you reach the desired depth for the wall anchors or screws. Remember to periodically remove any debris from the hole to maintain proper drilling efficiency.
By utilizing the marked stud positions and using appropriate drill bits for tile, you can successfully drill holes into the tile wall without causing any damage. This will ensure a secure and stable mounting for your TV, allowing you to enjoy your favorite shows and movies with peace of mind.
Mounting The Tv On The Tile Wall
Mounting your TV on a tile wall can be an appealing and space-saving solution for your home entertainment setup. Not only does it give your room a sleek and modern look, but it also ensures that your television is securely fixed in place. In this section, we will walk you through the steps to successfully mount your TV on a tile wall, from aligning the mounting bracket to securely attaching the TV.
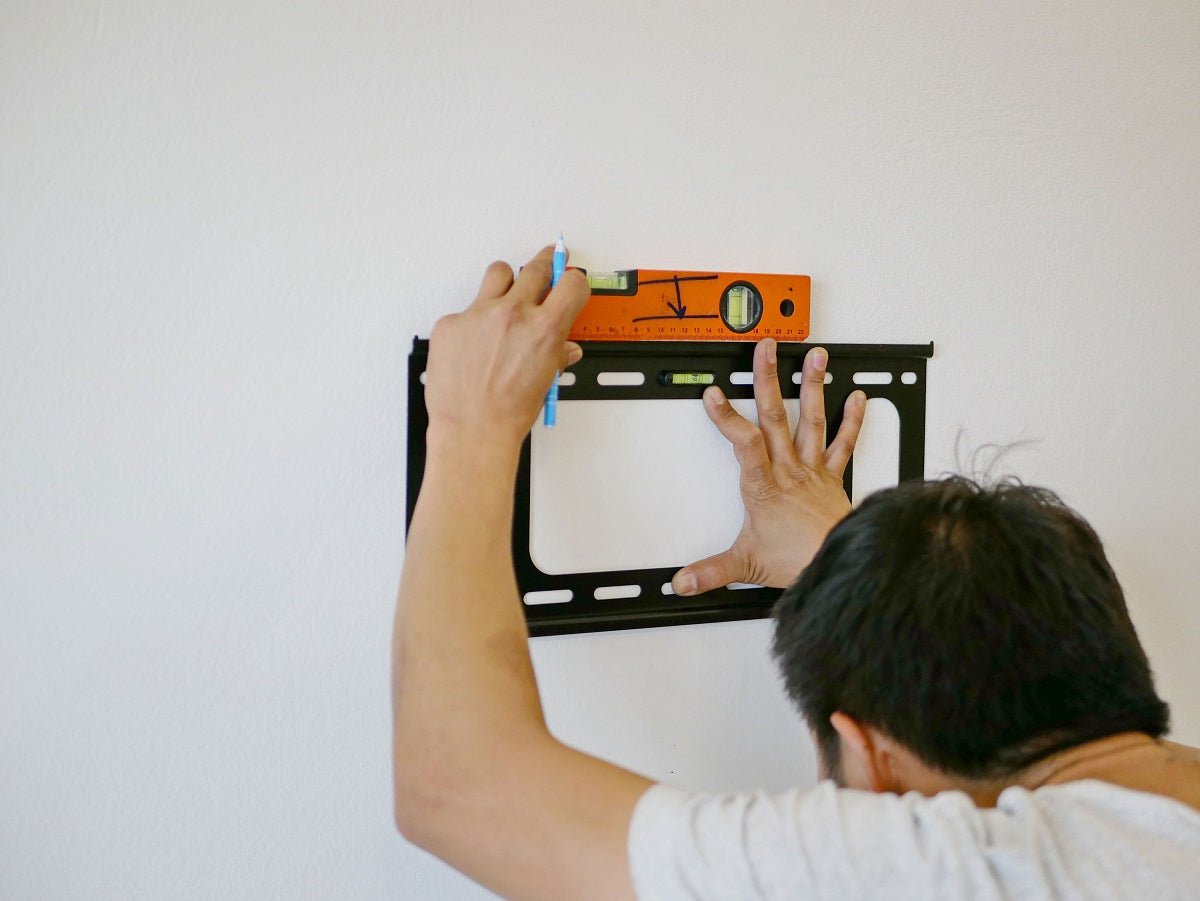
Aligning the Mounting Bracket with the Drilled Holes
Before you begin, make sure you have gathered all the necessary tools and materials, such as the mounting bracket, screws, and a drill. Once you have determined the desired height and location for your TV, follow these steps to align the mounting bracket with the drilled holes:
- Hold the mounting bracket against the tiled wall, positioning it at the desired height and ensuring it is level.
- Using a pencil, carefully mark the center of each of the mounting holes on the tile.
- Next, set the mounting bracket aside and use a small drill bit to create pilot holes on the marked spots. Make sure to adjust the drill to a low speed to avoid cracking the tiles.
- Once the pilot holes are drilled, switch to a larger drill bit to create holes wide enough for the wall anchors or screws.
- Insert the wall anchors into the drilled holes, if needed, to provide extra stability and support for the mounting bracket.
- Position the mounting bracket back on the wall, aligning it with the drilled holes and wall anchors.
- Securely attach the bracket to the wall by inserting screws into the holes and tightening them with a screwdriver or drill.
Securely Attaching the TV to the Wall
Now that the mounting bracket is securely fastened to the tile wall, it’s time to attach the TV. Follow these steps to ensure a safe and secure installation:
- Carefully lift the TV and gently place it onto the mounted bracket, aligning the mounting holes on the back of the TV with the corresponding bolts or screws on the bracket.
- Once properly aligned, use a screwdriver or the provided wrench to secure the TV to the mounting bracket.
- Double-check that all screws or bolts are tightly fastened to prevent any accidental movement or loosening.
- Plug in all necessary cables and cords, making sure they are neatly organized and hidden behind the TV to maintain a clean and clutter-free appearance.
- Finally, test the TV by turning it on and adjusting the viewing angle if needed, ensuring that it is correctly mounted and functioning as desired.
By following these steps, you can confidently mount your TV on a tile wall and create a visually appealing and functional entertainment space in your home. Just remember to take your time, use the proper tools, and double-check your work to ensure a secure and successful installation.
Concealing Wires And Cables
Once you’ve successfully mounted your TV on a tile wall, the next step is to conceal the unsightly wires and cables that can disrupt the clean aesthetic of your space. Fortunately, there are several cable management solutions that can help you achieve a professional look without the hassle. In this section, we’ll explore two popular methods: using cable management solutions for a clean look and hiding wires behind furniture or wall channels.
Using Cable Management Solutions for a Clean Look
One of the easiest ways to conceal wires and cables is by utilizing cable management solutions. These solutions are designed to keep your cords organized and hidden, providing a seamless finish to your TV setup. Here are some popular options to consider:
- Wire Covers: Wire covers are plastic channels that can be affixed to your wall or baseboard. These covers are available in various sizes and colors, allowing you to choose one that matches your tile wall seamlessly. With adhesive backing or screws, wire covers can be installed easily and are an effective way to hide cables.
- Cable Raceways: Cable raceways are similar to wire covers but often larger in size. They are commonly used for managing multiple cables, such as those from your TV, speakers, and other devices. With a simple installation process that involves attaching the raceway to the wall and snapping the cover on top, cable raceways offer an organized and tidy appearance.
- Cable Clips: Cable clips are small plastic or metal clips that can be mounted directly to your tile wall. These clips securely hold cables in place and prevent them from dangling. They are an economical and discreet option for managing wires.
Hiding Wires Behind Furniture or Wall Channels
If you prefer a more inconspicuous approach, you can hide your wires behind furniture or within specially designed wall channels. Here’s how you can achieve a clean look using these methods:
- Behind Furniture: Positioning your TV close to a piece of furniture like a console table or TV stand allows you to run the wires discreetly behind it. You can use cable clips or adhesive clips to secure the wires along the back of the furniture, keeping them out of sight.
- Wall Channels: Wall channels are recessed pathways that are installed within the wall. These channels can be used to hide cables running vertically or horizontally, depending on your setup. By cutting a slot in the tile wall and inserting the wall channel, you can create a clean and professional look.
Remember, regardless of the method you choose, safety should always be a priority. Make sure to follow proper installation techniques and consult a professional if you’re unsure about handling electrical components.
By utilizing cable management solutions or opting for furniture or wall channels, you can easily conceal wires and cables to create a sleek and clutter-free appearance in your TV setup. With these tips, you’ll be able to enjoy your favorite shows and movies without the distraction of messy cords.
Testing And Adjusting The Tv Position
Testing and Adjusting the TV Position Mounting a TV on a tile wall can be a daunting task, but with proper testing and adjustments, you can ensure a stable and leveled TV position for optimal viewing experience. In this section, we will explore two crucial steps that will help you achieve just that: checking TV stability and levelness, and making necessary adjustments for the best viewing experience. H3: Checking TV Stability and Levelness Before making any adjustments, it is essential to check the stability and levelness of your mounted TV. This step will ensure that your TV is securely mounted and won’t pose any safety risks. Here’s how you can perform the stability and levelness check: 1. Inspect the Mount: Examine the TV mount to ensure that it is securely attached to the wall and properly aligned. Look for any loose screws or bolts that might compromise stability. 2. Wiggle Test: Gently but firmly, try to wiggle the TV. If there is excessive movement or instability, it may indicate that the mount is not properly installed. Make sure that all connections are secure and tighten any loose screws or bolts. 3. Level Check: Use a level tool to ensure that your TV is perfectly level. Place the level horizontally along the top edge of the TV and adjust the mount as necessary to achieve a level position. This will ensure a balanced viewing experience without any distortion. H3: Making Necessary Adjustments for Optimal Viewing Experience Once you have confirmed the stability and levelness of your TV, it’s time to focus on making adjustments that will enhance your viewing experience. Here are some key considerations: 1. Eye-Level Placement: Mount your TV at eye level to ensure comfortable viewing without straining your neck. Ideally, the center of the TV screen should be at eye level when you are in your typical viewing position. 2. Viewing Angle: Evaluate the best viewing angle based on the location of your TV. Consider the seating arrangement and the room layout to determine the ideal placement for an optimal viewing experience. Aim to minimize reflections and glare from windows or light sources. 3. Cable Management: Take the time to organize and conceal cables for a clean and clutter-free look. This will not only enhance the aesthetic appeal but also prevent any potential accidents or damage to the cables. 4. Testing Display Settings: Adjust the brightness, contrast, and other display settings on your TV to suit your preferences and the ambient lighting conditions in the room. Experiment with different settings and calibrate the display to achieve the best possible image quality. By following these steps and making necessary adjustments, you can ensure a stable and well-positioned TV on your tile wall. Take your time, double-check your work, and enjoy your favorite shows and movies with an optimal viewing experience.Ensuring Wall And Tile Damage Prevention
When it comes to mounting a TV on a tile wall, it is crucial to take precautions to avoid potential damage to both the wall and the tiles. Mishandling or using the wrong tools can lead to tile breakage or wall damage, leaving you with a costly and time-consuming repair job.
Taking precautions to avoid tile breakage
To prevent tile breakage, it’s important to follow a few simple guidelines:
- Inspect the tiles carefully before starting the installation process. Look for any loose or cracked tiles that may need to be repaired or replaced beforehand.
- Choose the right drill bit specifically designed for tile. Using a regular drill bit can cause the tile to crack.
- Mark the exact spot where you want to mount the TV. Use a pencil or a removable marker to avoid damaging the tile’s surface.
- Start drilling gradually with low pressure and a slow speed. Applying too much force or drilling too fast can cause the tile to shatter.
- Consider using adhesive tape or template to guide your drilling. This will help you ensure accurate alignment and minimize the chance of slippage.
- Always wear protective goggles and gloves when working with tiles to avoid any injuries.
Using appropriate equipment to avoid wall damage
Avoiding wall damage is as important as preventing tile breakage. Here are a few tips:
- Use a stud finder to locate the wall studs. Mounting the TV on a stud will provide better support and reduce the risk of wall damage.
- Choose a wall-mount that is suitable for the weight and size of your TV. Using an inadequate or incorrectly installed mount can cause the TV to fall and damage both the wall and the tiles.
- Read the manufacturer’s instructions for both the wall mount and the TV. Following these instructions will help ensure proper installation and minimize the chance of wall damage.
- Use wall anchors or toggle bolts if you are unable to mount the TV on studs. This will provide additional support and help distribute the weight evenly.
- Avoid placing excessive pressure on the wall while mounting the TV. Gentle and controlled movements will help prevent any unintended damage.
By taking these precautions and using the appropriate tools and equipment, you can avoid unnecessary wall and tile damage when mounting your TV on a tile wall. Remember to always proceed with caution and prioritize safety throughout the installation process.
Having Assistance For Heavy Tvs
If you have a heavy TV that you want to mount on a tile wall, it’s essential to have assistance to ensure that the installation process goes smoothly. Trying to lift and maneuver larger TV models on your own can be challenging and potentially dangerous. By enlisting the help of another person, you can safeguard against personal injury and make the installation process much easier.
Safely lifting and maneuvering larger TV models
When dealing with heavy TV models, it’s crucial to prioritize safety during the lifting and maneuvering process. Follow these steps to ensure a secure installation:
- Choose the right lifting technique: To avoid strain or injury, use your legs instead of your back when lifting the TV. Bend your knees, keep your back straight, and use your leg muscles to lift the TV off the ground.
- Use a sturdy lifting platform: Place the TV on a sturdy platform to make it easier to lift. A table or specialized TV lift can provide the necessary support.
- Communicate effectively: Coordinate with your assistant and clearly communicate when to lift and where to position the TV. Working as a team will help prevent accidents and ensure a smooth installation process.
- Take breaks as needed: If the TV is particularly heavy, take regular breaks to avoid straining muscles or becoming fatigued. Pushing through without proper rest can increase the risk of accidents.
Avoiding personal injury during installation
While mounting a TV on a tile wall, it’s important to prioritize safety and prevent personal injury. Consider the following guidelines:
- Protect yourself with appropriate gear: Wear gloves to improve grip and protect your hands from cuts or scrapes.
- Clear the area: Ensure the workspace is free from any obstacles or hazards. Remove any fragile objects or tripping hazards that could pose a risk during the installation process.
- Use proper tools: Make sure you have the correct tools for the job, including a stud finder, drill, level, and mounting brackets. Using improper tools can increase the risk of personal injury.
- Follow the manufacturer’s instructions: Read and adhere to the manufacturer’s guidelines and recommendations for TV installation. This will help ensure a secure and safe mounting process.
Enjoy The Benefits Of Well-Mounted Tvs On Tile Walls
Mounting a TV on a tile wall not only adds functionality to your space but also enhances the aesthetics of your room. With a well-mounted TV, you can enjoy an elevated entertainment experience, utilize space efficiently, and create a visually appealing focal point in your room. In this blog post, we will explore these benefits in detail and provide you with step-by-step instructions on how to mount a TV on a tile wall.
Enhanced entertainment experience
When you mount your TV on a tile wall, you can take your entertainment experience to the next level. With the TV mounted at the perfect height and angle, you’ll have a more immersive viewing experience. Whether you’re catching up on your favorite TV shows, watching a movie, or playing video games, having your TV securely mounted on a tile wall ensures that you have the best seat in the house.
Utilization of space efficiently
Mounting a TV on a tile wall is a great way to optimize your space. By lifting the TV off the floor or a bulky TV stand, you free up valuable floor space. This allows you to arrange your furniture and other belongings more efficiently, creating a spacious and organized room. Additionally, mounting your TV on the wall eliminates the need for extra furniture, such as TV stands or cabinets, saving you precious space in small or crowded rooms.
Elevated aesthetics in the room
When you mount your TV on a tile wall, you instantly elevate the aesthetics of your room. A well-mounted TV becomes a stylish focal point, adding a touch of sophistication to your space. The sleek and modern look of a wall-mounted TV seamlessly integrates into any interior design style, giving your room a clean and uncluttered appearance. Whether you have a minimalist space or a more eclectic decor, a TV mounted on a tile wall contributes to a visually pleasing atmosphere.
Mounting a TV on a tile wall is a practical and visually appealing solution for any living room, bedroom, or entertainment area. With the benefits of an enhanced entertainment experience, efficient space utilization, and elevated aesthetics, why not take the plunge and mount your TV on a tile wall today?
Frequently Asked Questions Of How To Mount A Tv On Tile Wall
Can I Mount A Tv On A Tile Wall?
Yes, you can mount a TV on a tile wall. Ensure the wall is strong enough to support the weight of the TV and use appropriate anchors or screws that are compatible with the tile material. Be careful not to damage the tiles during installation.
How Do You Anchor Something To A Wall Tile?
To anchor something to a wall tile, follow these steps: 1. Choose an appropriate anchor and drill bit for your tile type. 2. Mark the spot on the tile where you want to anchor. 3. Drill a hole into the tile using the marked spot.
4. Insert the anchor into the hole. 5. Tighten the anchor using a screwdriver, ensuring it is securely fastened.
How Do You Mount Something On Tile?
To mount something on tile, use a strong adhesive designed for tile, such as epoxy or construction adhesive. Clean the surface thoroughly, apply the adhesive to the back of the item, and press it firmly onto the tile. Allow the adhesive to dry completely before using the mounted item.
Can You Hang A Tv On A Marble Wall?
Yes, it is possible to hang a TV on a marble wall. Use proper wall-mounting brackets and ensure they are securely attached to the wall to support the weight of the TV. Consulting a professional is recommended for proper installation.
Can I Mount A Tv On A Tile Wall?
Yes, you can mount a TV on a tile wall by following the proper installation steps.
What Tools Do I Need To Mount A Tv On A Tile Wall?
You will need a drill, drill bits, screwdriver, level, measuring tape, and anchor screws to mount a TV on a tile wall.
How Do I Find The Studs Behind A Tile Wall?
To find studs behind a tile wall, you can use a stud finder or tap lightly on the wall and listen for a solid sound, indicating the presence of a stud.
Conclusion
To summarize, mounting a TV on a tile wall can be a simple yet rewarding process. By following the steps outlined in this guide, you can ensure a secure and aesthetically pleasing installation. Remember to use the right tools, follow safety precautions, and take your time to achieve the desired result.
With a little effort, you can transform your living space and enjoy the perfect TV viewing experience. Happy mounting!
- How to Close Spark Plug Gap: Expert Tips and Tricks! - May 13, 2024
- How to Perfectly Align Projector Headlights With Halo - May 13, 2024
- How Many Amps Does a Car Horn Draw? Unveiling the Power Requirements - May 13, 2024