To test a generator on a tractor, use a multimeter to check voltage output and continuity of connections. Make sure the generator is properly grounded.
Then start the tractor and measure the voltage output to ensure it falls within the specified range. Properly testing a generator on a tractor is essential to ensure it is functioning correctly and providing the necessary electrical power for the equipment.
Regular testing can help prevent unexpected breakdowns and ensure optimal performance in the field. By following these steps, you can easily troubleshoot any issues with the generator and address them promptly, keeping your tractor running smoothly during operation.
Inspecting The Generator
When it comes to ensuring your tractor’s generator is functioning properly, conducting thorough inspections is crucial. By inspecting various components, you can identify any potential issues and address them before they cause major problems. Let’s start by examining the generator to ensure it’s in good working condition.
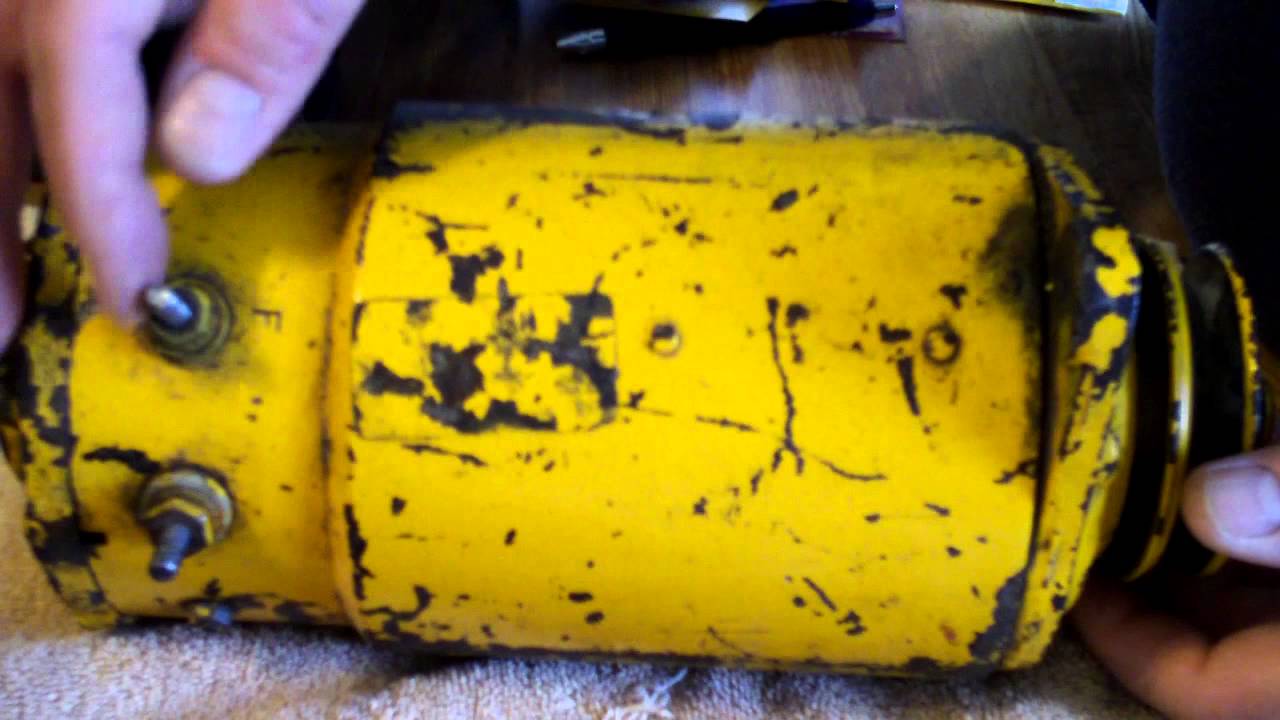
Checking For Damage
Thoroughly examine the generator for any signs of physical damage. Look for cracks, dents, or any other visible defects on the exterior casing. Noticing any damage can indicate potential problems with the internal components, and prompt action can prevent further issues. So, ensure the exterior of the generator is free from any visible damage.
Inspecting Wiring Connections
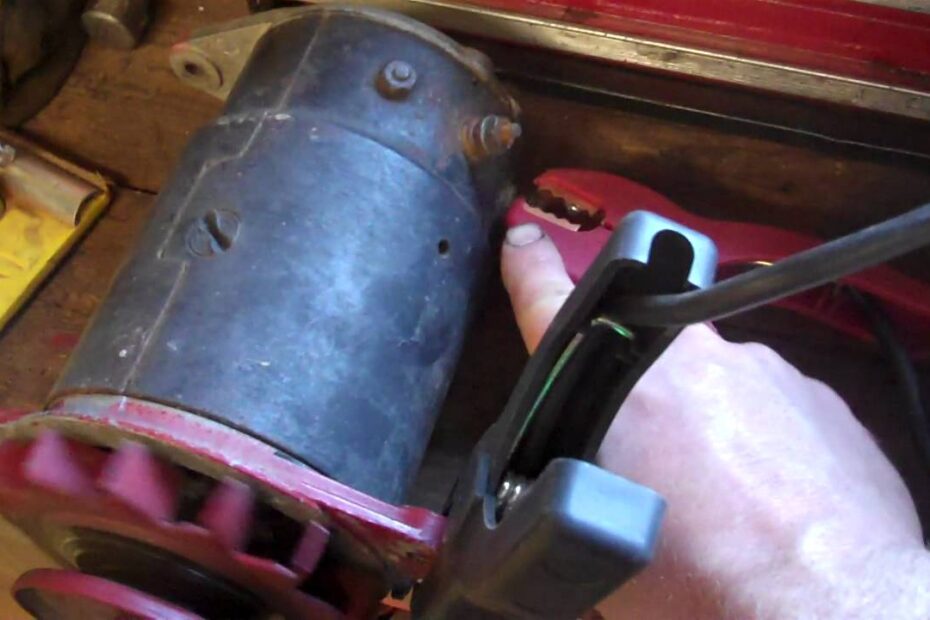
Next, inspect the wiring connections of the generator. Check each connection carefully to ensure they are secure and free from corrosion. Any loose or corroded connections can impede the flow of electricity, resulting in generator malfunction. Take note of any wiring issues and address them promptly to maintain the generator’s proper functionality.
Credit: www.wheelhorseforum.com
Testing The Generator Output
To test the generator output on a tractor, you can follow a few simple steps. First, start the tractor and let it run for a few minutes. Then, use a voltmeter to check the voltage output of the generator. Finally, compare the measured voltage with the specifications provided by the manufacturer to ensure the generator is functioning properly.
Preparing The Testing Equipment
Get multimeter, safety gloves, and manual.
- Wear safety gloves to protect against shocks.
- Refer to the tractor manual for specific instructions.
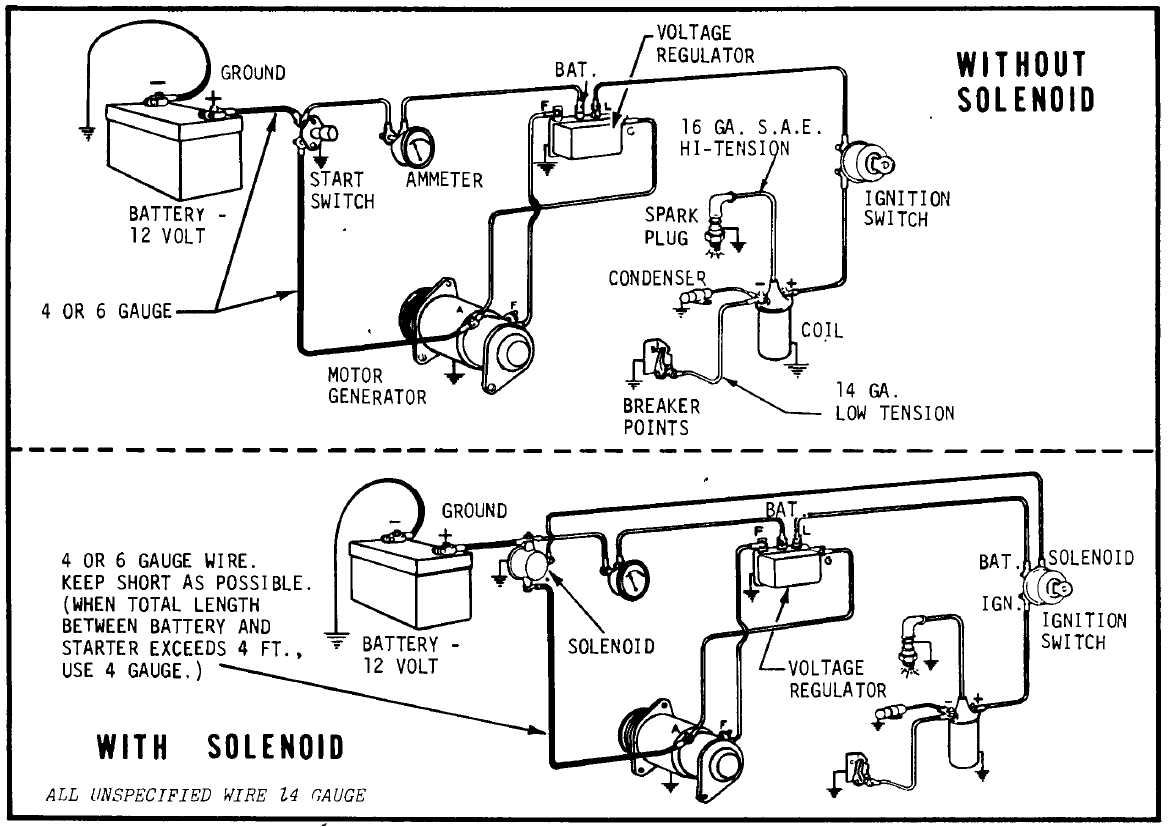
Connecting The Testing Equipment
Locate the generator and its terminals.
- Identify the positive and negative terminals.
- Connect multimeter’s red lead to the positive terminal.
- Connect multimeter’s black lead to the negative terminal.
Running The Generator
Start the tractor engine and engage the generator.
| Action | Result |
|---|---|
| Measure voltage output | Should be within specified range (refer manual). |
| Measure current output | Ensure it meets the required amp rating. |
Checking Voltage And Amperage
When testing a generator on a tractor, it is crucial to check both the voltage and amperage output to ensure it is functioning correctly. By measuring the voltage and amperage, you can determine if the generator is providing the necessary electrical power for the tractor to operate efficiently.
Measuring Voltage
To test the voltage output of the generator, use a multimeter set to the voltage setting and connect the leads to the generator’s output terminals. Make sure the tractor is running at the required RPM and check the multimeter reading to ensure it falls within the specified voltage range for the tractor’s electrical system.
Measuring Amperage
To measure the amperage output of the generator, switch the multimeter to the amperage setting and connect it in series with the generator’s output wire. Start the tractor and monitor the multimeter for the amperage reading. Ensure that the reading matches the tractor’s specifications for optimal performance.
Credit: www.netlink.net
Testing The Regulator

In order to ensure your tractor generator is working properly, one key component to test is the voltage regulator. This small but vital component controls the amount of charge the generator produces, ensuring your tractor’s electrical system works as it should. Testing the regulator involves checking its function and, if necessary, making adjustments to ensure optimal performance.
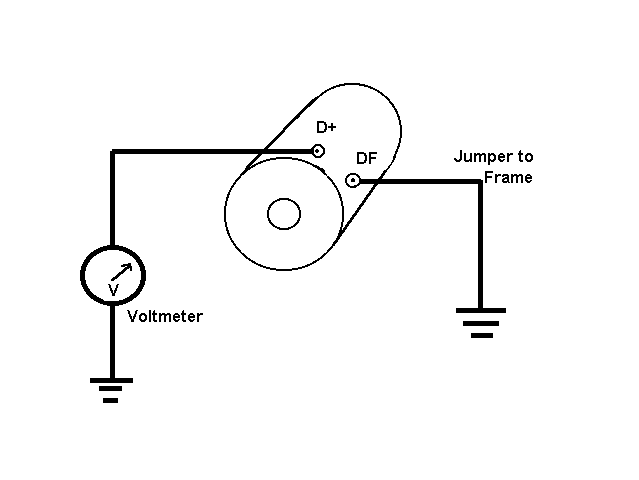
Checking The Voltage Regulator
To begin, you’ll need a multimeter to check the voltage output of the generator when the tractor is running. First, start the tractor and allow it to warm up. Then set the multimeter to the DC voltage setting and attach the red lead to the positive terminal of the generator and the black lead to the negative terminal. The multimeter should read between 13.8 and 14.4 volts, indicating the regulator is functioning properly. If the reading is higher or lower, further testing or adjustment is necessary.
Adjusting The Regulator
If the voltage reading is outside the recommended range, adjustments to the regulator may be needed. Begin by locating the adjustment screw on the regulator and carefully turning it to bring the voltage within the recommended range. It’s important to make small adjustments and retest the voltage output each time until the optimal range is achieved. Once the correct voltage output is attained, securely tighten the adjustment screw to ensure stability and proper function.
Troubleshooting Common Generator Issues
Ensure efficient tractor generator operation by conducting regular testing for common issues. Using a multimeter, check for proper voltage output and test the generator’s continuity. Performing these tests will help you identify and resolve any potential problems, ensuring optimal performance.
Identifying Generator Problems
If you find that your tractor’s generator is not functioning properly, it’s important to first identify the source of the problem. This will help you troubleshoot and resolve the issue effectively. Here are some steps to help you identify common generator problems:
- Check for loose or damaged connections: Inspect the wiring and connectors to ensure they are securely fastened. Loose or corroded connections can disrupt the flow of electricity and cause generator malfunctions.
- Look for visible damage: Examine the generator for any visible signs of damage, such as frayed wires or worn-out components. Physical damage can indicate the need for replacement or repair.
- Use a multimeter: A multimeter is a handy tool for testing electrical circuits. By using a multimeter, you can measure the voltage output of the generator and determine if it is within the recommended range.
- Observe warning lights or unusual noises: If your tractor has warning lights or if you notice any strange noises coming from the generator, it could be an indication of an underlying issue. Take note of these symptoms for further investigation.
Inspecting And Cleaning Components
Regular inspection and cleaning of generator components are essential to ensure optimal performance. Here’s what you need to do:
- Inspect the generator’s casing: Check for any cracks or damage to the casing. Cracks can allow moisture and debris to enter, which can lead to corrosion and other issues. If necessary, repair or replace the casing.
- Remove dust and debris: Clean the generator by gently removing any dust or debris that may have accumulated on the exterior. This will prevent overheating and improve overall efficiency.
- Clean the air filter: The air filter prevents dirt and debris from entering the generator. Remove the air filter, clean it, and replace if necessary. A clogged air filter can restrict airflow and affect the performance of the generator.
- Inspect the brushes: The brushes are responsible for transferring current within the generator. Check for wear and tear, such as worn-out or damaged brushes. Replace them if needed.
Replacing Faulty Parts
If you have identified a faulty component within your tractor’s generator, it may be necessary to replace the part. Here are the steps to take:
- Consult the manufacturer’s manual: Refer to the manual for guidance on identifying and replacing specific parts of the generator. The manual will provide detailed instructions and specifications for replacement parts.
- Purchase the required part: Once you have identified the faulty component, source a replacement from a reputable supplier. Ensure the replacement part matches the specifications outlined in the manual.
- Follow proper installation procedures: Carefully follow the installation instructions provided in the manual. Improper installation can lead to further damage or malfunction of the generator.
- Test the generator: After replacing the faulty part, test the generator to confirm that the issue has been resolved. Use a multimeter to measure voltage output and ensure it is within the specified range.
Credit: m.youtube.com
Frequently Asked Questions On How To Test A Generator On A Tractor
How Do I Know If My Tractor Generator Is Working?
To check if your tractor generator is working, start the engine and see if the lights and electrical components are functioning. Listen for any unusual noises, such as grinding or clicking sounds. If the generator is not producing power, consider having it inspected by a professional.
How Do You Test If A Generator Is Working?
To test if a generator is working, start it up and check if it produces electricity. Plug in a device to see if it powers on.
How Do You Check The Power Of A Generator?
To check the power of a generator, use a multimeter to measure the voltage output. Make sure the generator is running at full capacity. Calculate the power by multiplying the voltage reading by the current. Ensure the generator is properly maintained for accurate readings.
How Do You Test A Voltage Regulator On A Generator?
To test a voltage regulator on a generator, follow these steps: 1. Start the generator and let it run. 2. Use a multimeter to measure the voltage output. 3. Compare the measured voltage with the generator’s specifications. 4. If the voltage is outside the range, the voltage regulator may be faulty.
5. Consult a professional for further troubleshooting or replacement.
Conclusion
Testing a generator on a tractor is crucial for ensuring its reliability. Regular maintenance and testing can help prevent breakdowns and prolong the life of your equipment. By following the steps outlined in this post, you can confidently assess and troubleshoot the generator on your tractor, ensuring it’s always ready for use when needed.
- How Much Does It Cost to Fix a Sunroof: Expert Pricing Guide - May 18, 2024
- How Much is Oil Change at VW Dealer: Discover Cost-Saving Options Now! - May 18, 2024
- How to Calibrate Your Fuel Gauge: Step-by-Step Guide - May 18, 2024