To tighten a serpentine belt, locate the tensioner pulley and use a wrench to apply pressure and adjust it accordingly. A serpentine belt is a vital component in the engine that drives multiple peripheral devices and systems.
Over time, it may become loose or worn out, causing a squealing noise or affecting the operation of these accessories. Being able to tighten the serpentine belt can help maintain engine performance and prevent further damage to the belt or other components.
We will discuss step-by-step instructions on how to tighten a serpentine belt effectively. So, let’s dive in and learn the process of tightening a serpentine belt like a pro.
Understanding The Serpentine Belt System
When it comes to understanding the inner workings of your vehicle, one component that often gets overlooked is the serpentine belt system. This vital system is responsible for driving a wide range of auxiliary components in your engine, including the alternator, power steering pump, and air conditioning compressor. Without a properly functioning serpentine belt, these components would not be able to operate effectively, leading to potential problems and malfunctions in your vehicle.
Importance of the Serpentine Belt
The serpentine belt plays a crucial role in the overall performance and functionality of your vehicle. Serving as the main drive belt, it enables power from the engine to be transmitted to various components throughout the engine compartment. This ensures that these components can operate efficiently and effectively, keeping your vehicle running smoothly on the road.
One of the key benefits of the serpentine belt system is its ability to simplify and streamline the overall operation of your engine. Unlike traditional multiple belt systems, which required separate belts for each component, the serpentine belt system incorporates all the necessary functions into a single belt. This not only reduces complexity but also improves reliability and performance.
Components of the Serpentine Belt System
The serpentine belt system consists of several important components that work together to ensure smooth operation. These components include:
| Component | Function |
|---|---|
| Drive Belt | Transmits power from the engine to other components. |
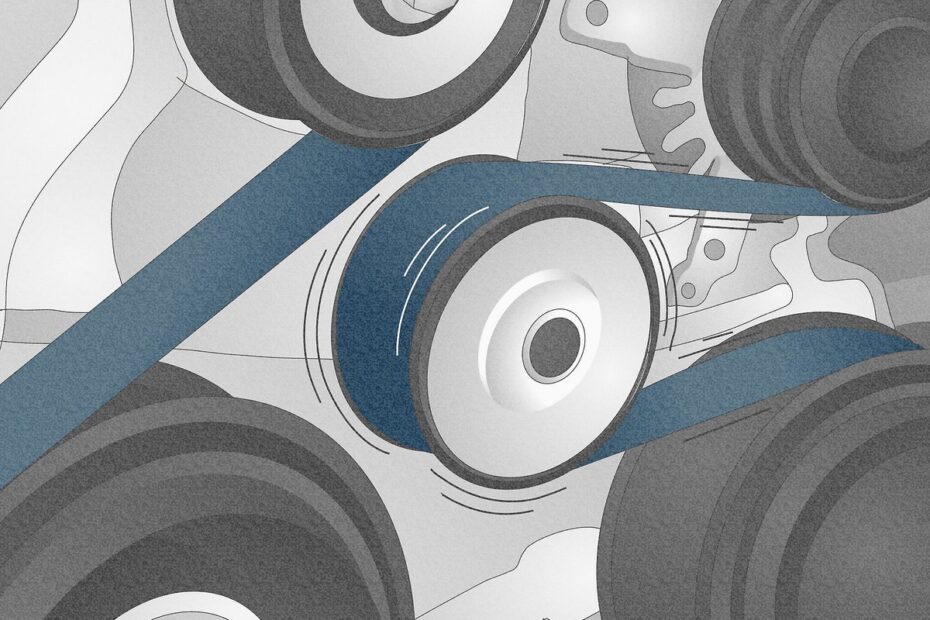
| Tensioner Pulley | Maintains proper tension in the belt to prevent slipping. |
| Idler Pulleys | Provides additional support and guidance for the belt. |
| Accessory Components | Includes the alternator, power steering pump, air conditioning compressor, and more. |
All of these components work in unison to ensure that the serpentine belt remains properly tensioned and aligned, allowing for efficient transfer of power and optimal performance. Regular inspection and maintenance of these components are crucial to prevent potential issues and minimize the risk of belt failure.
By understanding the serpentine belt system and its importance, you can take proactive measures to ensure that your vehicle remains in good working order. Regular inspection and maintenance, including tightening the serpentine belt when necessary, will help to extend the lifespan of the belt and avoid potential breakdowns on the road. Keep an eye out for any signs of wear or damage, such as squealing noises or visible cracks, and address them promptly to keep your vehicle running smoothly and safely.
Signs Of A Loose Serpentine Belt
It is important to keep an eye out for signs of a loose serpentine belt in your vehicle. Neglecting this small component can lead to major problems down the road. To ensure the smooth operation of your engine, it is crucial to understand the common symptoms and diagnose a loose serpentine belt promptly. In this section, we will discuss the signs you should look out for and how to identify if your serpentine belt needs tightening.
Common Symptoms of a Loose Belt
When it comes to a loose serpentine belt, there are several telltale signs that can indicate a problem. By recognizing these symptoms early on, you can avoid potential damage to your vehicle and costly repairs. Below are the typical indications that your serpentine belt may have become loose:
- Unusual squealing or chirping noise from the engine compartment
- Difficulty in starting your vehicle
- Visible wear or cracks on the belt
- Air conditioner not working properly
- Power steering issues, such as difficulty in turning the steering wheel
- Engine overheating
If you notice any of these symptoms, it is essential to investigate further to determine if your serpentine belt is indeed loose.
Diagnosing a Loose Serpentine Belt
Diagnosing a loose serpentine belt may require a visual inspection as well as a few simple tests. Here’s how you can assess the condition of your serpentine belt:
- Open the hood of your vehicle and locate the serpentine belt. It is a long, ribbed belt that runs across several engine components.
- Visually inspect the belt for any visible signs of wear, cracks, or looseness.
- With the engine off, check the tension of the belt by pressing down on it with your finger. It should feel firm and not have excessive give.
- Start the engine and observe the belt’s movement. It should glide smoothly across the pulleys without slipping or making any unusual noises.
- If you suspect a loose serpentine belt, it is advisable to seek professional assistance for a thorough inspection and tightening if necessary.
By regularly monitoring your serpentine belt and being mindful of the signs of a loose belt, you can prevent potential issues and ensure the smooth operation of your vehicle. In the next section, we will discuss how to tighten a serpentine belt.
Step 1: Prepare For The Belt Tightening Process
Tightening a serpentine belt is an essential maintenance task to ensure proper functioning of your vehicle. Before you begin, it’s crucial to be well-prepared and take necessary safety precautions. In this step-by-step guide, we’ll cover the important aspects of preparing for the belt tightening process. Let’s get started!
Gathering the necessary tools and materials
Before you can begin tightening the serpentine belt, it’s important to have the following tools and materials ready:
| Tools | Materials |
|---|---|
|
|
Make sure the socket sizes match your specific vehicle’s requirements. Having the right tools will make the process much smoother and efficient.
Ensuring safety precautions
When working with vehicle components, it’s crucial to prioritize safety. Here are some important safety precautions to adhere to:
- Ensure the vehicle is parked on a level surface and the engine is turned off.
- Engage the parking brake to prevent any unintentional movement.
- Wear protective gloves and safety goggles to protect your hands and eyes from any potential hazards.
- Familiarize yourself with the vehicle’s owner manual for specific instructions and precautions.
By following these safety precautions, you’ll minimize the risk of accidents or injuries during the belt tightening process.
Now that you have gathered the necessary tools and materials and taken the appropriate safety precautions, you are well-prepared to begin the serpentine belt tightening process in the next step.
Step 2: Locating The Belt Tensioner
Step 2: Locating the Belt Tensioner The belt tensioner plays a crucial role in keeping the serpentine belt tight and properly aligned. This mechanism ensures that all of the accessories driven by the belt, such as the alternator, power steering pump, and water pump, receive the necessary power. In order to properly tighten the serpentine belt, it is important to first locate the belt tensioner. Identifying the belt tensioner To locate the belt tensioner, start by opening the hood of your vehicle. The belt tensioner is typically positioned near the front of the engine and looks different from other pulleys. It is designed to apply tension to the serpentine belt, preventing it from slipping or coming off. One way to identify the belt tensioner is by looking for a pulley that is spring-loaded. This pulley will have a bolt or nut in the center that can be used to adjust the tension. Alternatively, some vehicles have a separate tensioner assembly that is mounted on a bracket. Understanding its function The belt tensioner is responsible for maintaining the proper tension on the serpentine belt. When the engine is running, the belt tensioner applies tension to the belt, preventing it from becoming loose or slipping. This ensures that all of the accessories driven by the belt continue to function properly. By locating and understanding the function of the belt tensioner, you are one step closer to tightening the serpentine belt. Once you have identified the belt tensioner, you can move on to the next step of the process.Step 3: Releasing Tension On The Serpentine Belt
Once you have located the tensioner pulley and figured out how to gain access to it, it’s time to release tension on the serpentine belt. This step is crucial to safely remove and replace the belt without causing any damage to the engine or other components.
Using the appropriate tool to release tension
Before we move forward, it’s important to use the correct tool to release tension on the serpentine belt. The tensioner pulley usually requires a specialized tool, such as a serpentine belt tensioner tool, to make the job easier and safer.
This tool is specifically designed to fit onto the tensioner pulley and provide leverage to release tension. It typically has a handle or ratchet mechanism that allows you to rotate the tensioner and loosen the belt. Make sure to use the proper tool for your vehicle’s make and model.
Safely loosening the belt

Now that you have the right tool at hand, let’s go ahead and safely loosen the serpentine belt. Follow the steps below:
- Identify the tensioner pulley and locate the square hole or socket where the tool will fit.
- Insert the tool into the hole/socket and ensure it is securely attached.
- Using the tool, rotate the tensioner in the direction indicated in your vehicle’s owner manual. Keep in mind that it may require significant force to release the tension.
- As you rotate the tensioner, you will notice the serpentine belt becoming loose.
- Once you have released enough tension, carefully remove the tool from the tensioner pulley.
Remember to be cautious while releasing tension on the belt. Sudden movements can cause injury. Take your time and apply steady pressure until the belt is loose enough to remove.
Now that you have successfully released tension on the serpentine belt, you can proceed to the next step of removing the belt and inspecting it for any signs of wear or damage.
Step 4: Inspecting The Belt For Wear And Tear
Once you have adjusted the serpentine belt tension and rotated all the pulleys to ensure it runs smoothly, it’s crucial to thoroughly inspect the belt for signs of damage or excessive wear. This step is essential as a worn or damaged belt can lead to reduced performance and potential breakdowns. By closely examining the belt, you can determine if belt replacement is necessary to maintain the optimal functioning of your vehicle.
Checking for signs of damage or excessive wear
Take a close look at the serpentine belt, paying attention to any visible signs of damage or wear. Here are some key indicators to look out for:
- Cracks or fraying: Inspect the entire length of the belt for any cracks or fraying edges. These can occur due to continuous exposure to heat, age, or excessive tension.
- Glazing or polishing: If the belt appears shiny or polished, it could indicate excessive wear. This occurs when the rubber contacts the pulleys too frequently.
- Missing ribs: Make sure all the ribs on the belt are intact. If any are missing, it’s a sign that the belt is worn and should be replaced.
- Glued or uneven edges: Check if the belt’s edges appear glued or uneven. This could suggest that the belt has been repaired, and such repairs are often short-term solutions.
Determine if belt replacement is necessary
After inspecting the serpentine belt, it’s important to determine whether it needs to be replaced or if it’s still in good condition. Here’s how to assess the belt:
- Measure the belt’s thickness: Using a belt gauge or a simple ruler, measure the thickness of the belt. If it is thinner than the manufacturer’s specifications or shows significant thinning in certain areas, it’s time for a replacement.
- Check the belt’s tension: Press down on the belt with your thumb. If it feels loose or has more than a half-inch of deflection, it needs to be tightened or replaced.
- Consider the mileage and age of the belt: Serpentine belts typically have a lifespan of around 50,000 to 100,000 miles or roughly five to eight years. If it has exceeded these limits or shows significant wear, it’s advisable to replace it.
Remember, a well-maintained serpentine belt is crucial for the proper functioning of your vehicle’s engine, alternator, air conditioning compressor, and other accessories. Regular inspections and timely replacement play a pivotal role in ensuring optimal performance and avoiding unexpected breakdowns.
Step 5: Adjusting The Belt Tension
Using the correct method to adjust tension
Adjusting the tension of your serpentine belt is a crucial step in maintaining the optimal performance of your vehicle. Using the correct method to adjust the tension ensures that the belt is neither too loose nor too tight, preventing premature wear and tear, as well as potential damage to other engine components. Follow these steps to adjust the tension of your serpentine belt:
Achieving the proper tension level
Now that you understand the importance of adjusting the tension, let’s delve into achieving the proper tension level for your serpentine belt. It’s important to note that the specific tension level may vary depending on your vehicle’s make and model, so refer to the manufacturer’s guidelines for the correct specifications.
Here are the key steps to follow:
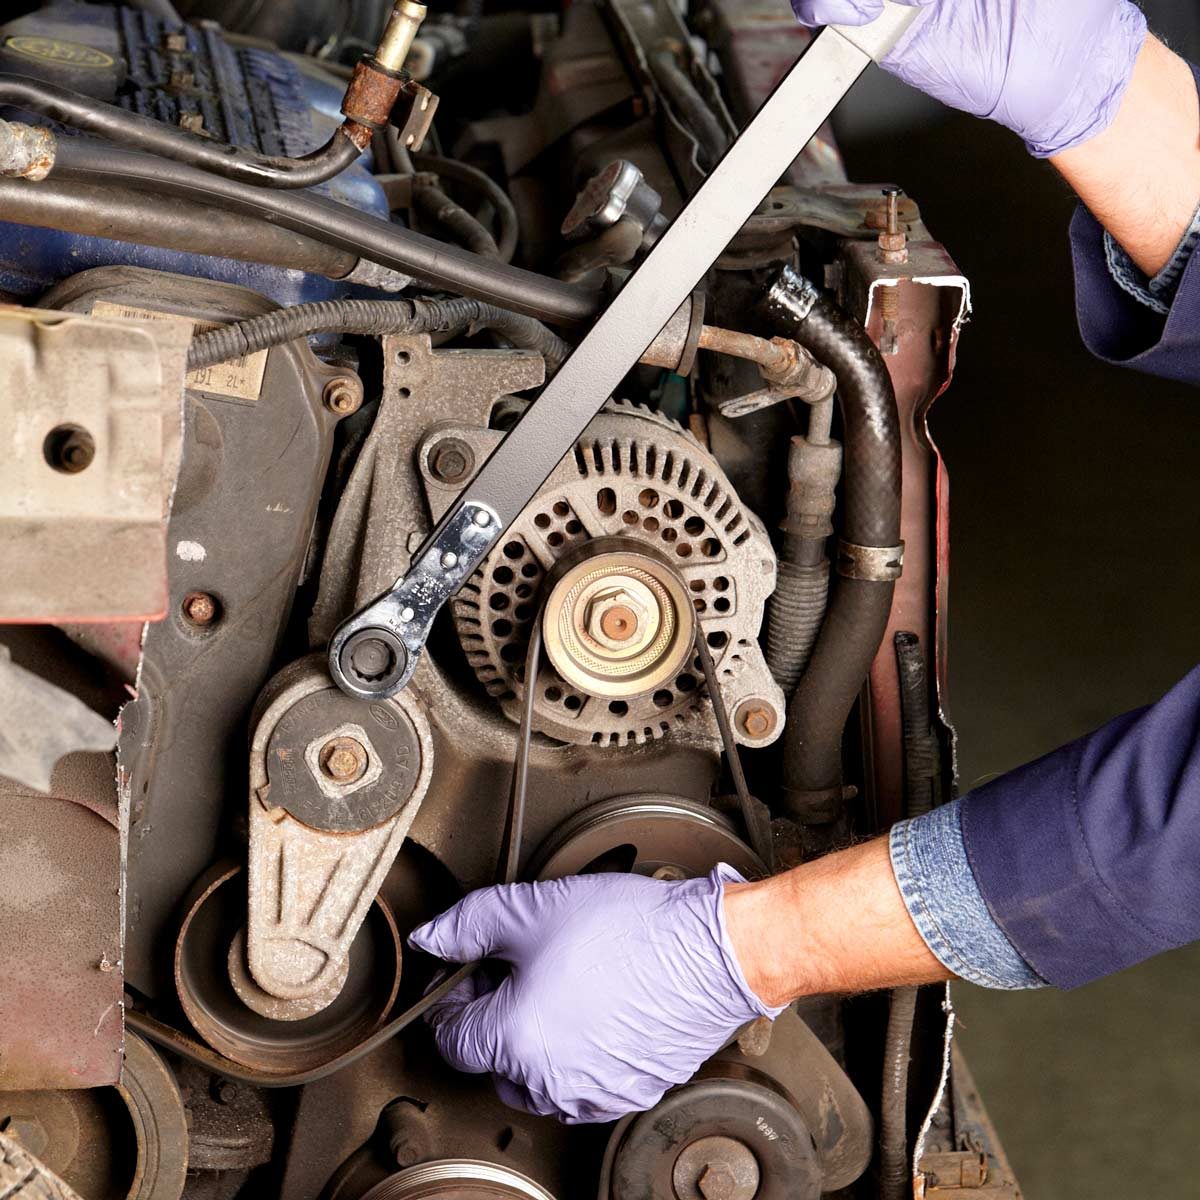
- Locate the tensioner: Start by identifying the location of the belt tensioner. It’s usually a metal pulley with a square hole in the middle, designed to accept a ratchet or breaker bar.
- Release tension: Use your ratchet or breaker bar to release tension on the belt. Insert the tool into the square hole of the tensioner and rotate it counterclockwise to relieve the pressure. This will loosen the belt, allowing you to make adjustments.
- Adjust tension: With the tension released, you can now adjust the tension of the belt. Carefully slide the belt tensioner back and forth to increase or decrease the tension. Consult the manufacturer’s guidelines to determine the ideal tension level for your specific vehicle.
- Check the tension: Once you’ve made the necessary adjustments, it’s essential to double-check the tension. Use a tension gauge or apply moderate pressure on the belt with your finger. The ideal tension is achieved when the belt deflects approximately 1/4 to 1/2 inch (6 to 12 millimeters) under moderate pressure.
- Lock the tensioner: Once you’re satisfied with the tension, lock the belt tensioner in place. Rotate the tensioner counterclockwise again using your ratchet or breaker bar, and allow it to engage with the belt. This will secure the tensioner and prevent any further adjustments.
By following these steps and achieving the proper tension level, you can ensure that your serpentine belt functions optimally, contributing to the overall performance and longevity of your vehicle.
Step 6: Reinstalling And Checking The Belt
After completing Steps 1-5 of tightening the serpentine belt, it’s time to put the belt back in position and verify the tension and alignment. This crucial step ensures that the belt functions optimally and maintains proper contact with all the pulleys.
Putting the belt back in position
To put the serpentine belt back in position, refer to the belt routing diagram located under the hood or in the vehicle’s manual. This diagram shows the correct path for the belt to pass through each pulley.
- Avoiding any twisting or crossing: Ensure that the belt is not twisted or wrapped around any pulleys in the wrong direction. Each ribbed section of the belt should be properly seated in the corresponding grooves of the pulleys.
- Following the correct tension configuration: There may be different tension configurations for various engines or vehicle models. Make sure you follow the correct configuration specified for your particular vehicle.
Once the belt is correctly positioned, take a moment to inspect it and ensure it is centered on each pulley and aligned properly.
Verifying the tension and alignment
To verify proper tension and alignment of the serpentine belt, follow these steps:
- Checking the tension: Apply moderate pressure to the longest and straightest part of the belt. The belt should deflect to a certain extent but not excessively. Use a belt tension gauge if available, following the manufacturer’s specifications for the correct tension range.
- Examining the alignment: Carefully inspect the belt’s alignment on each pulley. Look for any signs of misalignment, such as the belt riding up on the pulley’s edge or slipping off the pulley completely. Additionally, check for any damage or excessive wear on the belt’s surface.
If you notice any issues with tension or alignment, you may need to make further adjustments before proceeding. Remember that an improperly tensioned or misaligned belt can lead to decreased performance, excessive wear, and potential engine damage.
Once you’ve verified that the belt is properly tensioned and aligned, you’re ready to move on to the final step of the tightening process. Continue to Step 7 to ensure a secure and reliable serpentine belt installation.
Additional Tips And Maintenance
Regular maintenance practices for the serpentine belt:
Troubleshooting common issues:
When it comes to maintaining your vehicle’s serpentine belt, regular inspections and upkeep are key. By performing simple maintenance practices, you can ensure that your belt stays in optimal condition and functions properly.
- Regularly check the belt’s tension and alignment: Over time, the serpentine belt can become loose or misaligned, causing it to slip or squeal. To prevent this, visually inspect the belt for any signs of wear, cracks, or fraying. If you notice any issues, it’s essential to adjust the tension or realign the belt accordingly.
- Keep the belt clean and free from debris: Dirt, oil, or other contaminants can accumulate on the surface of the belt, leading to reduced performance. To prevent this, clean the belt regularly using a soft cloth or brush and a mild automotive cleaner. Be sure to dry it thoroughly before reinstalling.
- Properly lubricate moving parts: Some vehicle models have a tensioner or idler pulley that requires lubrication. Consult your vehicle’s manual to determine if this applies to your serpentine belt system. If lubrication is needed, use a silicone-based lubricant to reduce friction and promote smooth operation.
- Ensure proper belt tension: A serpentine belt that is too loose or too tight can cause various issues, such as excessive wear or premature failure. To maintain proper tension, use a tension gauge or follow the manufacturer’s recommendations. Adjust the tension by loosening or tightening the belt tensioner until you achieve the desired tension.
It’s important to note that troubleshooting common issues related to serpentine belts can save you from costly repairs and breakdowns. By being proactive and addressing any problems promptly, you can prolong the lifespan of your belt and avoid potential damages to other engine components.
- Inspect for abnormal belt noise: If you hear any unusual noises coming from the belt while the engine is running, it could indicate a problem. Common causes of belt noise include misalignment, worn pulleys, or a damaged belt. As a first step, visually inspect the belt for signs of wear or damage. If necessary, consult a professional to diagnose and rectify the issue.
- Check for proper belt tension after repairs: If you’ve recently replaced or adjusted the serpentine belt, it’s essential to double-check the tension. In some cases, improper installation or adjustment can lead to problems down the line. Verify that the belt has the correct tension by following the recommended guidelines.
- Address belt squealing immediately: Squealing noises originating from the belt should never be ignored. This high-pitched sound usually indicates a problem with belt tension, alignment, or even a failing tensioner. If you encounter belt squealing, immediately investigate the cause and take appropriate action to prevent further damage.
- Replace the belt at recommended intervals: Despite regular maintenance, serpentine belts will eventually wear out and require replacement. It’s important to adhere to the recommended replacement intervals provided by the vehicle manufacturer. Waiting too long can increase the risk of belt failure, which can result in costly repairs and potential engine damage.
In conclusion, by implementing these additional tips and maintenance practices, you can effectively care for your serpentine belt and avoid potential issues. Regular inspections, proper tensioning, and prompt troubleshooting will keep your belt functioning optimally, ensuring a smooth and reliable driving experience.
Credit: www.familyhandyman.com
Frequently Asked Questions For How To Tighten A Serpentine Belt
Do You Have To Tighten Serpentine Belt?
Yes, the serpentine belt needs to be tightened regularly to ensure proper functioning of the engine and its components.
What Happens If Serpentine Belt Is Too Loose?
If the serpentine belt is too loose, it may slip off the pulleys and cause your car’s engine accessories to stop working properly. This can result in the loss of power steering, air conditioning, and charging system failure. It is important to fix a loose serpentine belt to avoid potential damage and costly repairs.
How Do You Adjust Belt Tension?
To adjust belt tension, first locate the tensioner pulley. Use a wrench or socket to loosen the tensioner and create slack in the belt. Then, adjust the tension by either moving the tensioner pulley or the component the belt is connected to.
Finally, tighten the tensioner back up and check the belt for the correct tension.
How Do I Stop My Belt From Squeaking?
To stop your belt from squeaking, follow these steps: 1. Apply a lubricant like WD-40 or silicone spray to the belt. 2. Use a belt dressing or talcum powder to reduce friction. 3. Check for belt tension and adjust accordingly.
4. Inspect the belt for wear and replace if necessary. 5. Clean any debris or dirt from the belt and pulleys.
How Often Should A Serpentine Belt Be Replaced?
Serpentine belts should typically be replaced every 60,000 to 100,000 miles or according to your vehicle manufacturer’s recommendations.
What Are The Symptoms Of A Loose Serpentine Belt?
A loose serpentine belt may cause squealing noises, sluggish accessory performance, and even engine overheating due to inadequate cooling.
Can You Tighten A Serpentine Belt Yourself?
Yes, you can tighten a serpentine belt yourself by using an appropriate tool to adjust the tensioner and ensure it is properly aligned.
Conclusion
To wrap up, tightening a serpentine belt is a crucial maintenance task to ensure your vehicle runs smoothly. By following the steps outlined in this blog post, you can easily tighten the belt without any professional help. Remember to regularly inspect and maintain the serpentine belt to avoid any potential issues down the road.
By taking care of your vehicle’s belt system, you can enjoy a safer and more efficient driving experience.
- How To Tell If My Catalytic Converter Is Clogged - April 28, 2024
- How To Tell If A Catalytic Converter Is Aftermarket - April 28, 2024
- How To Tell Your Catalytic Converter Is Bad - April 28, 2024