
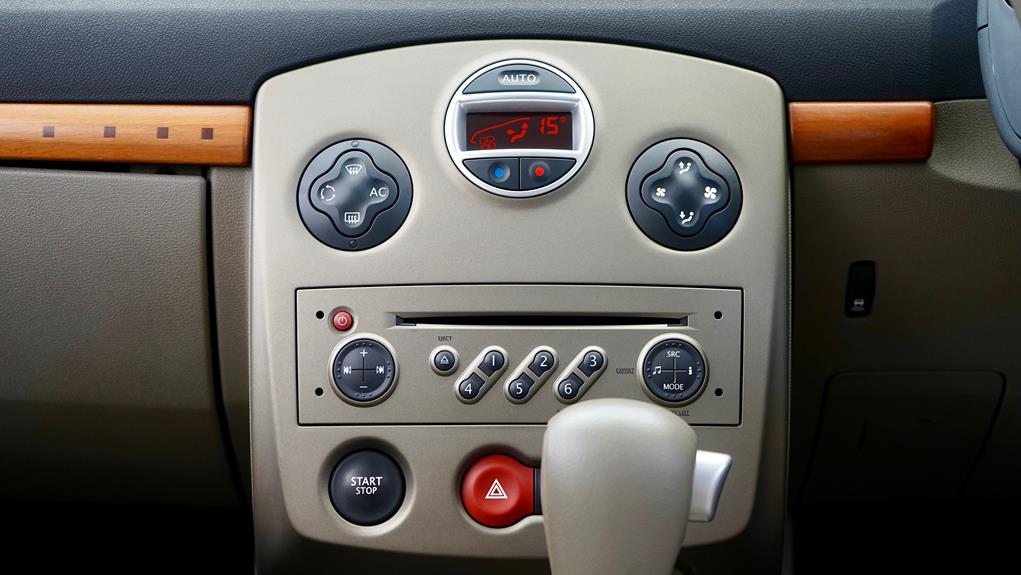
To turn off buckle up and unmute audio, simply follow these steps. Firstly, locate the buckle up button on your device and press it to disable the mute function.
Then, adjust the volume settings as desired. This quick and easy process allows you to enjoy your audio without the restriction of being muted when buckled up. Now, you can listen to your favorite music or videos without any interruptions during your travels.
Transform your journey and personalize your audio experience with this simple solution. Stay connected and entertained while on the go with this hassle-free method.

Credit: www.reddit.com
Understanding Buckle Up And Audio Muting
Define Buckle Up And Its Impact On Audio
Buckle up is a feature on various audio devices that automatically mutes the audio when the user fastens their seatbelt. This safety measure is primarily implemented in vehicles to promote responsible driving habits and prioritize driver focus. By linking the seatbelt with audio muting, buckle up encourages passengers to buckle up before indulging in audio entertainment.
Let’s explore why audio is muted due to buckle up and its implications.
Discuss Why Audio Gets Muted Due To Buckle Up
- Safety as a priority: The primary objective behind buckle up is to ensure the safety of drivers and passengers. By automatically muting audio when the seatbelt is not fastened, it encourages everyone in the vehicle to adopt responsible behavior and buckle up before hitting the road.
- Distraction reduction: Listening to audio, be it music, podcasts, or other forms of entertainment, can divert the driver’s attention from the road. Muting the audio until the seatbelt is fastened helps minimize distractions, allowing drivers to focus solely on the task at hand.
- Regulatory compliance: Many countries and states have strict laws mandating the use of seatbelts while driving. Some jurisdictions have made it obligatory for audio to be muted until seatbelts are engaged. This regulatory compliance ensures that both drivers and passengers adhere to seatbelt usage, promoting overall road safety.
- Reinforcing good habits: By associating audio muting with the act of buckling up, buckle up reinforces good habits. It prompts individuals to make wearing seatbelts a routine part of their travel routine, helping to reduce the risk of injuries and fatalities in accidents.
- Utilizing technology for safety: The integration of technology into audio devices allows for the seamless implementation of buckle up. This feature utilizes sensors or data from the vehicle’s seatbelt system to detect whether the seatbelt is fastened or not, triggering the audio muting function accordingly.
Overall, buckle up plays a vital role in promoting responsible driving habits and ensuring the safety of individuals on the roads. By muting audio until the seatbelt is engaged, it helps minimize distractions, encourages compliance with seatbelt regulations, and reinforces good habits for safer journeys.
Technique 1: Adjusting Sound Settings
Adjusting sound settings is a simple yet effective way to unmute audio on your device. By accessing the sound settings, you can easily tweak various options that control the volume and mute functions. Let’s explore how you can do it step by step:
Explain How To Access Sound Settings
To begin with, you need to access the sound settings on your device. The steps may vary depending on the operating system you are using, but here are the general guidelines:
- For windows users:
- Click on the “start” button located at the bottom left corner of your screen.
- Type “sound settings” in the search bar and select the corresponding option from the results.
- Alternatively, you can right-click on the speaker icon in the taskbar and choose “open sound settings.”
- For macos users:
- Click on the apple menu at the top left corner of the screen.
- Go to “system preferences” and select “sound.”
- Another way is to click on the speaker icon in the menu bar and choose “sound preferences.”
- For mobile device users:
- Access the settings menu by tapping on the gear icon or swiping down from the top of the screen and selecting the settings gear.
- Look for the “sound” or “sound & vibration” option and tap on it.
Discuss The Various Options Available For Adjusting Sound
Once you have accessed the sound settings, you will discover several options that allow you to adjust the sound on your device. Some common options include:
- Volume control: You can increase or decrease the volume level by sliding the volume bar or using the volume up and down buttons.
- Mute toggle: This option enables you to mute or unmute the audio by either clicking on a toggle switch or checking/unchecking a box.
- Sound output/input selection: You can choose the desired audio output and input sources from a list of available devices. For example, you might switch between speakers, headphones, or bluetooth devices.
Provide Step-By-Step Instructions On Unmuting Audio By Adjusting Sound Settings
Now, let’s explore the step-by-step process of unmuting audio by adjusting the sound settings:
- Begin by locating the sound icon in your taskbar/menu bar or accessing the “sound settings” from the respective os settings.
- Once you have opened the sound settings, locate the volume control option and ensure it is set to an appropriate level.
- Look for the mute toggle option and make sure it is unchecked or switched off to unmute the audio.
- Check the sound output/input selection to ensure the correct audio source is selected. If you are using headphones, ensure they are plugged in properly.
- Test the audio by playing a sound or video to verify if the audio is unmuted successfully.
By following these simple steps and adjusting the sound settings accordingly, you can easily unmute the audio on your device.
Remember, each device and operating system might have slight variations in their sound settings layout and terminology, so it’s important to familiarize yourself with the specific options available on your device.
Technique 2: Checking Device Connections
When it comes to unmute audio, one of the key techniques is to check your device connections. By ensuring that all your devices are properly connected, you can troubleshoot any connection issues that might be causing the audio to remain muted.

Follow these steps to identify and resolve any problems with your device connections:
Discuss The Importance Of Checking Device Connections.
Proper device connections are essential for ensuring that the audio is not muted unintentionally. By checking and confirming the connections, you can be confident that the issue lies elsewhere and proceed with other troubleshooting steps. Here are some reasons why checking device connections is important:
- It helps to rule out connection problems as the cause of audio muting.
- Identifying faulty or loose connections can prevent recurrence of the issue.
- Ensuring proper connections avoids unnecessary frustration and wasted time.
Explain How To Identify And Resolve Connection Issues.
To identify and resolve connection issues, follow these steps:
- Check all cables and connectors: Verify that all cables are securely plugged in and connectors are properly connected. Make sure there are no loose connections or damage to the cables.
- Restart your devices: Sometimes, a simple restart can resolve connection issues. Turn off all connected devices, unplug them from the power source, wait for a few seconds, and then reconnect and power them back on.
- Update device drivers: Outdated or incompatible device drivers can lead to connection problems. Visit the manufacturer’s website and check for any available updates for your devices. Install the updates as necessary.
- Use the correct ports: Ensure that you are using the correct audio input/output ports on your devices. Double-check the device manuals or online resources to confirm the correct port configuration.
- Try different cables or connectors: If you suspect a faulty cable or connector, try using different ones to see if the problem persists. This can help determine whether the issue lies with the connections or some other factor.
Provide Tips For Ensuring Proper Device Connections To Unmute Audio.
To avoid future audio muting issues, keep these tips in mind when connecting your devices:
- Use high-quality cables: Invest in good quality cables that are less likely to have connection problems or signal loss.
- Secure the connections: Ensure that all connections are firmly plugged in. Loose connections can lead to audio issues.
- Keep cables organized: Proper cable management can prevent accidental disconnections and reduce the chances of connection problems.
- Regularly check connections: Periodically inspect your device connections to ensure they remain secure and undamaged.
- Follow manufacturer recommendations: Refer to the device manuals or online resources for specific connection recommendations provided by the manufacturers.
By following these steps and tips, you can effectively ensure proper device connections and successfully unmute audio on your devices.
Technique 3: Updating Audio Drivers
Keeping your audio drivers up to date is crucial for a seamless and uninterrupted audio experience on your device. Outdated audio drivers can often result in audio issues, including the frustrating silent audio syndrome where your audio remains muted even when the buckle is off.
So, let’s dive into the significance of keeping audio drivers up to date and how you can update them to unmute your audio.
Highlight The Significance Of Keeping Audio Drivers Up To Date:
- Updated audio drivers ensure compatibility with the latest operating systems, applications, and hardware, allowing your system to deliver optimal audio performance.
- They fix bugs and glitches in previous versions, addressing audio-related issues that might be causing your audio to remain muted even after unbuckling.
Explain How To Identify And Update Audio Drivers:
Identifying and updating your audio drivers may seem like a complex task, but fret not! Here’s a simple guide to help you through the process:
- Open the device manager by right-clicking on the start button and selecting “device manager” from the context menu.
- In the device manager window, look for the “sound, video and game controllers” category, and expand it by clicking on the arrow icon.
- Locate your audio device from the list. It’s usually named after your sound card or integrated audio chip.
- Right-click on the audio device and select “update driver” from the options.
- Choose the option to search automatically for updated driver software. Windows will scan the internet and your local system for the latest driver version. If a newer version is found, it will be downloaded and installed automatically.
- If windows fails to find an updated driver, you can visit the manufacturer’s website for your audio device. Search for the latest driver version compatible with your operating system and download it.
- Once downloaded, run the installer and follow the on-screen instructions to update your audio driver.

Note: it’s highly recommended to create a system restore point before updating your audio driver to avoid any unforeseen issues.
Provide A Step-By-Step Guide On Updating Audio Drivers To Unmute Audio:
- Press the windows key + r to open the run dialog box, then type “devmgmt.msc” and hit enter. This will open the device manager.
- Expand the “sound, video and game controllers” category by clicking on the arrow icon.
- Right-click on your audio device and select “update driver” from the menu.
- Choose the option to search automatically for updated driver software.
- If windows finds an updated driver, it will download and install it. Follow the on-screen instructions to complete the process.
- In case windows doesn’t find an updated driver, visit the manufacturer’s website and download the latest driver for your audio device.
- Once downloaded, run the installer and follow the instructions provided by the manufacturer to update your audio driver.
- After updating the audio driver, restart your device to ensure the changes take effect.
- Test your audio by playing any sound or media file to make sure it’s no longer muted when the buckle is off.
- Enjoy your unmuted audio and continue to keep your audio drivers up to date for the best audio experience.
Remember, regular updates of audio drivers not only resolve issues like muted audio but also enhance the overall audio quality on your device. Don’t let outdated drivers hold back your audio experience; update them and enjoy crystal clear sound.
Troubleshooting Common Issues
Unmuting audio with buckle up can sometimes present a few challenges. To help you troubleshoot and resolve these common issues, we’ve compiled a list of solutions and tips below.
Issue 1: No Sound After Unbuckling
- Ensure that the audio is not muted or turned down low on your device.
- Check the volume level in the buckle up settings and increase it if necessary.
- Make sure that the audio source you are playing from is not muted or experiencing any technical difficulties.
- Try disconnecting and reconnecting your audio device to ensure a proper connection.
- Restarting your device can also help resolve any temporary glitches or software conflicts.
Issue 2: Audio Cuts Out Intermittently
- Check for any physical obstructions or loose connections in the audio cable or headphone jack.
- Test your headphones or speakers with a different audio source to determine if the issue is specific to buckle up or your device.
- Clearing the cache and data of the buckle up app can help resolve any software-related issues.
- Update the buckle up app to the latest version available, as newer updates often include bug fixes and improvements.
- Disable any power-saving features or battery optimization settings that may be interrupting the audio playback.
Issue 3: Distorted Or Poor Audio Quality
- Check the audio file or stream you are playing to ensure it is not of low quality or corrupted.
- Adjust the audio settings in buckle up to optimize the sound output for your specific headphones or speakers.
- Clean the audio port and audio connectors to remove any dust or debris that may affect sound quality.
- Update your device’s audio drivers to the latest version, as outdated drivers can cause audio issues.
- If using wireless headphones or speakers, make sure they are within the recommended range and not experiencing signal interference.
Issue 4: Unintended Audio Playback
- Make sure that buckle up is not running in the background or playing audio from another app or browser tab.
- Check if any other apps or programs on your device are controlling the audio output and close them if necessary.
- Disable any autoplay settings in buckle up or your device’s system settings to prevent unintended audio playback.
- Ensure that you are not accidentally triggering any gestures or shortcuts that initiate audio playback.
By following these troubleshooting tips, you should be able to resolve common audio issues when unmuting with buckle up. Remember to check the specific documentation or support channels for your device and audio equipment if you encounter any persistent problems.
Issue 1: No Sound Output
Having no sound output can be a frustrating issue when you’re trying to enjoy audio on your device. Whether it’s a movie, music, or a video, not being able to hear anything can dampen the experience. In this section, we will explore the various causes of this problem and provide troubleshooting steps to help you resolve it.
Explain The Causes Of No Sound Output:
- Misconfigured audio settings: Sometimes the audio settings on your device might be the culprit behind the sound issue. It could be that the audio is muted, the volume is turned down too low, or the wrong audio output source is selected.
- Faulty or outdated audio drivers: Outdated or incorrectly installed audio drivers can prevent sound from coming out of your device. These drivers act as a bridge between the operating system and your audio hardware, so any issues with them can lead to sound output problems.
- Hardware issues: Physical problems with your device’s audio hardware, such as a loose connection or a damaged speaker, can result in no sound output. These issues may require professional repair or replacement.
Offer Troubleshooting Steps To Resolve The Issue:
- Check the audio settings: Ensure that the audio is not muted and the volume is turned up to an appropriate level. Also, verify that the correct audio output source is selected.
- Update or reinstall audio drivers: Visit the manufacturer’s website or use a driver update utility to download and install the latest audio drivers compatible with your device. If you suspect that the current drivers are causing the issue, uninstall them and reinstall the drivers from scratch.
- Test with different audio source: Try playing audio from a different source (e.g., a different video or audio file) to determine if the problem is specific to a particular file or application.
- Check the physical connections: Ensure that all cables connecting your device to external speakers or headphones are securely plugged in. If you’re using wireless audio devices, try re-pairing them to eliminate any connectivity issues.
- Restart your device: A simple restart can sometimes resolve temporary software glitches that may be inhibiting sound output.
- Check for software updates: If you’re using a smartphone, tablet, or computer, make sure that your operating system and multimedia software are up to date. Often, software updates address known audio-related issues.
- Seek professional assistance: If none of the above steps work, it’s possible that your device has a hardware problem. In such cases, it’s best to consult a professional technician who can diagnose and repair the issue.
By following these troubleshooting steps, you can overcome the common causes of no sound output and regain the audio experience you desire. Remember to check each step methodically, as it’s often the simplest solutions that solve complex problems.
Issue 2: Distorted Audio
Discuss Why Audio Can Become Distorted
Audio distortion occurs when the sound quality becomes disrupted or altered, resulting in an unpleasant listening experience. This issue can be caused by various factors:
- Improper audio settings: Incorrect settings on your device or audio player can lead to distorted sound. For instance, if the volume is set too high or the equalizer is not properly configured, it can result in audio distortion.
- Connection issues: Loose or faulty connections between audio devices, such as headphones or speakers, and the source can lead to distorted sound. Faulty cables or damaged ports can also cause audio distortion.
- Outdated drivers: Using outdated or incompatible audio drivers can result in distorted sound. It is essential to keep your drivers up to date to ensure optimal audio performance.
- Hardware limitations: In some cases, the hardware itself may have limitations that result in audio distortion. For example, low-quality speakers or headphones may struggle to produce clear sound and can introduce distortions.
Techniques For Troubleshooting And Fixing Distorted Audio Issues
If you’re experiencing distorted audio, don’t worry! There are several troubleshooting techniques you can try to resolve the issue:
- Check audio settings: Make sure the volume levels are set appropriately and that the equalizer settings are adjusted correctly. Experiment with different settings to find the optimal configuration.
- Verify connections: Ensure that all audio connections are secure and not loose. If using headphones or speakers, check the audio jack and cable connections for any damage or debris that may be affecting the sound quality.
- Update drivers: Visit the manufacturer’s website to download and install the latest audio drivers for your device. This step is crucial as outdated drivers can contribute to audio distortion.
- Test with alternative devices: If possible, try connecting your audio source to different devices such as headphones, speakers, or another computer. This will help determine if the issue lies with the audio source or the device itself.
- Use high-quality audio equipment: Investing in good quality speakers, headphones, or audio cables can significantly improve audio performance and reduce distortion.
- Adjust audio settings during playback: Some media players have built-in audio controls, such as equalizers or sound enhancement features. Experiment with these settings while playing the audio to find the optimal configuration and reduce distortion.
By following these troubleshooting techniques, you can effectively address and fix distorted audio issues, ensuring a pleasant listening experience. Remember to check each step carefully to identify the root cause of the distortion and apply the appropriate solution.
Issue 3: Audio Delay
Audio delay can be a frustrating issue when trying to enjoy your favorite videos or music. It occurs when there is a delay between the visual content and the audio, resulting in a mismatch between what you see and what you hear.
Several factors can contribute to audio delay, but luckily, there are solutions to reduce or eliminate this problem. Let’s explore the potential causes and how to address them.

Explain The Potential Causes Of Audio Delay:
- Network congestion: When there are too many users demanding data on the network, it can cause delays in audio transmission. This is especially common when streaming videos or using online communication platforms.
- Device processing power: Older or underpowered devices may struggle to keep up with the demands of processing both video and audio simultaneously, leading to an audio delay.
- System settings: Incorrect configuration of audio settings, such as sample rate or audio buffer size, can cause audio delay issues. It’s important to ensure that the settings are optimized for your specific device and software.
- Software bugs: Sometimes, audio delay can be attributed to software glitches or bugs that affect the synchronization between video and audio playback.
Offer Solutions To Reduce Or Eliminate Audio Delay:
- Upgrade your network connection: If network congestion is causing audio delay, consider upgrading to a faster internet connection or connecting to a more stable network. This can help reduce the chances of delays during audio playback.
- Use more powerful devices: If your current device is struggling to handle simultaneous video and audio processing, upgrading to a more powerful device can alleviate the audio delay issue.
- Adjust audio settings: Take the time to review and adjust your system’s audio settings. Experiment with different sample rates or buffer sizes to see if it improves the synchronization between audio and video playback.
- Keep software up to date: Software updates often include bug fixes and performance optimizations. Make sure your audio and video player, as well as your operating system, are up to date to minimize the chances of experiencing audio delay due to software bugs.
By understanding the potential causes of audio delay and implementing the suggested solutions, you can enhance your audio playback experience and enjoy your favorite content without the frustration of mismatched audio and video. Remember, a stable network, powerful devices, and proper system settings are key to minimizing audio delay and ensuring an immersive audio-visual experience.
Frequently Asked Questions For How To Turn Off Buckle Up To Unmute Audio
Q1: How Do I Turn Off Buckle Up To Unmute Audio?
To turn off buckle up to unmute audio, simply go to the settings menu and disable the feature.
Q2: Can I Still Hear Audio When Buckle Up Is On?
Yes, you can still hear audio even when buckle up is on. It only mutes the sound temporarily when you unbuckle your seatbelt.
Q3: How Does Buckle Up To Unmute Audio Work?
Buckle up to unmute audio works by using sensors to detect when you have unbuckled your seatbelt and automatically mutes the audio.
Q4: Can I Customize The Buckle Up To Unmute Audio Feature?
Yes, you can customize the buckle up to unmute audio feature in the settings to suit your preferences.
Q5: Is Buckle Up To Unmute Audio Available On All Devices?
Buckle up to unmute audio is available on most modern devices that have the necessary sensors to detect seatbelt usage.
Conclusion
To conclude, turning off the “buckle up to unmute audio” feature can greatly enhance the user experience when it comes to audio playback. By providing a seamless and efficient way to control audio, users can easily mute and unmute with a simple click, without the need for additional steps or distractions.
This not only saves time but also eliminates frustration and improves overall satisfaction. Additionally, this feature is particularly useful for individuals who frequently interact with audio content, such as gamers, podcasters, and content creators. By optimizing the audio control process, users can focus more on the content itself, resulting in a more enjoyable and immersive experience.
So, whether you’re a regular audio consumer or a content creator, consider leveraging the “buckle up to unmute audio” feature and take your audio experience to the next level.