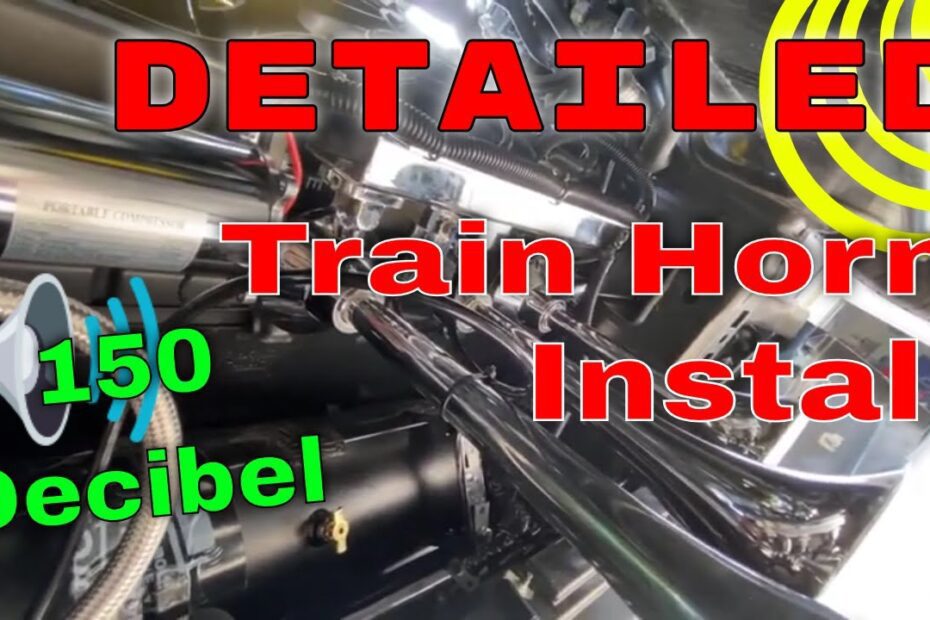
To wire a train horn to a factory horn, you will need to splice the train horn wires into the factory horn wires using appropriate connectors and electrical tape. Once connected, both the train horn and factory horn will sound simultaneously when activated.
It is important to ensure proper insulation and secure connections to prevent any electrical issues. In this guide, we will provide step-by-step instructions on how to wire a train horn to a factory horn, allowing you to enjoy the powerful sound of the train horn while still having the convenience of the factory horn.

Credit: www.amazon.com
Key Considerations For Upgrade
When it comes to upgrading your factory horn to a train horn, there are several key considerations to keep in mind. By evaluating your current horn setup, researching and selecting a suitable train horn kit, and determining installation requirements, you can ensure a successful upgrade.
Let’s dive into each of these considerations in more detail:
Evaluating The Current Horn Setup
Before embarking on the upgrade process, it’s essential to assess your current horn setup. Take note of the following points:
- Sound output: Determine if your factory horn is loud and audible enough for your needs. If not, a train horn upgrade might be the right choice.
- Wiring compatibility: Check if your factory horn’s wiring is compatible with the train horn kit you have in mind. Some kits may require additional components or modifications to ensure a seamless integration.
- Vehicle compatibility: Consider whether your vehicle has sufficient space to accommodate the train horn kit. Ensure that the kit won’t interfere with other essential components or compromise the overall functionality of your vehicle.
Researching And Selecting A Suitable Train Horn Kit
To make the most out of your upgrade, thorough research and careful selection of a suitable train horn kit is crucial. Consider the following factors:
- Sound output: Determine the loudness and quality of sound you desire. Train horns come in a variety of decibel levels, so choose one that suits your preferences.
- Kit components: Review the contents of each train horn kit you are considering. Ensure that it includes all necessary components such as horns, air compressor, mounting hardware, and wiring.
- Quality and durability: Look for reputable manufacturers that offer high-quality train horn kits known for their durability and longevity. Read customer reviews and seek recommendations to ensure a reliable product.
Determining Installation Requirements
Before diving into the installation process, it’s essential to determine the requirements for installing your new train horn kit. Consider the following points:
- Space and mounting location: Figure out where you want to mount the train horns. Ensure that there is sufficient space and that the chosen location won’t interfere with other vehicle components.
- Wiring and electrical needs: Determine the wiring requirements for your chosen train horn kit. Make sure you have the necessary connectors, cables, and relays to properly wire the system.
- Air source: Train horns require a source of compressed air. Determine if your chosen train horn kit includes an air compressor or if you need to separately purchase one. Consider the space required for the compressor as well.
By evaluating your current horn setup, researching and selecting a suitable train horn kit, and determining installation requirements, you can successfully upgrade your factory horn to a powerful train horn. Remember to follow manufacturer instructions and seek professional help if needed to ensure a safe and efficient installation process.
With your new train horn, you’ll undoubtedly turn heads on the road with its impressive sound and functionality.
Gathering The Necessary Tools And Materials
Before you begin the process of wiring your train horn to your factory horn, it’s important to gather all the tools and materials you’ll need for a successful upgrade. Having everything in place beforehand will make the installation process much smoother and more efficient.
Here is a list of the tools required and materials needed for this project:
List Of Tools Required For The Installation
- Wrench set: A set of wrenches will be necessary to loosen and tighten bolts during the installation process.
- Wire strippers: These tools are essential for removing the insulation from the wires, allowing you to connect them properly.
- Crimping tool: A crimping tool is necessary for securing electrical connections by compressing metal parts together.
- Electrical tape: This will be used to insulate and protect the electrical connections, ensuring they are secure and safe.
- Socket set: A socket set will be useful for removing any necessary components to access the factory horn wiring.
- Wire connectors: These connectors are used to join the wires together securely and reliably.
- Screwdriver set: Having a variety of screwdrivers on hand will be helpful for removing any screws or fasteners that may need to be accessed during the installation process.
- Multimeter: This tool is used to measure the electrical current, voltage, and resistance, allowing you to troubleshoot any potential issues.
- Safety goggles and gloves: It’s important to prioritize safety, so having goggles and gloves on hand will protect your eyes and hands during the installation process.
Materials Needed For A Successful Upgrade
- Train horn kit: This will include the train horn itself, along with any necessary mounting hardware and brackets.
- Wiring harness: A wiring harness will be needed to connect the train horn to the factory horn system.
- Fuse holder and fuses: To ensure the safety of your electrical system, a fuse holder and appropriate fuses should be used.
- Electrical wire: You’ll need sufficient wire to connect the train horn to the factory horn system. The gauge of the wire will depend on the power requirements of the train horn.
- Heat shrink tubing: This tubing will be used to protect and insulate the connections, providing added durability.
- Zip ties: These can be used to secure the wires and keep them organized and out of the way.
Having these tools and materials gathered before you start the installation process will save you time and frustration. Now that you are well-prepared, let’s move on to the next steps of wiring your train horn to your factory horn system.
Preparing The Vehicle
Ensuring A Safe Working Environment
Before starting the process of wiring train horns to your factory horn, it is crucial to ensure that you have a safe working environment. Taking the necessary precautions will minimize the risk of accidents and protect both you and your vehicle.
Here are the key points to consider:
- Gather the required safety equipment: To create a safe working environment, gather the necessary safety equipment, including gloves, safety goggles, and a fire extinguisher. These items will protect you in case of any unforeseen incidents.
- Work in a well-ventilated area: It is essential to work in a space that offers proper ventilation. This will help dissipate any potentially harmful fumes, ensuring you have clean air to breathe while performing the task.
- Park your vehicle in a suitable area: Find a flat and stable area to park your vehicle. Ideally, the surface should be level to ensure both your safety and the stability of the vehicle during the wiring process.
- Keep the engine turned off: Ensure that the vehicle’s engine is turned off before you begin working. This is not only for your safety but also to prevent any electrical mishaps while handling the wiring.
- Use proper lighting: Adequate lighting is essential for visibility during the process. Ensure that you have enough light to comfortably access the components and safely complete the necessary connections.
- Organize your tools: Before starting the wiring process, organize your tools and keep them within reach. This will save you time and minimize the chances of accidents due to misplaced tools.
Remember, safety should always be a priority when conducting any vehicle-related task. By following these key points, you can create a safe working environment before proceeding with the wiring process.
Disconnecting The Battery For Safety Measures
Disconnecting the vehicle’s battery is an important safety measure when wiring train horns to the factory horn. It eliminates the risk of electrical shock or short circuits and ensures a smooth and secure installation process. Here’s what you need to know:
- Locate the battery: Familiarize yourself with your vehicle’s battery location. Typically, it can be found in the engine bay or trunk area, depending on the vehicle make and model.
- Wear safety gloves: Before disconnecting the battery, put on a pair of safety gloves to protect yourself from any potential electrical hazards.
- Identify the negative terminal: The battery terminals are marked with either “+” (positive) or “-” (negative) signs. Locate the negative terminal, which is usually black in color or marked with a “-“, to disconnect the battery properly.
- Disconnect the negative terminal: Use a wrench or socket set to loosen the nut or bolt securing the negative terminal. Once it is loose, carefully remove the negative cable from the battery and set it aside in a secure location, away from the battery terminal.
- Insulate the negative terminal: To prevent accidental contact and potential electrical discharge, cover the disconnected negative terminal with a rubber or plastic insulator.
Taking these steps to disconnect the battery will ensure your safety and prevent any potential damage to your vehicle’s electrical system during the installation process.
Locating And Accessing The Factory Horn
Locating and accessing the factory horn is the first step towards wiring your train horns. By understanding where it is located and how to access it, you can easily proceed with the installation. Here’s what you need to do:
- Consult the vehicle manual: Consult your vehicle’s manual or do a quick online search to determine the factory horn’s general location. The specific location may vary depending on the make and model of your vehicle.
- Understand the horn’s design: Familiarize yourself with the factory horn’s appearance and components. This will help you identify it among other vehicle parts and understand how it is attached.
- Check the front or rear of the vehicle: In most cases, the factory horn is located either near the front grille or in the engine bay, depending on the vehicle’s design. However, it can also be located near the rear of the vehicle, such as near the trunk area.
- Remove any obstacles: Clear any obstructions that may block your access to the factory horn. These obstacles may include plastic covers, bumper attachments, or other vehicle components that need to be temporarily removed.
- Prepare the necessary tools: Make sure you have the required tools, such as a screwdriver or ratchet set, to remove any fasteners holding the factory horn in place.
By locating and accessing the factory horn, you will be ready to proceed with the wiring process and successfully integrate your train horns into your vehicle’s existing setup.
Wiring The Train Horn
Understanding The Wiring Diagram Of The Train Horn Kit
Before you begin wiring your train horn to your factory horn, it’s essential to understand the wiring diagram of the train horn kit. This will help you identify the necessary wires in your vehicle and make the correct electrical connections.
Here are the key points to keep in mind:
- The train horn kit should come with a wiring diagram that shows the different components and their connections. Take some time to study the diagram and familiarize yourself with the wires and their functions.
- The diagram will typically include labels for the power wire, ground wire, trigger wire, and relay. Understanding the purpose of each wire is crucial for a successful installation.
- If the wiring diagram provided with your train horn kit is not clear or detailed enough, you can search online for a similar diagram specific to your vehicle make and model.
- It’s important to note that the wiring diagram may vary depending on the brand and model of the train horn kit you are using. Always refer to the specific instructions provided with your kit for accurate information.
Identifying The Appropriate Wires In The Vehicle

Once you have a good understanding of the wiring diagram, the next step is to identify the appropriate wires in your vehicle. Here’s what you need to do:
- Locate your vehicle’s factory horn. It’s usually located in the engine compartment, behind the grill.
- Carefully inspect the wires connected to the factory horn. You’re looking for the power wire and the ground wire. The power wire is usually connected to the positive terminal of the battery, while the ground wire is connected to a metal part of the vehicle’s chassis.
- Note down the colors of the power and ground wires. This information will be crucial when making the electrical connections later on.
- In some cases, the factory horn may have a relay connected to it. If that’s the case, you’ll need to locate the relay and its associated wires as well.
Making Electrical Connections With Proper Techniques
Now that you’ve identified the appropriate wires in your vehicle, it’s time to make the electrical connections to wire your train horn. Follow these steps to ensure a secure and proper connection:
- Start by disconnecting the negative terminal of the vehicle’s battery. This will prevent any accidental short circuits and ensure your safety during the installation process.
- Using wire strippers, carefully strip the insulation off the power wire and ground wire of the factory horn. Make sure to remove just enough insulation to expose the bare wire.
- Connect the positive wire from the train horn kit to the power wire of the factory horn. You can use wire connectors or solder the wires together for a secure connection. Repeat this process for the ground wire, connecting the train horn kit’s negative wire to the factory horn’s ground wire.
- If your factory horn has a relay, follow the wiring diagram provided with the train horn kit to connect the trigger wire to the appropriate terminal on the relay.
- Once all the connections are made, double-check everything to ensure proper insulation and secure connections.
- Reconnect the negative terminal of the vehicle’s battery and test your newly wired train horn by pressing the horn button.
Remember, safety should always be your top priority when working with electrical connections. If you’re not confident or comfortable with the process, it’s always recommended to seek professional assistance.
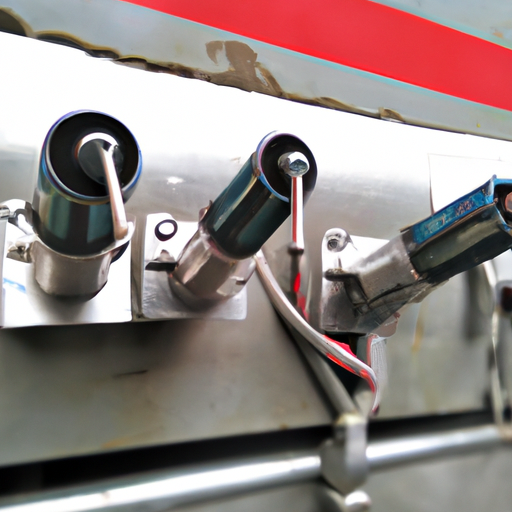
Mounting The Train Horn
When it comes to wiring a train horn to your factory horn, one of the most important steps is properly mounting the train horn. This ensures both security and optimal sound projection. Follow these guidelines for a successful installation:
Choosing The Right Location For The Train Horn:
- Find a suitable mounting location that provides enough space for the train horn and is easily accessible for maintenance and adjustments.
- Consider the overall design of your vehicle, ensuring the train horn does not interfere with other components or impede visibility.
- Look for areas with minimal obstructions that may hinder sound projection, such as nearby wiring or structural elements.
- Avoid mounting the train horn in locations that are prone to excessive moisture or debris accumulation, as this can cause damage over time.
Installing The Train Horn Securely:
- Use sturdy mounting brackets and hardware specifically designed for train horns to ensure a secure installation.
- Locate and reinforce existing mounting points on your vehicle’s chassis or frame if necessary.
- Double-check that all connections are tight and secure to prevent any loosening or vibration during operation.
- Consider using rubber or vibration-dampening pads to reduce noise and minimize potential damage to the vehicle’s body or components.
Ensuring Proper Alignment And Angle For Optimal Sound Projection:
- Align the train horn in a way that allows for the best sound dispersion and projection.
- Orient the horn so that the sound waves are not obstructed by other vehicle parts or body panels.
- Opt for an angle that directs the sound waves forward, towards the intended target, rather than dispersing in different directions.
- Test the horn’s sound projection after installation to ensure it emits a clear and loud sound without any obstructions.
Remember, by choosing the right location, installing the train horn securely, and ensuring proper alignment and angle, you can enjoy the full potential of your train horn while maintaining a safe and functional vehicle.
Finalizing The Installation
Congratulations! You’ve successfully installed your train horn and now it’s time to finalize the process. This involves testing the newly installed horn, adjusting sound levels if necessary, and securing all connections while tidying up the wiring. Follow the steps below to ensure a smooth and efficient finalization of your train horn installation.
Testing The Newly Installed Train Horn
Before you can hit the road and start sounding your train horn, it’s crucial to test the system to ensure everything is working correctly. Here’s how you can do it:
- Connect the horn switch to its designated location, ensuring a secure fit.
- Turn on your vehicle’s ignition and ensure the horn switch is in the ‘off’ position.
- Press the horn switch and listen for the sound of the train horn. You should hear a loud and distinct blast.
- If the horn doesn’t sound or produces a weak sound, double-check all connections and wiring to ensure everything is properly connected.
- Make any necessary adjustments or repairs before proceeding to the next step.
Adjusting The Sound Levels If Necessary
Once you have tested the train horn and it produces the desired sound, you might want to fine-tune the sound levels to your preference. Follow these steps for adjusting the sound levels:
- Locate the horn’s sound adjustment feature, usually located near the air source or compressor.
- Use a screwdriver or wrench to turn the adjustment knob or screw clockwise or counterclockwise.
- Test the horn after each adjustment to determine if the sound level is to your liking.
- Continue making small adjustments until you achieve the desired sound level.
Remember, there are legal restrictions on how loud a horn can be, so ensure you comply with local regulations while adjusting the sound levels.
Securing All Connections And Tidying Up The Wiring
With the testing and adjustment complete, it’s time to secure all connections and tidy up the wiring to ensure longevity and a clean appearance. Follow these steps:
- Inspect all connections, ensuring they are tightly secured. This includes any connectors, wires, and switches.
- Use zip ties or wire clips to neatly organize the wiring, preventing it from becoming tangled or snagged on any components.
- Ensure that all exposed wiring is properly insulated with electrical tape or heat shrink tubing, protecting it from potential damage.
- Double-check the wiring against the manufacturer’s instructions to ensure everything is correctly routed and connected.
- Take a final look at the area around the horn installation, making sure there are no loose or dangling wires.
By securing all connections and tidying up the wiring, you not only ensure the longevity of your train horn but also create a professional and polished appearance.
Now that you have completed the finalization process, you can confidently enjoy the powerful and attention-grabbing sound of your newly installed train horn. Remember to adhere to local regulations and use the horn responsibly, creating a safer and more aware environment on the road.
Safe travels!
Maintenance And Troubleshooting Tips
Regular Maintenance To Ensure The Horn’S Functionality:
- Inspect the wiring connections: Regularly check the wiring connections of your wire train horn to ensure they are securely connected. Loose connections can lead to malfunctioning of the horn.
- Check for any corrosion: Corrosion can interfere with the electrical flow and affect the functionality of the horn. Inspect the wiring for any signs of corrosion and clean it if necessary.
- Verify the power source: Ensure that the power source for the wire train horn is supplying the correct voltage. Low voltage can result in a weak sound or no sound at all.
- Clean the horn regularly: Dust, debris, and even bugs can accumulate on the horn and affect its performance. Clean the horn regularly using a soft cloth or brush to remove any contaminants.
- Lubricate moving parts: If your wire train horn has any moving parts, such as valves or diaphragms, apply a suitable lubricant to ensure smooth operation and prevent any sticking or seizing.
Troubleshooting Common Issues With Wire Train Horns:
- No sound from the horn: If your wire train horn is not producing any sound, check the power supply, wiring connections, and horn relay. Ensure that all components are properly connected and functioning.
- Weak or distorted sound: If the horn produces a weak or distorted sound, inspect the horn itself for any damage or blockage. Clean the horn and check for any obstructions that may be interfering with the sound output.
- Intermittent sound: If the horn sound is not consistent, it could indicate a wiring issue. Check the wiring connections for any loose or faulty connections that may be causing intermittent operation.
- Horn getting stuck: If your wire train horn gets stuck in the on position, it could be due to a faulty horn button or relay. Inspect these components and replace them if necessary.
- Fuse blown: If the fuse for your wire train horn keeps blowing, it may indicate a faulty wiring connection or a short circuit. Inspect the wiring for any exposed or damaged sections and repair or replace as needed.
Seeking Professional Help When Needed:
- When troubleshooting becomes challenging: If you are unable to identify or resolve the issue with your wire train horn, it may be time to seek professional help. A qualified technician can diagnose and fix complex problems more effectively.
- Expert installation: If you’re not confident in your wiring skills, it’s always advisable to consult a professional for the installation of your wire train horn. This ensures proper wiring and reduces the risk of any electrical issues in the future.
- Safety concerns: If you encounter any safety concerns while working with your wire train horn, such as exposed wiring or sparks, it is crucial to seek professional help immediately. Safety should always be a top priority.
Remember, regular maintenance and troubleshooting can help ensure the functionality of your wire train horn. By following these tips, you can keep your horn in optimal condition and enjoy its powerful sound whenever you need it.
Frequently Asked Questions On How To Wire Train Horn To Factory Horn
How Do You Wire A Train Horn To The Factory Horn?
To wire a train horn to the factory horn, you need to identify the factory horn location, disconnect it, and connect the train horn to the same wires.
Can You Use The Existing Wiring For The Train Horn?
Yes, you can use the existing wiring for the train horn by checking the voltage requirements and ensuring it is compatible.
What Tools Do You Need To Wire A Train Horn?
To wire a train horn, you will need wire cutters, wire strippers, electrical tape, crimp connectors, and a voltmeter.
Why Should You Wire A Train Horn To The Factory Horn?
Wiring a train horn to the factory horn allows you to have a louder and more attention-grabbing horn sound while utilizing the existing wiring system.
Is It Possible To Install A Train Horn Without Professional Help?
Yes, it is possible to install a train horn without professional help by following the step-by-step instructions and using the necessary tools.
Conclusion
To wrap things up, wiring train horns to the factory horn can be a simple yet rewarding diy project for automotive enthusiasts. With the right tools and a step-by-step guide, you can enjoy the powerful sound of a train horn while still retaining the functionality of your factory horn.
By following safety precautions and consulting the vehicle’s wiring diagram, you can ensure a successful installation. Remember to secure all connections properly and test the horns before hitting the road. Not only will you enhance the presence of your vehicle, but you’ll also benefit from the added safety feature that a train horn provides.
So, why wait? Start the process today and enjoy the adrenaline-pumping sound of a train horn with just a few simple steps.